Your cart is currently empty!
Author: admin
Tailbone Pain When Sitting: Understanding the Causes & Symptoms
Is your work or play causing you pain? While sitting may not seem like a strenuous activity, and might even seem like a relief at the end of a long day, it could be causing you more issues than you realize. In fact, tailbone pain when sitting and hip pain while sitting are all too common.
It is no secret that many of us sit far too much. We sit when we are driving, when we are at our job, and oftentimes once we get home to unwind from that hard day of work.
All of that sitting adds up and can become more and more of a burden. Because sitting can actually be hard on your body, especially if you aren’t sitting in proper alignment. And, if you already have tailbone pain when sitting, extra sitting will only exacerbate the issue.
There are several reasons why you may experience pain when you sit or when you stand up from sitting, but a major issue when addressing pain is that we often start by treating the symptoms.
When it comes to tailbone pain, addressing the symptoms will give you some temporary relief, but to get long-lasting comfort when sitting, you need to address the root cause of your pain.
There are so many reasons why you could be experiencing tailbone pain when sitting, from how long you are sitting and the position you are sitting in, to underlying health factors.
An all too common culprit for tailbone pain is your hip muscles – specifically, your hip flexors.
But how do you know if that is the problem? And, if your pain is generalized in your pelvic region, how can you be sure that your tailbone is the issue?
Symptoms of tailbone pain when sitting
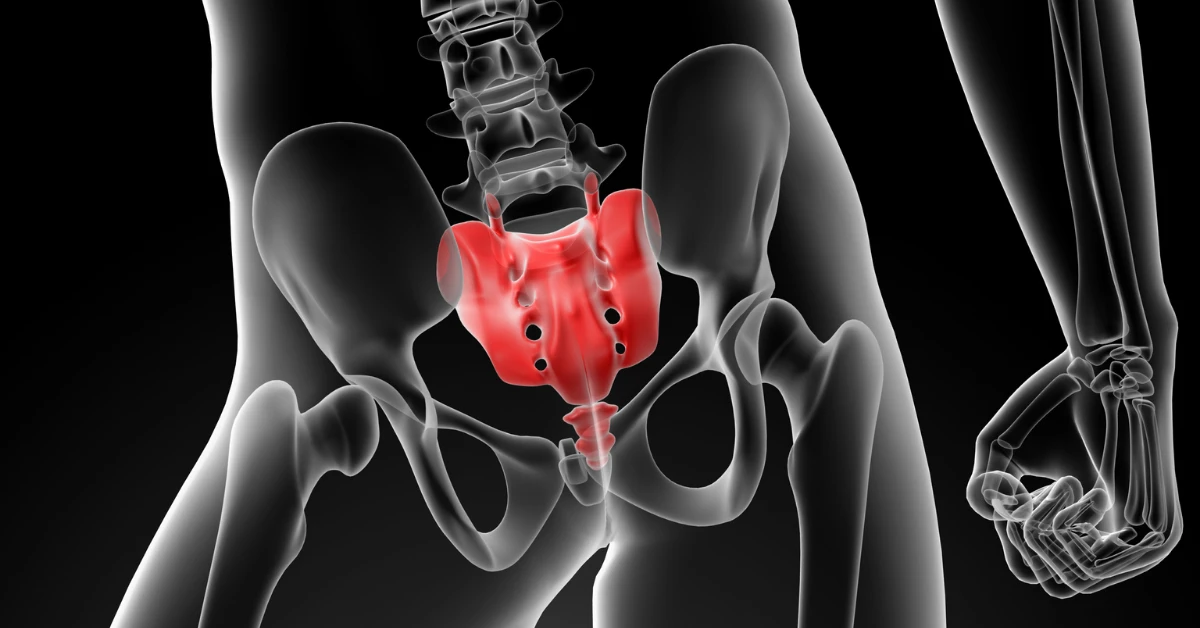
It’s important to understand your anatomy to pinpoint the culprit of your pain when sitting, so let’s make sure you know what your tailbone is!
The tailbone is the same thing as your coccyx and is made up of 3-5 fused vertebrae. Several muscles, tendons, and ligaments connect to your tailbone, and the location at the base of your spinal column makes it a common area to experience pain from trauma or other causes.
Tailbone pain is also referred to as coccydynia. It is most easily defined as the pain that occurs in and around the bone at the bottom of your spinal column.
Part of the reason why you may be having tailbone pain when sitting is that when you are in the seated position, your coccyx and ischial tuberosities are taking the brunt of the weight and pressure. The shape of your tailbone can also influence how it feels when you sit as well.
Tailbone pain can extend beyond the pain you feel while you are seated or after sitting. Other symptoms of tailbone pain or coccydynia include:
- Tailbone pain when changing from sitting to standing up
- Severe tailbone pain when sitting for extended periods
- Aches in the tailbone
- Piercing pain in your tailbone
- Pain during bowel movements
- Pain during sex
- Tailbone pain that lasts for a long time may also cause other symptoms like anxiety, depression, back pain, and poor sleep.
The interconnected nature of the human body means that if one thing goes wrong, it can impact several other parts of your body over time. Learning other aches and pains that are connected to one another is another step towards body awareness and pain management.
But what made your tailbone start hurting in the first place? Let’s discuss the most common instigator of tailbone pain while sitting.
Why does my tailbone hurt from sitting?
If you have SI (sacroiliac) joint pain, lower back and hip pain when sitting, or tailbone pain when sitting, there is a high likelihood that your pain originates from tight hip flexor muscles.
Your hip flexors are also known as the iliopsoas muscles. This is the connection of your iliacus and psoas muscles that allow hip flexion actions such as squatting, standing from sitting, stepping up, running, walking, etc.
Your psoas muscle attaches to your spine, and the iliacus muscle attaches to your pelvis. Together they are responsible for the alignment of your lower back and the SI joint.

Because of the constant use and contraction of your iliopsoas muscles throughout the day, including when you are sitting, they can become overused and tight.
This is especially true when you stay stationary or in the same position for long periods, and why you may experience hip pain while driving as well as when you’re at the office.
When the iliopsoas is contracted in the seated position, the muscles are in a shortened position. For a short time this isn’t harmful, but the longer your muscles stay there, the more likely they are to develop knots and tension that lead to pain and potential misalignment of your pelvis.
As the irritation of your hip joint area builds over time, so does the tightness of your muscles. That’s because your muscles tighten naturally as a way to protect the irritated area.
While this is a natural and sometimes necessary defense mechanism, it can also cause more issues in the long run. And, although your tight iliopsoas muscles could be in reaction to another culprit of your pain, they are equally likely to be the culprit of your pain themselves.
As mentioned, when sitting for too long, your muscles are put in a short, contracted position that causes muscle knots. As the muscle tightness builds, it will begin to pull on the connection points and nearby joint structures.
This uncomfortable pull is what can cause your pelvis to become misaligned, leading to a bit of a domino effect within your body.
Other things that can cause tailbone pain when sitting include:
- Falling or trauma to the tailbone
- Repetitive spinal strain from activities like biking or rowing
- Obesity
- Pregnancy and childbirth
For any people that experience tailbone pain when sitting down and getting up, it is possible that a combination of reasons contribute to your pain.
For instance, if you have gone through a pregnancy and birth, you may also have some issues with tight iliopsoas muscles in combination with the pelvic trauma associated with giving birth.
So now that you know some reasons why your tailbone or hips are hurting while sitting, let’s take a look at what you can do about it.
4 ways to find relief from tailbone pain when sitting
Finding the cause of your pain is so important because depending on the root of your pain, how you treat it will vary.
If you have a bruised tailbone after sitting versus tailbone pain when sitting down and standing up, there may be different causes at play. It can also change if you’ve experienced a traumatic fall and injured your tailbone versus simply sitting on a hard surface for too long.
Once you’ve narrowed down the potential causes of your tailbone pain, then you can start to address it at the root while also managing symptoms along the way.
Here are my favorite remedies for soothing your tailbone pain while sitting.
1. Stretch and strengthen your lower back and pelvis muscles
While this may not be necessary for everyone that experiences tailbone pain when sitting, adding some stretching and strength training to your routine can help reduce some pain.
Taking breaks during the day to stretch your muscles lightly for a few minutes helps to break up the contraction in your hip muscles and give some new movement to the area.
Your posture can also be influenced by your lower back and abdominal strength. Some imbalances in muscle strength can lead to imbalances in how you sit – which become pain in certain areas of your body.
These exercises are best decided with the guidance of a medical professional like a physical therapist, and should target your lower back, hips, and pelvis.
Working towards muscle strength and muscle balance, along with light stretching, can lead to less severe tailbone pain when sitting – but only when it is done consistently and intentionally.
2. Sit on a donut pillow
How you are sitting can impact the level of pain you experience. With tailbone pain when sitting, oftentimes a medical professional will recommend a wedge or donut pillow to take some pressure off of the tailbone area.
Since lower back and tailbone pain when sitting can often be caused by tight hip flexor muscles, employing home office ergonomics to improve your sitting position can also help take some pressure off of the tailbone.
There are pros and cons to different ergonomic home office accessories, so find the desk and chair that work best for you and your body.
While a pillow may work for you to alleviate pressure and pain for some time, remember not to neglect addressing the root causes of the tailbone pain, not just the symptoms.
3. Decrease your time spent sitting
Since one of the most common causes for lower back pain and tailbone pain when sitting is the length of time you spend sitting, decreasing how much you sit can make a big difference. Investing in a certain home office ergonomics like an adjustable desk that can move from standing to sitting is one way to do this.
You can also try to take more breaks and go on short walks throughout your day.
Walking and standing take the pressure off of your tailbone and changes the length and position of your iliopsoas muscles. Even though this is a simple change in position, it can be a big shift for your body and can drastically reduce the amount of pain you feel in your tailbone.
4. Release tight muscles
If the cause of your tailbone pain when sitting is from tight iliopsoas muscles, then one of the most effective things you can do to eliminate and reduce pain is to release those tight muscles.
The issue with releasing muscle tightness within the iliacus and psoas is accessibility. The iliacus in particular is difficult to reach without the assistance of another person because it is somewhat hidden on the inside of your pelvic bone.
There is a way that you can release and relax your iliacus muscle at home though, and that is by using the Hip Hook daily. The Hip Hook is designed to target the problem at the source by using muscle pressure release to relax your hip flexor muscles.
Whether you have tailbone pain or hip pain when standing up from the sitting position, one thing remains the same between the two: the pain originates in your muscles. Without targeting the muscle tightness and muscle knots head on, it is likely that your tailbone pain will continue.
In under 10 minutes each day, you can use the Hip Hook to relieve your pain at the very source. As you begin to release the psoas and iliacus muscles, over time, you will start to feel the positive effects and experience relief from your tailbone pain when sitting.
Live life free from tailbone pain
Tailbone pain isn’t something you simply have to grit your teeth and bear. In fact, with the simple solutions of stretching and strengthening exercises, a muscle release tool like the Hip Hook, and the proper home office ergonomics, tailbone pain could swiftly become a thing of the past.
Frequently asked questions about tailbone pain when sitting
Is tailbone pain a serious problem?
Unless you’ve recently experienced some type of trauma to your tailbone, your tailbone pain probably isn’t associated with a serious issue. Sometimes, tailbone pain can be a sign of something worse than muscle tightness but those cases tend to be quite rare.
If you suspect that you may have a tailbone injury of some kind, then you can get an x-ray or MRI to determine if you have a fracture or tumor of some kind.
Can a pinched nerve cause tailbone pain?
Nerves can influence sensations all around your body. A pinched nerve in your lower back, tailbone area, or even the sciatic nerve can cause some pain, tingling, or numbness around your tailbone.
Can you have arthritis in your tailbone?
If you have tailbone pain, arthritis in the sacrococcygeal joint is a possibility. This is usually only an issue with older individuals, but should be treated if noticed.
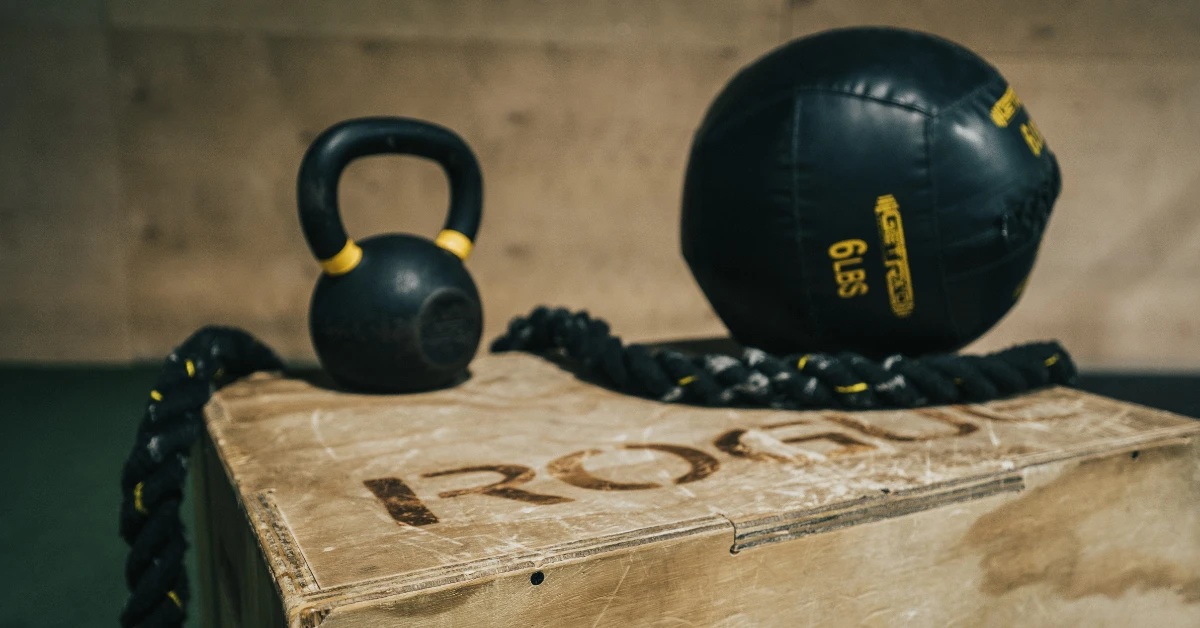
Habits New CrossFitters Should Adopt Right Away
When it comes to workouts, CrossFit is not just exercise. It is designed to push your limits and test your endurance. The high-intensity functional training uses your normal gymnastics elements, but leaves little or no time for recovery between sessions. For beginners, the intensity of the sessions and limited recovery time may even lead to CrossFit injuries.
Since CrossFit is meant to keep you fit as well as help you love every bit of your workout of the day, you may need a few tips on how to avoid getting hurt. Don’t let muscle pains dampen your determination as you start your new exercise habit!
CrossFit Injuries
To get the full benefit of a CrossFit program, participants go through high-intensity functional exercises that test and push their limits. In most cases, the exercise bouts are alternated with little or no time to rest. Like with any sport, a wrong approach or inadequate guidance may lead to injuries, especially for beginners. By adopting a few simple habits, though, you can keep yourself in the gym.
1. Keep Your Core in Good Shape
CrossFit is a functional exercise that engages core muscles. In general, the exercises improve cardiovascular/respiratory endurance, stamina, flexibility, power, coordination, speed, agility, accuracy, and balance. However, the hip flexor muscle group is one of the most important in the entire body. The hip flexor muscles are responsible for lower body movements as well as keeping the middle of your body stable. If you live a sedentary life, you may experience tight hip flexors which greatly impact your life. To keep yourself active and improve your endurance, you require both strengthening the hip flexors and stretching the hip flexors.
2. Take a Day Off
You may be enthusiastic about your new CrossFit routine, and you may feel great after every workout. Pressure from your peers may also push you to overwork your muscles. Overworking your muscles makes you tired and prone to injuries. In addition, muscles are at their peak when they have time to recover. Allowing your muscles time to recover reduces the risk of injuries, as well as helps improve their effectiveness during your next session. In general, don’t train more than three days in a row without taking a day off.
3. Release Tight Muscles
Tight muscles are common after physical exercise. The intensity of CrossFit exercises may increase the risk of developing stiff muscles, especially for beginners. Muscle stiffness may be intense if you are starting CrossFit out of shape. You may experience tight muscles after long hours of inactivity, such as in the morning after waking up or in the evening after work. However, the stiff muscles should not derail your CrossFit goals, since there are tools dedicated to managing stiff muscles.
Everybody’s heard of stretching, rubbing, and massaging tight and sore muscles. Many people even know about using lacrosse balls and similar tools to put pressure on angry muscles. These can bring about some temporary benefits, but to really release tight muscles, you need deep, precise, sustained, and correctly-angled pressure, not just any old lacrosse ball. It’s the kind of thing you require a specialized tool to do, such as a Hip Hook or Nuckle.
The Hip Hook helps to release the psoas & iliacus muscles (your hip flexors), while the Nuckle is designed to release tightness in the neck, pec, shoulder, and upper trap muscles. All of these are very common areas that are over-worked and become tight in CrossFitters.

4. Know Your Muscles
CrossFit is intense and dynamic. It involves muscles you may not have heard of, even if you’re no stranger to the gym. Knowing what these muscles can and can’t do, as well as understanding how they work together to help you move, can transform the way you think about exercise. Examples: Do you know what your iliopsoas does, or that it can cause pain from your toes to your back? Which muscles help you squat correctly? Once you understand the muscles involved in each functional movement, you will correctly position yourself to reduce the risk of injuries.
Untight
Aletha is committed to providing you with the tools and education to get rid of muscle tension and improve pain. Through our Learning Lab blog posts, product How To hubs, YouTube videos, as well as our upcoming courses and certification programs, learn how to live Untight. Please reach out to us at hello@alethasupport.com for more information.
How to Relieve Shoulder Tension: Tips, Tools and More
We only really think about our shoulders when we want to relieve shoulder tension.
Being on the back of our body and out of our natural field of vision, it’s easy not to see the stress we put our tight shoulders under in our day-to-day lives.
It seems like today more than ever, we have to shoulder what the world throws at us. I can’t tell you how to take every metaphorical weight off your shoulders, but I can help with how to relieve shoulder tension and knead out those shoulder tension knots that often lead to tension headaches.
How unwanted tech neck brings us down
It’s become a generally accepted norm that we sit at our desks in awkward positions.
Sometimes for a whole day but even short periods of typing have been linked to shoulder tension. If you’re reading this slouched over a laptop or looking down on your phone on your commute then more than likely you’re taking part in a tech neck pandemic that leaves shoulder muscles tight and unhappy.
However, it’s not just tech that’s got us hunched over with tight shoulders. Driving, sleeping, or gym injuries all play their part in creating shoulder tension knots.
Why don’t we pay better attention to our shoulders?
When’s the last time you actually checked out your shoulders? Maybe it was when you tried on that backless dress for a night out. (If you went with it, good for you). But perhaps you preferred a shirt or jacket and kept your shoulders out of the spotlight and hidden away.
Whether you’re showcasing your shoulders or not, let’s take a moment to appreciate the work that this group of muscles is doing. You wouldn’t be able to hold up your head without them, after all. We’re constantly using them in one way or another, and that’s why we need to relieve shoulder tension often as a matter of importance.
The anatomy of our shoulders
Understanding is the best way that we can do something about how to relieve shoulder pain. Let’s start with simply familiarizing ourselves with the muscles in this part of our body.
Then let’s go to the top of your neck – those muscles at the base of your skull. Meet the suboccipitals (your new favorite word to impress your friends and family with) and the upper trapezius (or “upper traps” for short) muscles.
They’re constantly at work holding up your head, and even more so when you’re in forward head posture when looking at your devices.
These muscles are ultimately connected to your shoulders and they work together to stabilize your vision by holding your eyes level and your head up. If you’re looking to relieve shoulder tension, it’s worth starting here and these muscles are looking for some treatment too.
Now, relief from tense or tight shoulders isn’t as simple as booking yourself in for that massage that you’ve been promising yourself for the last few months. Even though that’s going to give you some temporary relief it’s not actually going to be as long-lasting as you want it to be. That’s not how to relieve shoulder tension on a permanent basis.
To actually relieve shoulder tension, really to relieve tension anywhere, physiotherapists are always going to recommend precise, enduring pressure on the knotted area. Now as these muscles are out of reach, a PT designed this tool for use to relieve shoulder tension and it’s pretty nifty. This is the Nuckle.
How to get muscle release with the Nuckle
Here you can see how the Nuckle is able to dig in and focus on the tight area at the back of the neck; that tight area if your suboccipitals are in need of some TLC.
There are a number of great things about this exercise. Lying back, you’re able to use your body weight to apply pressure in an area you’d never be able to reach and apply enough pressure with your fingers alone. Even a ball doesn’t do the trick because it won’t apply precise pressure to these smaller muscles due to its rounded shape.
The other great benefit is that this physiotherapy equipment is yours whenever you need it. If it’s been a particularly hunched-over-the-laptop day in the office meeting that deadline (you know the one- it was brought forward last minute even though you told your boss it would require working overtime), then you’ve got the Nuckle ready to go back at home without having to book a physiotherapist appointment on demand.

Just a thought
Orrrrrr you could take it to your office and lie on the floor there, depending on your office culture. And if you’re the one who sets the culture in your office, you may want to consider purchasing a couple as a targeted alternative/addition to stress balls (particularly if you’re the one breaking the bad news about shortening that deadline). A happy office is an office free of shoulder tension knots, after all.
Final tips before you go
Imagine a trapezoid. That’s the shape of your trap muscles in your shoulders. That’s how it got its name. The trapezius muscles are large muscles that help to move and rotate your neck, and lift your head and skull (which is always heavier than you think it is because of bone density). ALSO, they help shrug your shoulders up and assist with lifting your arms in front of you or to your sides, with whatever target weight your personal trainer recommended today.
So it’s a powerful muscle, but with so many uses it’s prone to collecting muscle knots and trigger points.
Why do I even get shoulder knots?
It’s a good question. Muscles are quite simple when it comes to it. Unable to think for themselves, they are tools puppeted by your brain, who is managing the whole movement/motion operation.
Muscles are supposed to be in either a contracted or a loose state. Consider contracted to mean “being turned on” and loose to be “turned off”. When you’re making your personal trainer proud lifting that weight above your head, you’re contracting muscles in your shoulder to get power into them. You hold for 3 seconds and then you put the weight down in a controlled way and hope she’s not going to ask you to do it again.
But once you’re resting and take a moment to sit down, it gets “switched off” again. It’s loose. Only, if you’re hunched over getting your breath back then the muscle is in limbo about whether it’s needed or not. Certain fibers get so used to being in an in-use, contracted state that they just stay there. That’s a muscle knot.
If your partner is giving you a massage, your muscles are supposed to feel relaxed and loose and switched off. A knot is easy enough to locate because some of the muscle fibers refuse to stop being switched off. They never heard the signal and just stayed at work, even when it wasn’t necessary.
Other negative effects caused by muscle knots
Most of us have shoulder tension knots, and fixing them is not only going to ease discomfort but also give us a greater range of movement in those muscles, the muscles surrounding them, and our joints. Knots also inhibit circulation and pull on surrounding structures, like the spine. These knots are what can lead to migraines and tension headaches.
Try the Nuckle on your shoulders, too.
It’s basically the same principle as using the Nuckle on your neck in the base of your skull, but this time, given the position of the muscles, you won’t be able to use your own bodyweight in quite as effective a way.
That’s when you enlist the help of a handy sofa/chair leg (or a door jamb) to push up against.
Like the previous Nuckle exercise, you have to sustain the pressure and you may get a “hurts so good” feeling while your brain works out what’s going on. Hold it for just over a minute in the right area and you should start to feel the positive effects of kneading out the knots almost immediately.

Ongoing neck and shoulder care for less tension
After locating and eliminating those pesky shoulder knots, it’s mostly about avoiding the habits that are going to build back new ones. The Nuckle will always be there again for whenever you need it, but once you’re back to having healthy shoulders then how to relieve shoulder tension is mostly about preventing the behaviors that lead to it in the first place.
Stretches and massages can help your body learn how to relax your shoulders, even though those stretches can’t resolve muscle knots.
Both stretches and massages are encouraging circulation in the relevant areas, and your shoulders are always going to appreciate a healthy blood flow to transport the nutrients needed to maintain the protein-heavy makeup of muscle fibres, as well as clearing out the excess lactic acid created through anaerobic respiration when you were exercising.
Arm yourself with a working knowledge of which ones fit in with your lifestyle and apply them when necessary. Good luck!
FAQs on relieving shoulder tightness
What causes shoulder tension?
Lifestyle choices that encourage bringing the shoulders for sustained periods of time. Activities like typing and scrolling through Instagram are going to pull our shoulders forwards and result in not giving our shoulders enough downtime. When a muscle believes it should be in constant use, the signal to turn it off gets misheard and that leaves a tightness in an otherwise relaxed muscle. That tightness is a muscle knot.
What are tension knots?
Tightened, contracting muscles that don’t need to be contracted. A muscle should either be completely relaxed and switched off (which allows it to stretch) or turned on, when you’re using it for movement or motion. A tension knot is a group of fibers in your muscle that are still turned on even when the rest of the muscle is turned off, which compromises the muscles ability to do anything, adds pressure to the area and surrounding muscles, reduces circulation and makes pinch points more likely because of your reduced range of movement.
How do I relieve tension knots?
Sustained (30-90 seconds), targeted pressure is the best way to relieve muscle knots or trigger points. Whether with a physical therapist or a specific tool, holding pressure in either of these two ways in the exact area of tightness is going to get the signal through that the muscle should relax entirely rather than holding onto tension in certain areas. Stretches and massages will also help in a more temporary and preventative way, but to relieve shoulder tension knots that you’ve already amassed, you need to apply direct, prolonged pressure.

Aletha Health Products Featured in Telemundo
Aletha Health products were recently featured on Telemundo!
See the articles below!
Technology That Will Make Our Lives Easier in 2022
Home Essentials to Massage Your Body
Fitness Products to Help Your Well-Being in 2022
Valentine’s Day Gifts to Enjoy Together

5 Ways to Reduce Hip Flexor Pain When Sitting at Your Desk
If you’re reading this, my guess is that you have a desk job of some kind. A job that requires you to sit all day (or most of the day) – which means you are sitting far too long. That long day at a desk could cause hip flexor pain when sitting.
Many of us are familiar with the idea of back and neck pain from sitting at a desk, but can sitting all day cause hip pain too?
Unfortunately, yes.
Hip flexor pain when sitting is an all too common problem, especially now that more of us are working from home.
Unless you are able to integrate intentional movement into your work day, you may begin to experience hip flexor pain when sitting. This pain can impact other areas of your body, causing low back pain and influencing your posture as well.
When at the office, you get up to walk to a coworker’s desk, make copies, or walk down the block to grab lunch.
But when you’re working from your home office or kitchen table, the only thing you are bouncing between is Zoom meetings and emails. (And you know your snack or lunch is just a few steps away.)
So even though you may seem to have more freedom when working from home – you’re probably in your seat even more. And that could spell bad news for hip flexor pain when sitting.
What causes hip flexor pain when sitting?
Put simply, hip flexor pain when sitting is caused because you are in the same position for hours at a time – making the hip flexor muscles tighten and shorten.
Your hip flexor muscles are made up of your iliacus and the psoas muscles and are together known as the iliopsoas. These hip muscles rarely get any rest, and although you may feel that sitting is a resting position, your hip flexors are still engaged.
When you are sitting, the iliacus holds your pelvis in line with your thigh bone and the psoas holds your spine in place so you can sit up straight. In fact, when they are kept in this position, they are in a shortened position.
Staying in a shortened position for long periods of time can cause muscle knots and cramps that creep into the inside of your hip, outside of your hip, and even your glute area and low back.
You also may notice that you begin to slouch more as the day goes on. Gravity encourages us to slouch while we are sitting, and slouching actually takes some pressure off of your hip flexor muscles so they are not working quite as hard. But that doesn’t make slouching a good thing!
Even though the iliopsoas may be getting a bit of a break when you slouch, your lower back and upper body start to suffer if you have bad body posture while sitting. Sitting up straight may cause the iliopsoas to shorten, but it is still more optimal than slouching.
The reason being is that you can use a few of the suggestions I gave above to lessen your hip pain while sitting.
When you work a job that requires you to sit for long periods of time, especially if you can’t choose your breaks, as each day passes the stress will build on your iliopsoas muscles.
As they shorten more and continue to contract in that shortened position, muscle knots and muscle tension will begin to cause you hip flexor pain when sitting. You may even begin to experience hip pain when standing up after sitting if the iliopsoas muscle tightness is never addressed.
The good news is that you don’t have to live with hip flexor pain when sitting forever. There are many ways to treat and alleviate hip pain, and one of them is knowing a few ways to reduce pain when sitting at your desk or kitchen table.
Here are five ways that you can reduce your hip flexor pain when sitting so you can enjoy a pain-free day at work.
5 ways to reduce hip flexor pain when sitting
There are many dangers in sitting too much too often, and one of them is long-lasting hip pain or low back pain. Here are five ways that you can reduce your hip flexor pain when sitting.
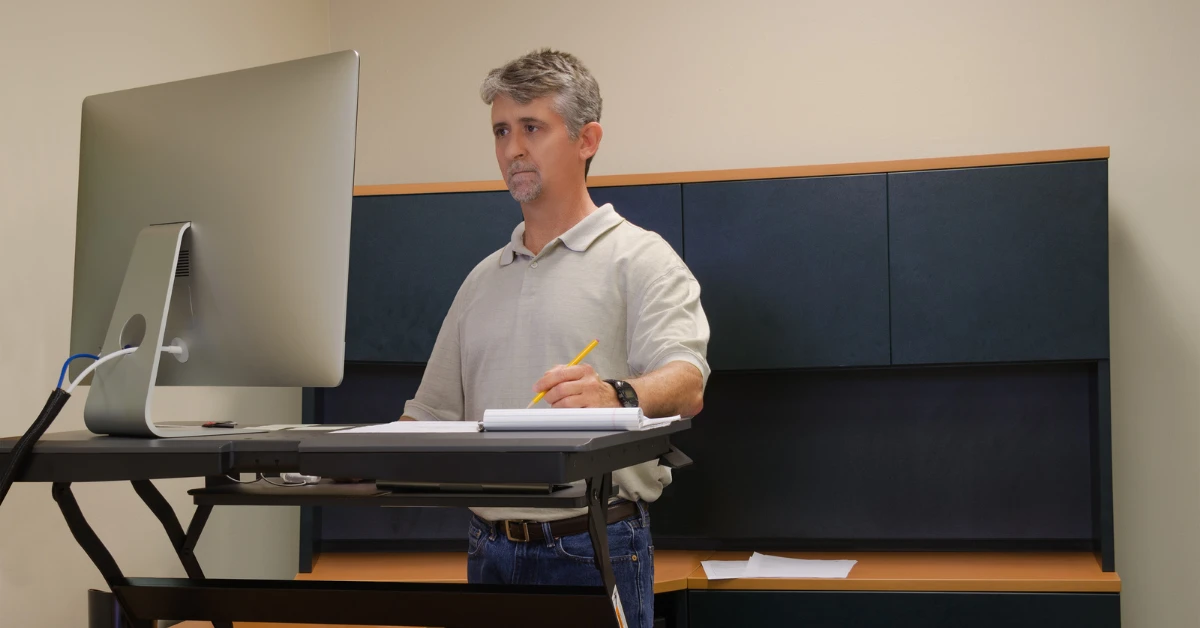
1. Invest in an ergonomic workstation
A big part of the problem with our work day is that we sit in one position for too long. That’s why I suggest investing in an ergonomic workstation. This could look different for everyone and you should modify it to fit your needs.
Some companies may be willing to improve worker productivity by adding some ergonomic workstation solutions, but if you work from home you have more options and control over your environment to an extent.
There are plenty of options other than the standard desk and chair, including:
- Standing desk
- Desk with multiple heights to move from sitting to standing
- Treadmill desk
- Using an exercise ball as a chair
- Other ergonomic chair options
When designing a workstation to alleviate lower back and hip pain when sitting, you need to be able to change positions throughout the day. It can be helpful to work from home so you can create an environment that encourages movement and change throughout the day.
Even if you have a standing desk, it isn’t necessarily good for your body to stand all day long either. Your muscles need breaks from time to time and can be strained if they are stuck in the same position for too long.
The other aspect to consider is your body alignment and the way you are sitting. Try to find the best sitting position for hip pain. Even if you are changing positions throughout the day, your body alignment can impact how you feel at the end of your work day.
Whether you are seated or standing, find a way to maintain your posture and keep your head erect as you look at your computer screen. This may mean a platform for your laptop or a drawer for your keyboard. Whatever you need to encourage proper posture and less strain on your body.
2. Take breaks to stretch
Never underestimate how even the smallest stretch can impact your day. Taking even five minutes to stand up and stretch or even perform stretches seated at your desk for 10-30 seconds at a time can improve your posture and mindset.
Since we are focusing on hip flexor pain when sitting, standing up and moving your hips is encouraged here, but stretching your back and legs is equally as important.
Standing up (or kneeling on the ground) and doing a gentle lunge stretch to bring some movement to the hip area is great, but be careful not to over do it. There are a number of gentle hip flexor stretches for tight hips that should create almost immediate relief. You should be looking for a gentle pull (like when you wake up in the morning and do a big stretch before getting out of bed), but never any pain.
While your hip flexor pain when sitting is likely caused by tight muscles, that doesn’t mean that stretching is what will cure the pain. Over stretching tight muscles right after sitting can do more harm than good, which is why only a small amount of gentle stretching is encouraged.
3. Make time to go on walks and move your body
As I have already mentioned, movement is the key to keeping your hips happy. When you are in an office, this can look like taking a break every hour to walk over and refill your water, delivering a piece of mail on the other side of the building, or dropping off some information at someone else’s desk/office.
When you are at home, you may have more room or time to plan out some time for walks and movement during your work day. If you have a dog or a small child at home with you, they too will benefit from getting out of the house during the day.
Walks don’t have to be long, they can even simply be around a block or two. The idea is to get your iliopsoas muscles into a new position and do a new activity for a little while so they do not freeze up and shorten so much that muscle knots or trigger points are created.
Try to fit in at least two shorts walks into your work day and then after work you can integrate other targeted exercises or longer walks.
4. Space out and stagger tasks if you can
If you have a job that requires meetings, emails, phone calls, and other types of tasks, try to build a schedule that mixes up the type of activity you are doing. Try to avoid doing the same activity the entire day.
An example of this is if you have a project you are working on, work on that project for a specified amount of time, but then try to schedule a phone call in between that project work and answering emails.
During your phone call, get up from your desk and maybe walk around the house or the office just to mix up your body positioning and add a bit more movement to the day. Then, after the phone call, you can return to your desk and answer the emails.
These types of changes in tasks can help you build habits that remind you to move your body or change body position.
5. Create a before and after work routine to alleviate hip pain
Part of the problem for many people reading this article is that they discover that the amount of sitting they do for work is what is causing their hip pain only once their pain has become chronic.
Having hip flexor pain when sitting means that you’ve already developed tight iliopsoas muscles and now you need a way to reverse that pain.
Stretching and massages may alleviate some pain in the moment, but they will not address the issue of tight muscles head on. To truly address tight hip flexor muscles, you need to teach your muscles how to relax.
The only way that muscle knots and general muscle tension can relax is by applying prolonged pressure. The problem is that the location of the iliacus and psoas make it very difficult to perform a pressure release.
That’s exactly why I invented the Hip Hook. If you’ve gone to a physical therapist for your hip pain, then you may be familiar with the pressure release they are able to perform on the psoas and iliacus muscles (your hip flexors). The Hip Hook allows you to perform that same targeted pressure from the comfort of home.
For best results with the Hip Hook, it helps to create a routine that allows you to use it daily (or every other day) to start. It doesn’t take long to achieve a muscle release of the psoas and iliacus muscles (only about 30-90 seconds) if you are using the Hip Hook correctly. You can use it longer than that, but when you are first starting out, it is recommended to take it easy and work up to longer periods with time.
For some people, using the Hip Hook before they’ve had a chance to workout or before starting a long day at work is what works best. For others, they may prefer to use the Hip Hook right after getting home. And others still prefer to use it before going to bed. Or all of the above!
No matter when you decide to use it, the main thing you need to do is create a sustainable routine that allows you to be consistent with use.
Over time, your hip flexor pain when sitting will dramatically improve, and other pain in your knees or back may also be impacted positively by your hip release exercises.

Frequently asked questions about hip pain when sitting at your desk
How do I know if my hip pain is arthritis, bursitis, or a hip flexor issue?
Getting to the root cause of your hip pain often requires a medical diagnosis. You can often narrow down possibilities by evaluating and recording your symptoms throughout the day – such as when they seem to worsen and where you specifically feel pain or stiffness.
You can choose to work with a physical therapist to treat symptoms and to help differentiate between the possible causes of the pain. For some people, there may also be a combination of two different conditions contributing to their hip pain.
Will sitting in a saddle chair help my hip pain when sitting?
Saddle seats or stools position your hips in a wide stance with your knees apart. The thought is that this position stabilizes the pelvis in an upright position to help to correct alignment and spinal orientation.
Sitting in a saddle chair isn’t necessarily feasible for the entire workday, but it could be included as a part of your workday as you change positions often. Saddle chairs may be uncomfortable at first as your hip readjusts to this new position, and they may not be ideal for everyone.
When should I see a doctor for my hip pain?
If you are experiencing hip pain, you should feel empowered to visit the doctor at any time. If you are unsure whether or not it is necessary to pay the doctor a visit, consider if your hip pain is interfering with your daily life in any way.
Does your hip pain prevent you from getting a good night’s sleep? Does it interfere with your workday productivity? Does hip pain stop you from doing your favorite activities?
If you answered yes to any of these questions, then you should absolutely consider visiting a doctor to get a diagnosis and treatment plan for your hip pain.
Say Goodbye to Lower Back and Hip Pain When Sitting: How to Create an Ergonomic Home Office Setup
Whether you work from home or in an office, desk jobs that require sitting for extended periods can cause lower back and hip pain. Luckily, home office ergonomics can help to prevent or minimize these unwanted symptoms during your work day.
Although there are a few different things you can do during your work day to alleviate your hip pain when sitting, one of the best ways to find relief is to invest in your home office ergonomics.
Having an ergonomic home office setup has a few basic principles, but the end result may vary for everyone. Perfecting your personal workspace and home office ergonomics helps you to create a productive office environment – boosting your productivity while also improving your overall health.
Many companies and office spaces dedicate time and money to set up ergonomic environments for their employees to work from. However, recent times have forced many workers to work from home for longer than anticipated.
Some workers may be returning to offices, while others are experiencing a long term switch to remote working. This means it’s past time to overhaul their home office ergonomics.
If you’re reading this, then you are probably looking for ways to minimize lower back and hip pain while sitting with the help of home office ergonomics. In this article, I will be going over how sitting all day can cause hip pain, as well as how to create an ergonomic home office setup that fits your needs.
What causes lower back and hip pain when sitting?
How you sit, and how long you sit, can affect your body in serious ways. Staying in any one position too long will have an impact on your body, whether you are sitting or standing.
When you sit for too long, you can easily start to develop lower back pain and hip pain. Many people also experience piriformis pain while sitting. This is a muscle in the back of your hip in the gluteal region.
So how can sitting cause hip pain, and how might that pain spread to your piriformis muscles or lower back?
While it may seem like you are in a relaxed position when you are seated, your hip flexor muscles are actually engaged the entire time. These muscles are made up of two separate muscles: the iliacus and psoas.
These two muscles (known together as the iliopsoas) are what stabilize you when you do almost everything. We most often think of their engagement during flexion activities like running or lunging, but they are also at work when we sit.
When you are in a seated position, your iliacus is what holds your pelvis in line with your thigh bone and the psoas is what is holding your spine in place so you can sit up straight.
When you slouch, your iliopsoas does get a little bit of a break, but that should not be an excuse to slouch. Slouching or improper posture can still cause you upper back and neck pain.
Not only are your hip flexors engaged when sitting, but they are in a shortened position. Staying in this shortened position while being contracted for long periods of time can cause muscle knots and immense amounts of tension.
This muscle tension is what eventually causes you hip pain when sitting. Over time, you may start to experience hip pain when standing up from sitting or hip pain during your other daily activities.
Lower back and piriformis pain when sitting are often associated with tight hip flexors as well. As the iliopsoas muscles tighten, they impact the other muscles around them and they can even pull your pelvis out of alignment over time creating more issues.
The piriformis and the iliacus in particular play tug-of-war with each other. If one of them is tight, you can expect the other one to be too tight also. All of these connections create a bit of a domino effect, making your home office ergonomics even more important.
How to create an ergonomic home office setup
The basics of home office ergonomics will help you give your workstation an upgrade. The main aspects include having the correct chair height, good posture and sitting positions, and computer or equipment spacing and height.
With the right setup, and ability to make adjustments throughout the day, you can begin to manage and potentially alleviate your hip pain while sitting through home office ergonomics.
But before we talk about equipment you can purchase for your home office ergonomics, let’s discuss how you can optimize something you already have on hand – yourself!
Focus on proper sitting positions and posture
The way you sit while you work is a big part of your home office ergonomics. Some people prefer using a standing desk, but for both sitting and standing while working, maintaining the correct sitting posture is important.
If you haven’t invested in an office chair, try to base your choice off of optimizing your home office ergonomics. So, choose a setup that sets you up for the following posture:
- Sit all the way back in your chair.
- Keep your body in alignment – specifically, keep your head over your shoulders, and in line with your spine and hips.
- Tuck your elbows close to your body and keep them bent at a 90-degree angle. Your arms should hang below your shoulders, and your elbows shouldn’t be jammed up against your body either.
- Keep your shoulders relaxed. This should happen naturally if your elbows are aligned properly.
- Have your feet flat on the floor so your legs can comfortably rest at a 90-degree angle.
When you are standing, focus on keeping your body in alignment and not putting too much weight on one side of your body. Leaning to one side puts more strain on that side of your body and puts your entire body out of alignment.
If you cannot find a chair that allows your feet to sit flat on the floor comfortably while achieving the other posture aspects, then you may need to find a stool or a solid surface to support your feet.
Even when you are sitting with good posture, your hip flexors are fully contracted and this is still putting them in that shortened position.
So what should you do?
There are a few ways you can sit, and knowing the best sitting position for hip pain may help alleviate some of your discomfort if you choose to sit while you work. The sitting positions good for hip pain are also often good if you experience lower back or piriformis pain when sitting.
Other home office ergonomics tips
To help your body easily and comfortably stay in a proper position while you work, the office setup needs to fit you. Once you have the right office equipment, your seated or standing position will come naturally.
Home office ergonomics you need to adjust may include:
Your office chair:
Remember that you want to keep your back against the chair you sit in while you work. Not only that, but your office chair needs to support your spinal curves.
It is nice if the chair is adjustable, especially if you have an adjustable desk. This is primarily so you can find the proper height to have your feet flat on the floor and aligned with the desk height.
Having a chair with armrests is helpful so your shoulders can be even more relaxed while you are using the keyboard and to keep your elbows at a 90-degree angle.
Your keyboard and mouse:
Both your keyboard and mouse should be on the same surface. If the top of the desk allows you to use them while keeping your arms in the most ergonomic position, then that will work. Otherwise, you may need to find a desk with a keyboard drawer to allow for this.
When using the keyboard, your wrists should be straight, so the size of the keyboard will also matter to keep your arms and wrists aligned.
Your computer monitor:
Your computer monitor should be directly in front of you and about an arms distance away from you.
To get the screen height correct so you can keep your head and neck in alignment, the screen should be at or just below your eye level. You may need to lower and adjust the height if you wear bifocals or have other vision issues.
If you use a laptop, your setup will need to be a bit different. The primary concern with the laptop should be if it requires you to look down to work.
You want to keep your head and neck in alignment with your spine and above your shoulders, so to do this, you will need to elevate your laptop in some way.
An easy fix for this might be to stack books, but they do also make adjustable platforms for ergonomic laptop setups which often create a more stable and comfortable position.
This positioning with a laptop will not allow you to have the proper arm and elbow alignment, but you can invest in a separate keyboard if this becomes a concern.
Your desk:
The height of your desk is important, especially in comparison to the chair you choose. You need to make sure that there is enough clearance under the desk for your legs.
Having both an adjustable desk and chair is ideal, but if just one is adjustable you can easily make adjustments to ensure your desk’s height will suit your needs.
A desk that can be both a seated and standing desk is one of the best home office ergonomics hacks I know. That’s because it gives you the option to change your body positioning and your muscles are less likely to tighten and tense if you can move around more during your work day.
When home office ergonomics aren’t enough
Even with the right home office ergonomics, sitting for extended periods of time during the day can lead to tight muscles and hip pain when sitting. That’s why a combination of good home office ergonomics and healthy routines – including muscle release – is encouraged.
What do I mean by a muscle release routine?
When your muscles are tight and start to form muscle knots, that’s when they start to cause pain. For your hip flexor muscles, when they get too tight and form muscle knots, they also start pulling on neighboring muscles and can even pull your pelvis out of alignment completely.
This leads to a chain of issues that impact your posture and many other aspects of your body movement. Stretching and massages may help alleviate some of this pain, but only for a short time.
The only way to truly address your tight iliopsoas muscles is to apply prolonged pressure. This gets tricky because of where both the iliacus and the psoas are located.
Since the iliacus muscle in particular tends to cause the most issues in this case, I will focus on how you can easily perform a pressure release of this muscle. The iliacus is really close to your hip joint and is located on the inside of your pelvis.
Usually, you can only release this muscle with the help of a physical therapist. If you are dealing with a tight iliopsoas though, you need to release these muscles daily, not just every few weeks.
That’s why I invented the Hip Hook.
The unique design of the Hip Hook gives you the ability to apply prolonged pressure to your iliacus muscle at home. With the help of the Hip Hook, you can easily build an at home routine that addresses your hip pain when sitting.
Go beyond home office ergonomics and take control of your low back, hip, and piriformis pain when sitting.
All you need is 10 minutes after work or before bed to benefit from using the Hip Hook. As you get used to it, using it daily should become a part of your routine, especially if you do sit most of the day.
With the Hip Hook, proper alignment, and the best home office ergonomics – you’ll be well on your way to happy, healthy hips.
Frequently asked questions about creating an ergonomic home office setup
What are the three areas of ergonomics?
The International Ergonomics Association separates ergonomics into three categories: physical, cognitive, and organizational. All three of these can be applied to your office workspace in various ways.
What defines an ergonomic workspace?
When designing your workspace to optimize ergonomics, consider the following:
- Safety
- Comfort
- Ease of use
- Productivity/performance
- Aesthetics
These ergonomic principles can provide a general baseline for designing an ergonomic workspace, but home office ergonomics are most effective when you tailor your workspace for your specific needs.
These needs will include your posture while you work at your computer, the height of your chair to optimize body alignment, and even desk organization to minimize stress.
How do I know if I have poor office ergonomics?
You will know you have poor office ergonomics if you experience any type of muscle fatigue, strain, or imbalance during or after your day at work. You may feel pain in your hips, neck, back, wrists, etc. releasing these muscle knots by applying direct, prolonged pressure can provide relief.
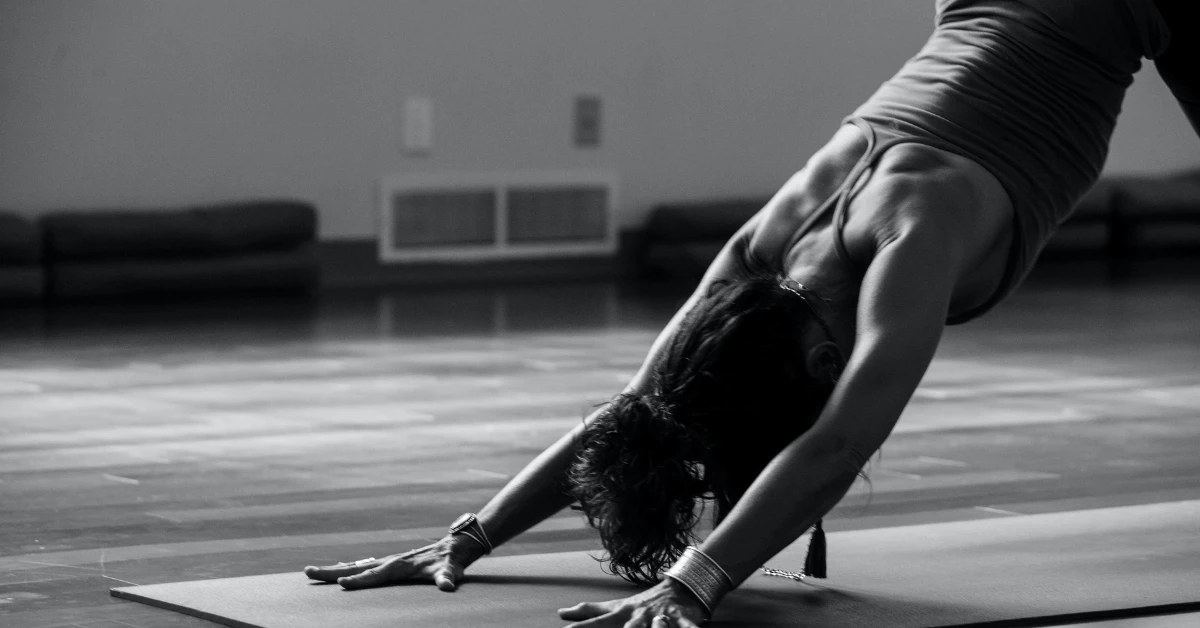
Improve Your Yoga Routine with These Simple Tips
As the new year approaches, many of us make grand resolutions for the upcoming months. Foremost among these commitments are often health-related vows, such as increasing exercise frequency, losing weight, or eating a more balanced diet.
Yoga is a popular exercise choice for beginners. Whether you are considering yoga to relieve pain, develop a leaner appearance, or gain greater flexibility, knowing your body and how to engage in the exercises correctly is extremely important. Yoga may be considered a gentle workout compared to CrossFit, but that doesn’t mean you can’t get injured.
Follow our tips below to improve your yoga routine and feel better all day, every day.
Don’t force it
If you are new to yoga, you might assume that it is just a matter of doing stretches on a comfy mat. It’s easy to take those stretches too far, though, and that’s a recipe for injury.
Be gentle with your body as you start yoga, especially if you haven’t been active in some time. Pushing yourself or trying to stretch too deep can result in common injuries to the hip, shoulder, knee, wrist, hamstring, and back. To avoid hurting yourself, focus on increasing your strength in your poses instead of getting a deeper stretch. Also, pay attention to creating balance to encourage your core to support and stabilize your body. Remember, stability is as important as mobility.
To cultivate your body’s strength and stability, you may need to do certain things as you are exercising, such as:
- Ease back when in certain poses if you feel pain
- Reduce extreme ranges of motion
- Utilize aids that reduce the weight on certain joints, such as a wedge tool or towel roll
- Perform poses to the best of your ability instead of as the instructor does them
Take care of your hips
As mentioned above, stability is a crucial element in yoga. That stability largely comes from the muscles in the core of your body, especially your hip flexors, which are responsible for keeping your back, hips, and legs in line.
How hip problems begin
A popular staple of yoga is ‘hip-opening’ exercises that can involve unnatural movements and lots of hip rotation. These actions can create too much mobility in the hip, and when the hip joint’s stability is decreased, the predominant hip muscles (the iliacus and psoas or ‘hip flexors’) try to re-establish the stability of the hip, lower back, and pelvis by tightening (holding tension).
This overstretching can put a strain on the hip capsule, making your hips feel sore. If the issue is not corrected, it can progress to long-term problems, such as arthritis, poor posture, or even tears in your muscle.
Breaking the hip-yoga pattern
When addressing hip pain, there are preventative measures you can take, like working on strengthening your core or focusing on posture and breathing. If you are already experiencing hip pain, try to shorten your stance or find alternative poses that are more comfortable.
There are a few key things you can focus on to break the pattern of tension in your muscles:
- Stop overstretching – Don’t stop doing yoga, but reassess your goals. Rethink the notion that you must stretch ever deeper to have an effective workout. Instead, listen to your body and stop stretching once you attain a level of flexibility that is comfortable for you.
- Avoid movements that misalign your pelvis – Be cautious of exercises like warrior and triangle pose that rotate your pelvis and can cause the hip flexors to tighten. It is not necessary to stop doing these poses but practicing simple modifications can lessen the strain on your muscles.
- Use the Hip Hook – Applying sustained, angled pressure via the Hip Hook will help to release muscle tension.
Dealing with hypermobility
Many drawn to yoga have a level of natural flexibility and don’t necessarily need to focus on becoming more mobile. If you do live with hypermobility, though, you still need to be careful with your yoga practice, as it’s easier to overdo it when you’re naturally flexible.
If you push past the natural limits of the human body, your muscles will attempt to compensate by holding tension, and not just after or during exercise, but while going about normal activity and times of rest as well. This is why it is so important to know your body to understand when it may be time to ease back on your exercise routine.
To help with yoga-induced pain for hypermobile people, follow these three tips:
- Know Your Body, Know Your Exercise – You must listen to your body and understand how to perform your exercises safely, especially when you may be more flexible than your instructor. This means not ignoring pain or pushing your body past what is comfortable.
- Practice Balance – Take a whole-body approach when it comes to your workouts. Focus on building strength equally in all areas of the body and decreasing putting strain on only select muscles.
- Go for a Deep Release – Stretching or rubbing a muscle can have temporary benefits that feel good, but to teach your muscles to relax, sustained pressure at the correct angle is required.
Help tight muscles, don’t hurt them
Muscles that don’t allow for a full range of motion are holding excess tension. Although massage and stretching can be effective means of relief for tight muscles, they often only bring temporary ease. The best way to release tension is not through massage or stretching but through prolonged pressure on the muscle.
Tight muscles are often at the core of pain issues. You can resolve tense muscles by applying deep pressure at just the right angle and for just the right amount of time. The Hip Hook does the job, and it, along with the other tips in this article, can help you maximize your yoga routine day in and day out.

How to Start a Good Rowing Habit without Injuring Yourself
Rowing is a lovely way of staying in shape. If you do it the old-fashioned way, it lets you enjoy the beauty of nature as you soak in the fresh air along the winding rivers or the expansive lakes. Thanks to modern innovations, rowing is no longer a reserve for the outdoor adventurer, as indoor rowing machines are in practically every gym.
The only problem is that not everyone knows how to row, and jumping in as part of a New Year’s habit can quickly cause injury, especially if you’re just getting back into exercising regularly. But don’t worry, we’ve got a few tips to help you get more out of your rowing without risking injury.
Muscles used in rowing
Rowing targets nearly all major muscle groups in the body. It activates both the upper and lower cores of the body at once, giving you a more intense workout with every back and forth stroke. To understand the muscle groups involved, we need to look at the mechanics of rowing techniques:
The catch
The catch is the start of a rowing stroke, and as the name suggests, it involves stretching forward the arms as if making a catch, with the knees bent close to the chest. This move works on the hamstrings, calves, triceps, deltoids, trapezius, abdominal muscles, and lower back.
The drive
For the second phase of a rowing stroke, the rower stretches the legs forcefully until they’re almost fully extended. All the while, the upper body should be in an almost upright position as you start pulling the handle towards your abdomen. The muscles activated in this move include the calves, hamstrings, quadriceps, and gluteus muscles in the lower body. The upper body engages the biceps, deltoids, trapezius, and other upper back muscles.
The finish
In the third phase, the legs are fully extended, and the upper body leans back slightly as you pull the handle much closer to your abdomen. Your arms, shoulders, and back do much of the work in this movement, but a few leg muscles also do the lifting. The muscles activated include the latissimus dorsi, trapezius, deltoids, forearms, glutes, quadriceps, and biceps.
The recovery
The last move in the stroke feels like a reversal of the first three phases. You will start moving back to the catch position, extending the arms out in front, and bending the knees. The recovery phase invokes the abdominal muscles, calves, trapezius, hamstrings, deltoids, triceps, and forearms.
Common injuries from rowing exercises
It is easy to avoid injuries once you have a good idea of the muscle activity involved. We’re going to look at some common injuries many people experience when jumping into a new rowing habit unprepared.
Lower back pain
Most rowing injuries result from improper technique, and nothing illustrates this better than back pain. Leaning back way too early or far too late causes more strain on the lower back, forcing it to bear unexpected weight at wrong body angles. A good rowing stroke should be powered by your arms and legs, as the back remains unmoved.
Knee and Achilles tendon pain
The majority of knee pain from rowing injuries is connected to the tendons. Kneecap injury occurs when damage happens to the patellar tendon connecting the quadriceps muscles. Stretching the Achilles tendons may cause injury, especially where the rower hasn’t done enough stretching before the exercise.
Iliotibial band syndrome
The Iliotibial band is a group of connective tissue stretching from the hip and running across the knee down to the shin. Iliotibial band syndrome is a persistent pain on the outer knee, usually caused by repetitive bending activity. It’s often caused by mistakes in training and can be corrected with proper technique.
Shoulder and neck pain
A sore neck from rowing usually happens because of poor upper body posture and technique. Many newbies fail to make their arms and legs do the work, forcing more strain on the rotator cuffs, causing pain and irritation in the shoulder.
How to prevent injuries from rowing exercises
Properly executed rowing can be a huge asset to your training regime, giving you high-level cardio while working all your major muscles. However, leaving with back pain should be the last of your worries every time you hit the rowing machine. Proper technique, sufficient rest intervals, and releasing muscle tension are the best tricks in the book when fighting injury.
Maintain good technique
If you need to achieve your fitness goals and minimize injuries, you need to pay more attention to your technique. Unnecessary movements are wasteful of your energy and put more strain on body parts that should bear the brunt of the exercise.
Rowers need to practice limiting their back movements and strengthening their cores to support the back throughout the strokes. Rowing should essentially involve pulling with the arms and pushing with the legs, and your back shouldn’t bear the strain in any of these movements.
Give yourself time to rest and recover
Proper rest and recovery should be top of your list of things to know when starting rowing. Besides, your muscles need time to heal from all the strain of the rowing activity. Different studies have proven that muscle growth is achieved during your rest days.
Always observe proper nutrition to give your body the fuel it needs to recover. Hydration is also important as it stabilizes many of the body’s processes, such as cooling, digestion, and blood pressure regulation.
Release tight muscles
Tight muscles put you at high risk of strains and injuries. Because rowing involves doing the same thing over and over, you might need to infuse stretching exercises in your training program to condition your muscles for the activity. Stretching flexes the muscles and improves their range of motion in the joints.
If you’re already experiencing pain and tightness at the hip, the Hip Hook can be a very convenient tool to relieve the tension. The Nuckle is another minimal impact tool that you could use for tension relief on the neck and shoulders.
As you’re discovering more things to know when starting rowing, check out the Aletha website for more tools and instructional resources to help with alleviating pain and revitalizing your fitness journey.


Top 3 Habits New Indoor Cyclists Should Start Doing Today to Avoid Cycling Hip Pain
Indoor cycling, commonly referred to as spinning, is one of the top fitness trends these days. Over 34.7 million people consider it part of their regular cardio routine, and its popularity has only grown in recent years. While indoor cycling is a safe, low-impact form of exercise, there are a few helpful habits newcomers should consider before starting a new routine. You’re ready for a new year, new you, but your muscles might need some reminding!
Basics of indoor cycling
As exhilarating as they are challenging, indoor cycling classes benefit the body even more than bicycling, according to a 2017 study. These benefits include building strength, improved cardiovascular health, and of course, weight loss through burning calories.
In addition to the above, indoor cycling also targets all the major muscle groups, making it a true full-body exercise.
- Core muscles: Used to keep your torso upright during cycling.
- Upper body: Supporting yourself as you lean against the handlebars.
- Back: Stabilizes and supports you during workouts.
- Glutes: Part of the pedaling process, especially if you incorporate standing periods on your bike with increased resistance.
- Quadriceps: A major mover in the pedaling cycle.
- Lower legs: That extra, final push while you pedal
- Hamstrings: Move the pedals behind you every time you move around.
- Hip flexors: Lift the pedals to the top every time you move around.
Indoor cycling training plan for beginners
As daunting as it may seem, getting started with an indoor cycling training plan is surprisingly easy for beginners. Because the exercise is so convenient, people find it’s easy to work in a quick spin over lunch or on the way home from the office.
The most crucial step to consider if you’re new to indoor cycling training is to assess your fitness level with a Function Threshold Power (FTP) test. This is a simple way to tell how well your physiology responds to exercise so you can scale your workouts to meet your needs.
Practical indoor cycling goals to structure your workouts around and help you get into a routine include:
- 20-minute rides, three times a week
- Train for a couch to 30 miles in 8 weeks cycle for an average of 25 miles a week
- Enhance muscle endurance with twice a week strength sessions
Habits beginner indoor cyclists should start today
1. Stretch before & after workouts
Stretching increases blood flow and is an excellent warm-up aid for quads, shoulders, neck, hips, and related muscles.
If you’re in a spin class, expect the trainer to lead you through a series of warm-up exercises to prevent muscle injury and increase performance. If you’re indoor cycling on your own, spend a few minutes on the mat getting your muscles ready to go.
The post-workout feeling of warm and loose muscles may be followed by tense and achy muscles. For this reason, you’ll want to consider ending your workout with another brief stretching session. Not only does it improve flexibility and overall athleticism, but it also aids in mobility, helping you move with ease, and it can prevent soreness.
The International Journal of Sports Physical Therapy led a study that shows stretching after a workout widens your range of motion. A five to ten-minute session of stretching after a class should include the following:
- Forward fold (targets the back of the legs)
- Hamstring stretch
- Quad stretch
- Calf stretch
- Banana stretch (targets the side of the body)
- Tip-over tuck (targets the hamstrings and shoulders)
2. Maintain good posture
Sitting on a bicycle isn’t exactly natural. From the bent-forward position your torso and hips adapt to the upright angle you’ll hold your neck in, even a short cycling session can cause tight muscles in odd places. Fortunately, with a little patience and attention to your posture, you can minimize the risk of injury.
For a low-impact cardiovascular workout emphasizing body alignment and postural awareness, be sure to ask your instructor for tips on proper form. This includes pulling your core muscles in, elongating the torso, and adjusting the seat so the pedals are at the right height.
More tips to keep good cycling posture:
- Keep your back flat and chest up
- Keep your weight back and off the handlebars
- Keep your weight on the pedals
- Keep your feet flat
- Add enough resistance to prevent bouncing in the saddle
- Use your abdominal muscles to hold up your lower back
- Focus on your spine shape and keep a neutral shape
3. Release tight muscles
Muscles don’t like to work when they are short. When you’re cycling, you’re bent at the hip, moving your legs up and down, forcing your hip flexors to work while compressed. The more you cycle, the more you upset those hip flexors, causing all kinds of posture issues and muscles knots. If you don’t keep that tension at a minimum, you could experience back pain, sciatica, leg pain, and other issues, even when you haven’t touched a bike all day.
Stretching and massage can temporarily relieve tense muscles. They aren’t permanent solutions, however, as they can’t release tightness or relieve muscle knots on their own. In fact, rubbing and massage can actually make certain conditions worse.
The only way to release muscles is to apply deep, direct, constant pressure at just the right angle. The Hip Hook is a great tool to release hip flexors like the iliopsoas, a muscle group that’s particularly hard-hit by cycling routines. Additionally, the Nuckle can help relieve tense shoulder, chest, and neck muscles that tighten up due to the awkward forward position we’re in when cycling.
By releasing your muscles on a regular basis, you can ensure that every activity you do throughout the day – from cycling to driving – can be done without pain or impaired movement. It’s arguably the single best habit you can adopt to improve your indoor cycling sessions.

Fix This Common Posture Problem Almost Everyone Has
Stroll through any office and you’ll see row after row of people hunched over their desks, with their heads shooting forward and shoulders rounded. Even when out and about, you’ll see people on their cell phones holding that same head-shoulders forward position.
This all-too-common position can lead to some extremely common issues, including migraines, jaw pain, and the dreaded tech neck. Most people know they should respond when pain like this occurs, but when it’s “just” a posture problem, few people take action.
What’s the common posture problem almost everyone has? Rounded shoulders. It’s so pervasive that we think it’s ordinary, yet as we’ll see below, ignoring hunched shoulders can lead to a number of bigger, more painful issues.
What causes rounded shoulders?
At its core, rounded shoulders result from poor posture habits, too much focus on certain exercises, and muscle imbalances. For a majority of people, they stem from spending too much time slouching in front of a computer or phone, with the shoulders forward and down.
Other causes of rounded shoulders are:
- Driving or riding in a car
- Sitting for long periods
- Focusing exercises that bring the arms forward and tighten the chest
- Carrying heavy objects
The core cause of rounded shoulders
At its core, one primary muscle that causes rounded shoulders is the pectoralis minor — an often forgotten muscle that attaches the shoulder and the ribs. This muscle contracts when we move the shoulders forward.
When we keep a forward position for hours, every day, for weeks on end, we slowly train the pectoralis minor to stay contracted. It quickly gets the message that it should stay in this position, making it harder for it to relax and move back. Over time, this creates the unsightly rounded shoulders we’re all familiar with.
Our bodies aren’t isolated systems. When one muscle pulls forward, another goes slack. A chronically tight muscle, then, can get into a tug-of-war with muscles responsible for opposing movements. In the case of the pec minor, this can include muscles throughout the shoulders and upper back, spreading tightness throughout our body.
A few posture-related problems that often stem from pec minor tightness:
- Tech neck
- Tight upper traps
- Backaches
- Shoulder pain
- Pain between the shoulder blades
- Migraines

How do you tell you have rounded shoulders?
The first thing to check is how your shoulders sit in a resting position when you’re standing upright.
Step 1: Stand in front of a mirror, letting your hands hang naturally by your sides.
Step 2: Look at your shoulders. Do they seem a little slumped? Straighten them out then relax once again, see if they fall into the same position.
Step 3: Look at your thumbs; do they point forward? Slouching shoulders tend to turn our hands inward, making the thumbs point towards each other.
If this quick test reveals your shoulders are rounded, don’t panic! We’ve got a great solution that can start repairing your muscle tightness and posture problems in a jiffy.
Temporarily relieve rounded shoulders
Just as you trained your muscles and joints to hunch forward, you can also retrain them to relax back to their normal, correct resting position. This can be done through a combination of modalities, including stretching, exercise, and muscle release.
Stretching to relax shoulder muscles
Stretches release muscle tightness and tension by boosting blood flow to the impacted muscles. You can use any number of shoulder, upper back, and chest stretches to temporarily relieve a tight pectoralis minor muscle. Stretches on their own won’t remove the tension for long, however. As soon as you go back to your usual routine, you may find the rounded shoulders (and pain!) return.
Rubbing to increase muscle relaxation
When you rub a tight shoulder muscle, it may relax a little because you’ll increase flexibility and blood circulation. As is the case with stretching, though, a rubbed muscle will regain tension pretty quickly. It may feel good to massage these muscles, but it won’t train them to relax and return to their normal resting position.
Exercising to correct muscle imbalance
Some exercises can help strengthen your core, upper back, and chest muscles to correct rounded shoulders. These include planks, pull-ups, push-ups, band pull-aparts, shoulder external rotation exercises, and other upper body movements. Exercises are best used in conjunction with the other modalities above and below, of course. Muscles don’t always respond well when we exercise them while they’re tight.
Fix rounded shoulders with muscle release tools
The best way to relax specific muscles is to apply direct and prolonged pressure — in other words, applying sustained pressure without movement. This is distinctly different from rubbing or massage, and its benefits last much longer than stretching.
Prolonged pressure releases muscles like the pectoralis minor in as little as 30-90 seconds. When pressure is applied at just the right angle and in just the precise manner, it informs the brain that the muscle under pressure needs to relax. The brain responds, the muscle releases, and your pain and rounded shoulders melt away.
You’ll need the right tools to release your pec minor, however, as the pressure required to do this is precise. Tennis balls and similar implements won’t always work, as their surface is too broad or too round to pinpoint small muscles like the pec minor. That’s why we created the Nuckle.
The Nuckle was designed by a physical therapist specifically to release, relax, and realign the neck and shoulders. With three widths and six angles, it can adjust to every body type and apply clinically effective, specific pressure to relax tight muscles and reduce pain.
By releasing your pec minor on a daily basis you can permanently fix rounded shoulders, eliminate tech neck, and stand tall once again.
