Your cart is currently empty!
Author: admin
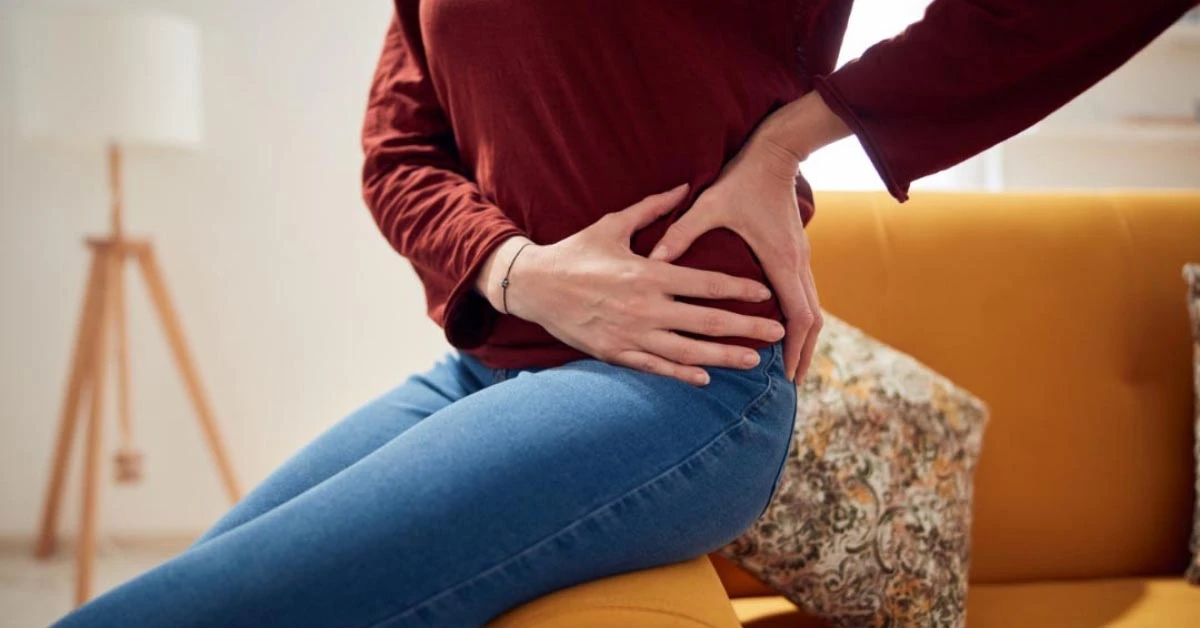
Are trigger points the cause of your muscle pain?
What are trigger points?
Myofascial trigger points (or simply “trigger points”) are contracted areas inside a muscle or surrounding connective tissue (called fascia) that stay shortened no matter what you’re doing. Also known as muscle knots, these areas can be very sensitive to pressure and cause pain.
While you could previously contract and relax that muscle, some of the muscle fibers are now outside your conscious control. It’s like the “on” button at the control center gets flipped and the controller goes out to lunch.
Trigger points are important to understand because sometimes we can feel pain in one area that is actually coming from a different location. Referred pain from trigger points is often felt in multiple locations. Localized pain is felt in the immediate area surrounding the muscle knot, while referred pain is felt elsewhere in the body.
What are latent trigger points?
A latent trigger point can be described as a tight area within the muscle tissue that is “hidden” beneath the surface, meaning that you don’t know it exists until it gets accidentally, or purposefully, pressed on. Because of this, it’s possible that one of these trigger points has existed in your body and remained unaddressed for a long period of time.
For example, let’s say you’re sitting at your desk and a friend swoops by and squeezes your shoulders around your upper traps (a common area to find trigger points on people), pressing their thumbs into the muscle. You’ll probably feel some pain (and possibly relief, if they hold that spot for at least 30 seconds) directly where they were pressing, but possibly also up into the neck and head area. If they pressed hard enough, you might even experience a headache from the pressure. You may not have noticed those spots before, but you’ll definitely notice them now!

What are active trigger points?
A latent trigger point can become an active trigger point if it’s rubbed, contracted, overstretched, or during periods of stress or dehydration. Active trigger points cause localized and referred pain patterns without being pressed on. Using the same example from above, you’d experience pain in the traps, neck, and head while simply sitting at your desk. No outside stimulus needed; it hurts all on its own. Having someone press on the active trigger point likely would increase the pain, but it exists regardless.
What are common symptoms of trigger points?
If you squeeze your shoulder with your hand and feel a dense ball of muscle (what we often call a muscle knot), you have found a trigger point. You can either do this yourself, or have a trained professional (such as a physical therapist or massage therapist) help you out in feeling for these spots. If you hold on to that point for a few seconds and with enough pressure, you may even feel that trigger point start to refer somewhere else.
Common trigger point symptoms may include (but are not limited to):
- Dull aching or muscle tenderness
- Muscle stiffness and reduced range of motion
- Muscle weakness or fatigue
- Involuntary muscle contractions (or twitches)
- Inability to get a muscle to relax
- Affected area feels “warm” to the touch
- Burning or tingling sensations
Because of latent and active myofascial trigger points, another tell-tale sign and common symptom of having a trigger point is experiencing local and/or referred pain patterns when having pressure applied to that area of your body.
Trigger points may mimic other conditions
Due to possible referred pain patterns, trigger point symptoms may mimic the symptoms of other conditions, such as:
- Sciatica
- Sacroiliac (SI) joint pain
- Iliotibial (IT) band syndrome
- Neck pain and tension headaches
- Temporomandibular joint (TMJ) pain
- Abdominal or pelvic pain
- Sexual dysfunction (including pain with intercourse)
- Low back pain, hip pain, and knee pain
- And so much more…
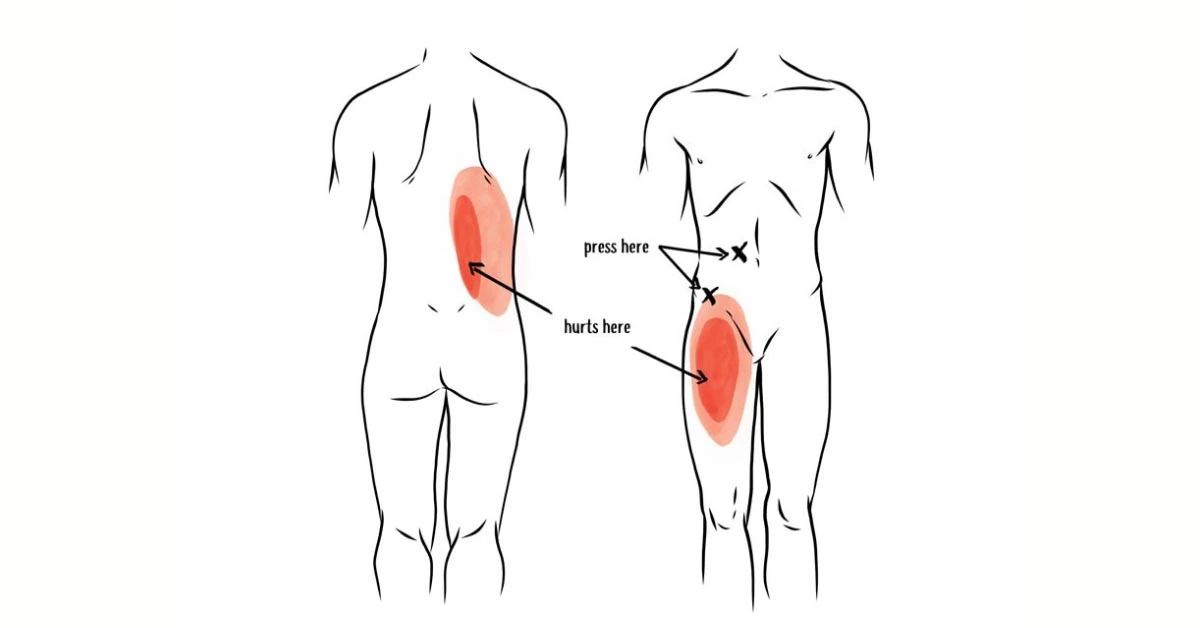
The below images show common patterns caused by trigger points, and why the root of the problem may not be where you’re feeling the pain. They’re also great examples of why trigger points can cause myofascial pain that may be mistaken for other conditions or diagnoses.

Iliacus trigger point & psoas trigger points
- iliacus trigger points refer pain to the anterior hip/thigh and groin, which may be mistaken for quadricep pain/tightness, hip arthritis or hip labrum issues
Gluteus minimus trigger points
- refer pain to the deep glute, outer hip, and down the leg, which may be mistaken for hip bursitis, IT band syndrome, or possibly even sciatica
Piriformis trigger points
- refer pain deep in the glute and down the back of the thigh, which may be mistaken for sciatica
Quadratus lumborum trigger points
- refer pain to the SI (sacroiliac) joint and glute (buttocks), which may be mistaken for SI joint pain or dysfunction
Because of this possibility, it is best to check with your healthcare practitioner for an evaluation of your pain to determine the root cause of your symptoms and set you up with an appropriate course of action to treat and improve the issue.
What causes trigger points?
Trigger points can develop as a result of muscles being used too much, contracted for a long time without relaxation, shortened too long, or in a stressful situation. Once a muscle is “on” for too long, the brain decides to keep that muscle contracted for good.
Poor posture can cause trigger points
Being in poor posture takes your body out of its natural alignment, making certain muscles work harder than they should to hold you in that position. For example, many people have rounded shoulders and a forward head posture. This makes the muscles in your upper back (in between the shoulder blades) and on the back side of your neck tighten up and hold tension to prevent the body from falling forward even more.
Inactivity can cause trigger points
As more and more of us slowly sink into our couches, it’s not a surprise when there is a myofascial component contributing to people’s pain. Spending lots of time consecutively in a stationary position (e.g. sitting, whether on an Ikea couch or a Herman Miller chair) does not challenge or strengthen the muscles in your body.
As this way of living continues consistently over time, it leaves your muscles in a weakened and unconditioned state to where they now begin to take on the shape and length of where they spend the majority of their time — in a seated, slouched, or distorted position.
Working on a computer can cause trigger points
Muscle knots in the tops of the shoulder area (upper trapezius) are common for people doing computer work. With your arms reaching out in front of the body all day long, the upper trapezius muscle is constantly “on” to prevent your shoulders from falling forward and to keep your head from rolling off your shoulders (and you thought your morning coffee was doing that!)
After a long day of work, this muscle will likely stay contracted when you‘re done typing. So even if you’re just walking the dog or making dinner, or relaxing on the couch, this muscle is stuck in the “on” position.
Sitting at a desk can cause trigger points
Sitting also results in the shortening and tightening of the body’s hip flexor muscles and ultimately the development of trigger points in the hip flexors that cause localized and referred pain in the body.
Muscular imbalances can cause trigger points
Your muscles hold your body in alignment, where there is a necessary relative relationship between the strength and length of the muscles on either side of your body — front vs. back and left vs. right — to remain in balance and function optimally.
For example, when the hip flexor muscles on the front side of your body tighten up and become shorter, this tilts your pelvis forward into an anterior position. The glute and hamstring muscles connect to the pelvis on the back side of your body, where they become longer than normal and weaken. It basically becomes a game of “tug-of-war” where those muscles now tighten up and hold tension in this lengthened position to accommodate the shortened hip flexors on the front of your body.
Another example is when the lateral hip muscles (like the gluteus medius and tensor fascia latae, or TFL) are stronger on one side of the body versus the other. With every single step you take, these muscles engage to help stabilize your pelvis. Let’s imagine that these muscles on the right side of your body are weaker than the left side of your body. When taking a step with your left leg, the muscle will engage properly and keep the pelvis level. However, when stepping with your right leg, the pelvis may be unstable because the muscles aren’t strong enough to perform their function. To prevent the pelvis from laterally tilting, your body will respond by engaging the left quadratus lumborum (QL) muscle more than it normally does.

Injuries can cause trigger points
An acute injury creates damage to the connective tissues around the injured area. As these tissues heal and begin to repair themselves, the muscle fibers may tend to tighten up as the body recovers to protect and stabilize the area following injury. This can lead to muscle knots developing, as well as other joint and soft tissue restrictions, which must be addressed even after the injury has “healed” in order to restore your full range of motion.
If left unaddressed, movement pattern compensations begin to occur in order to work around those limitations that came about from the past injuries. Over time, this ultimately affects proper body mechanics and can lead to the development of muscle imbalances (and therefore more trigger points).
Improper body mechanics can cause trigger points
Whether you are working out, doing yard work, or picking up your kids, having the ability to control your body with good mechanics allows you to perform your daily activities in the safest and most efficient way possible.
If your body mechanics are negatively impacted — by an injury, a muscle imbalance, or simply a lack of strength & control relative to the task at hand — then the work being performed by your body is no longer being distributed as efficiently as possible, increasing the risk for injury (and potentially trigger points).
Repetitive movements can cause trigger points
Doing the same thing over and over again utilizes the same muscles (and therefore doesn’t use other muscles), which can lead to the development of trigger points from overuse and other muscle imbalances in the body.
Take a golfer, for example. On a daily basis, they may take hundreds of swings — each of which is performed in the same direction and uses the body unevenly. The hips and thoracic spine will rotate differently, and the glutes and core repeatedly engage more on one side. Now scale the number of swings out to a weekly, monthly, and yearly basis or even out as far back as the person started playing golf — that’s a lot of reps in the same direction!
Stress can cause trigger points
Common reactions to mentally or emotionally stressful situations include the tensing up and clenching your muscles. Coupled with shallow breathing and triggering more of a “fight or flight” sympathetic nervous system response, this may be a recipe for muscle knots to form in the body.
Poor nutrition or hydration can cause trigger points
To perform your daily tasks, your muscles require a certain amount of water and macro/micro nutrients to fuel their performance and also adequately recover. Without a proper recovery, the muscles will not be able to perform at their best and the likelihood of developing trigger points may increase as a result.
How do trigger points affect the function of a muscle?
The muscles in your body need to be able to contract (shorten) and relax (lengthen) on either side of the joints needed to create movement and perform your daily tasks. The presence of myofascial trigger points affects the ability of your muscles to function at their best.
When there are these hypercontracted areas within the muscle, there is decreased blood and nerve supply to the tissue, affecting the muscle to where it no longer performs optimally. If you’ve been working seven days a week without a vacation for ten years, you won’t want to do any more work. Same goes for your muscles with knots in them. And their co-workers (the muscle fibers that are not knotted) end up doing more of the work with less resources. The results may include reduced range of motion, decreased force output, longer recovery times, and increased chances of pain and injuries.
In addition to the impact on your muscles, trigger points can affect how your nervous system perceives the pain. The chemical environment around the areas where your muscles have trigger points changes, where it causes pain receptors to fire more frequently and more easily than in healthy muscle tissue.
The longer that someone remains “stuck” in this environment, the more sensitive their nervous system becomes to feeling pain. This can contribute to more chronic myofascial pain patterns that may later develop into conditions such as myofascial pain syndrome of fibromyalgia.
How to get rid of trigger points
This is the moment you’ve been waiting for! By now, you’ve probably realized you have a trigger point or three affecting your movement and comfort, or sitting quietly to the side waiting to cause trouble. If you are experiencing pain from trigger points, it might be a good idea to begin taking actions to improve and get rid of those tight spots to prevent the pain from getting worse. Depending on your personal preference, you may look to address your trigger points through a self-care approach or see a healthcare professional for treatment.
Could Digestive Issues and Low Back Pain be Caused by Tight Hip Flexors?
Many people act as though health issues are specific and isolated. It’s time for a new angle. The systems in your body are intricately connected: if you’re experiencing problems in one area it can directly affect another.
This domino effect is especially prevalent when it comes to your back, hips, and digestive system.
Your abdominal region is packed full of tissues and necessary systems that you use 24/7. It is home to your bladder, kidneys, female reproductive system and can also be ground zero for potential dysfunction, from ovarian cysts to irritable bowel syndrome (IBS).
Many of these internal organs in your abdomen are also adjacent to the iliopsoas or hip flexor muscles. That’s why it isn’t uncommon for patients to ask me: can IBS cause hip and groin pain?
I’m going to walk you through the inner workings of your abdominal region so you can better understand your body and how your organ health directly relates to your muscle health.
How body alignment and tight muscles affect digestion and back pain
Body alignment is an essential part of overall bodily functioning and health. When your spine or hips are out of alignment, it can throw many things off. And if left unaddressed, it can lead to more complicated medical issues.
The impact of your muscles on your body alignment is also often overlooked. If your muscles – especially your iliopsoas muscles – are too tight, they can pull and shift joint and bone alignment. This misalignment, in turn, can disrupt even your organ function.
The role of your iliopsoas muscle
Your iliopsoas is one of your primary hip flexor muscles. It is comprised of two muscles: the iliacus and the psoas. Your iliacus attaches directly to the pelvis, while your psoas attaches to your lower spine and travels diagonally through your body to where both muscles cross the hip joint and attach to the femur (thigh bone).
The location and overlap from the lower to the upper body are essentially what makes up your body’s core. The iliopsoas acts as a stabilizer for your hips and your spine, so if those muscles are too tight or not working properly, it impacts everything around them.
When your core is weak, your body as a whole becomes weak and wobbly.
Your core helps you perform many daily functions like sitting, standing, squatting, etc. It is no wonder then that your iliopsoas muscles may get tight from all this use; they are continually being used and engaged, and very rarely getting time to relax.
On top of this, the iliopsoas muscles are located right next to your reproductive organs, bowel, bladder, and large intestine. The proximity of the iliopsoas to these systems affords the muscles more opportunities to protect the abdominal organs when one system is struggling or weak.
One primary example is if you have irritable bowel syndrome or any other digestive tract issue.
Your body will react by tightening surrounding muscles to protect that part of your body. Since the iliopsoas muscle is one of the closest muscles to your intestines, keeping the iliopsoas muscle tight is your body’s natural response.
Depending on the location of the organ issue, different parts of the iliopsoas will tighten, and other muscles may also join in. The tension can continue to spread over time or as the condition worsens, causing pain.
Pain from abdominal issues
Now you should have a good understanding of how your muscles, organs, and bones are interconnected and can affect each other when one isn’t functioning properly. You’ve also seen that your body alignment can get disrupted if your muscles are too tight. When your body alignment is disrupted, there is increased potential for organ discomfort or abdominal issues to arise as well.
How tight hip flexors affect the digestive system
Tight hip flexors can affect your digestive health. Your iliacus and psoas are located right next to the small and large intestine. When you begin to have issues with either part of the intestine, it can cause the iliopsoas muscles to quickly tighten around the intestinal area.
Medical issues like irritable bowel syndrome can cause hip and groin pain, which is why if you start to have lower back pain, it could be due to your digestive issues.
As the iliopsoas tightens, it doesn’t much matter where the tightening begins. Once one part of the hip flexor muscles are impacted, the rest of them play an internal tug of war to try to balance and stabilize the core of your body. As the muscle tightness increases, the pull on your bones also increases. This pull is what impacts body alignment and how your joints fit together. These subtle changes can affect your posture, the way you walk, and cause back and hip pain over time.

How tight hip flexors affect the reproductive system and urinary tract
Just as the digestive system can impact muscle health, the reproductive organs and urinary tract are part of your abdominal health as well. Issues with your kidney, bladder, or reproductive organs (ovaries, uterus, prostate) can affect body alignment and iliopsoas tightness.
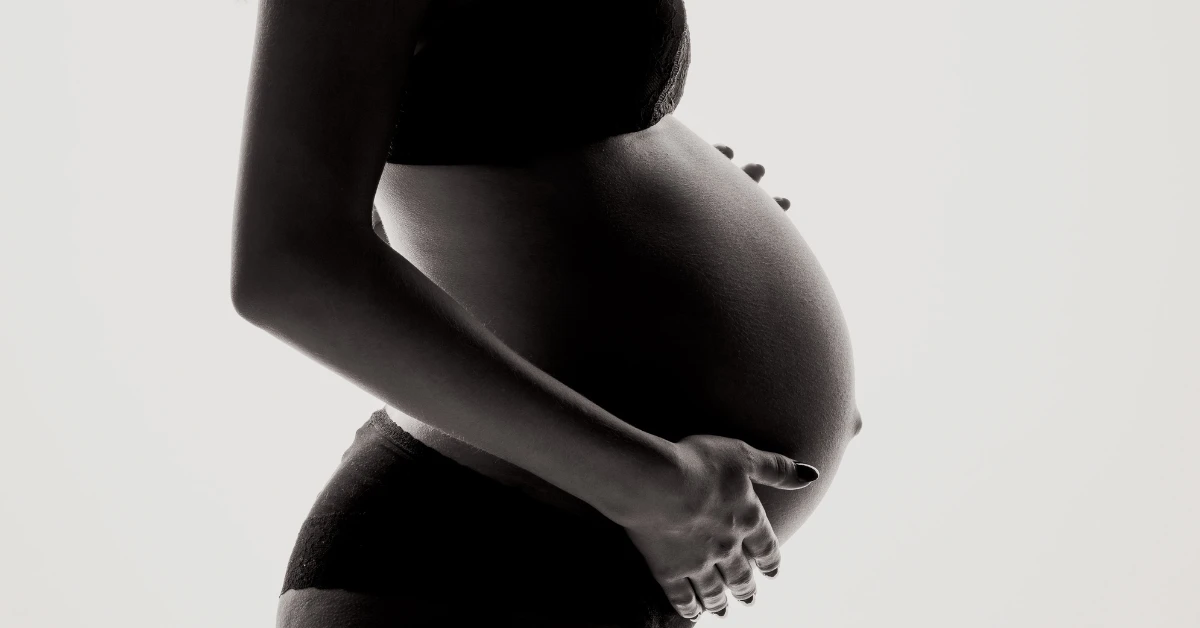
When your body is going through significant change or trauma, this muscle reaction becomes even more elaborate. For instance, when a woman experiences pregnancy and childbirth, there are some major adjustments her body must make. This additional trauma often causes the iliopsoas muscles to overtighten: they’re attempting to stabilize and realign the hips and back.
Other major organ traumas like ovarian cysts can cause issues with the iliopsoas muscles. The ovaries are very close to the iliopsoas muscle, so once they’re inflamed, the muscle contracts and tightens to keep the area safe and protected.
If you are unsure if you have ovary issues, but you are having groin or abdominal pain, it is important to note muscle tightness. Tight iliopsoas muscles alone can cause groin and abdominal pain, so pain may not necessarily be attributed to the organ itself.
Muscle release for abdominal pain
When you’re experiencing medical issues such as IBS, ovarian cysts, or general digestive problems, working closely with a medical professional is important. There are many contributing factors to your organs’ health, including your diet, exercise routine, and overall wellness.
Tight muscles can also be a major contributing factor to your lower back, groin, and hip pain. With that in mind, finding ways to integrate some muscle-specific exercises, stretches, and releases into your routine could improve your abdominal health and realign your body to get things back on track a bit faster.
Targeted iliacus and psoas release
One of the most effective ways to release tight muscles is to apply prolonged (30-90 second) pressure.
One major issue with the psoas and the iliacus muscle is that they are difficult to reach unless you have a massage therapist or physical therapist there to help you. This is why I invented the Hip Hook.
The Hip Hook is the world’s first muscle release tool for both the psoas and the iliacus. Its unique angled design allows you to apply prolonged pressure while relaxing the rest of your body. Initially, the pressure is applied to the psoas muscle. Pressing down on the handle allows the tip to pivot and apply direct angular pressure to the iliacus. Releasing your psoas and iliacus muscles once a day for just a few minutes can bring astounding results, and you will be able to feel an immediate difference in your hip alignment.
Don’t ignore your backside! Because tight hip flexors affect the front and back of the body, it’s also important to release the muscles in the back of the hips. To tackle those points, you can use the Hip Release Ball.

Abdominal stretches
No matter your condition, adding a bit of stretching into your life will do you good. You should err on the side of caution, however, because too much stretching can be detrimental to your hip flexor muscles. It is best to stretch your iliopsoas muscles in moderation.
Beyond focusing solely on your hip flexor muscles, adding in some trunk twists and back stretches can also be helpful. This spreads out the muscle area being stretched and opens more areas along your spine, hips, and core.
Taking a few gentle yoga or restorative yoga classes can be helpful to give you a few ideas for specific hip or back openers as well as some twists to work into your stretching routine.
Muscle relaxation
Muscle relaxation and muscle release go hand in hand. Since your iliopsoas muscles are engaged continuously even when performing simple tasks (like sitting), they hardly ever get a break from contracting.
Something we often don’t get enough of these days is rest and relaxation. This can come in many forms, but find 10-20 minutes every day to truly relax (and not just right before bed).
Relaxation could be something as simple as lying on the floor and taking deep breaths for 10 minutes. It could be a hip flexor release with your legs resting on the couch while your back is on the floor. It could be scheduling a Swedish massage once a month.
Whatever you can fit into your schedule and budget, I highly recommend taking the time to truly relax your mind and your muscles each day.
Chiropractic care
The final piece of the puzzle that we have for you today is to look after your bones and joints. Many chiropractic doctors and massage therapists will work together to create a healing space for your body.
Chiropractic care may not need to be an ongoing piece of your treatment plan, but if your iliopsoas muscle tightness has pulled your hips or spine out of alignment, then a few visits could be helpful.
As you work to release and relax your muscles, your body will start to realign naturally. However, depending on the severity of the misalignment, you may need some extra help from a chiropractor.
Take control of your abdominal health
The more you understand your body’s inner mechanics, the more you learn how interconnected your organs, muscles, and bones are, the more likely you’ll discover a treatment plan that is right for your body.
To further your knowledge of how the iliopsoas muscle impacts most aspects of your body, check out my book Tight Hip, Twisted Core: The Key to Unresolved Pain.
This book not only contains helpful information on the way your muscles, organs, and bones work together to form a healthy, balanced core, but also targeted stretches and tools to relieve lower back and hip pain.
FAQs on digestive issues
Can tight hip flexors cause digestive problems?
The iliopsoas muscles are in close proximity to the intestines. Tension in the psoas and iliacus muscles can create a general alignment imbalance, affecting the functioning of these organs.
Can tight hip flexors cause constipation?
Muscular tension can compress and restrict organ functioning and bowel movements. Releasing the muscles in this area, especially the psoas and iliacus muscles can provide relief.
Pelvic Pain Causes: from Appendicitis to Muscle Tightness
Pelvic pain can manifest itself in many ways. It comes on very suddenly for some and can cause a range of other symptoms beyond just discomfort.
Pinpointing what causes pelvic pain can be tricky, though, because several medical conditions could be the culprit. What’s more, if your pain is chronic, multiple conditions could be pelvic pain causes.
With so many different systems interacting with the body’s pelvic region, it can be difficult to pinpoint the exact pelvic pain causes right away. This is especially true since when one area of the body begins to malfunction, others tend to follow suit.
Recognizing that you have pelvic pain is usually relatively easy, but figuring out the pelvic pain causes is far more complicated. However, issues related to your pelvic floor and muscle tightness in your iliopsoas often appear together.
While pelvic pain causes can range from digestive issues to the reproductive and urinary systems, the iliopsoas muscles are intimately connected to the other functioning parts of the pelvic floor.
If something is amiss in your pelvic area, the iliopsoas muscles attempt to rebalance and assist the pelvic bone. Unfortunately, this usually causes more harm than good.
What defines pelvic pain?
Pelvic pain is most often defined or described as pain below the belly button (in the anterior lower abdomen). While pelvic pain causes vary, it remains an increasingly common problem among both men and women. However, it tends to be an issue more widespread amongst women.
The origin and intensity of pelvic pain tends to fluctuate from person to person, and no specific disease has been pinpointed to cause it. Depending on the pelvic pain causes, the pain can be categorized as either being acute or chronic.
Acute pelvic pain means that the pain is felt very suddenly and is often very severe or debilitating. Whereas chronic pelvic pain means the pain may come and go, but it could also be constant – lasting for six months or longer.
Common pelvic pain symptoms
The most common symptom of pelvic pain is, of course, pain in your lower abdomen below your belly button. However, how many doctors end up diagnosing pelvic pain causes by looking at other symptoms associated with when the pain began to occur.
When monitoring the severity of your pelvic pain and how long it is present, look for these specific symptoms as well:
- Cramping
- Localized pelvic pain
- Sudden onset of pain
- Pain aggravated by movement
- Pain involving your entire abdomen
- Pain that slowly develops
If you start to develop some of these symptoms, then it is a good idea to start asking, answering, and recording the answers to the following questions. When you visit the doctor for a diagnosis of your pain, you will have a better foundation for them to work from.
- Is the pain dull or sharp?
- How long does the pain last?
- Is anything triggering the pain, or under what circumstances does the pain happen?
- Is the pain occurring during a menstrual cycle, sex, or urination?
- Does the pain begin suddenly or gradually?
- Does the pain come and go?
- How long have you been experiencing any amount of pelvic pain?
When describing your pelvic pain and other symptoms, being as thorough as possible can help your medical provider understand more about your condition and the possible pelvic pain causes.
Pelvic pain causes
As mentioned before, there are two different types of pelvic pain: acute and chronic. Their differences are primarily in how the pain presents – and how long the pain lasts – but the pelvic pain causes can differ.
There can be an overlap between the two types of pain and the underlying causes, so it is essential to weigh all possible options.
Common acute pelvic pain causes
Ovarian cyst
When a fluid-filled sac develops on the ovary, this is called an ovarian cyst. Ovarian cysts are relatively common, and in most cases, will subside without any symptoms. While many go away naturally within a few months without treatment, it can cause pain in the pelvis when the cyst or fluid-filled sac bursts. Pain can also occur in the pelvis if the cyst twists in any way.
Urinary tract infection
A urinary tract infection (UTI) often comes with some form of acute pelvic pain, but it should subside once the infection has gone away. The UTI can present anywhere within the urinary system, including the bladder, urethra, or kidneys.
The severity of the pelvic pain associated with the infection depends on the person and where the infection is located in the urinary tract. However, most pelvic pain will be present when urinating.
Appendicitis
Appendicitis is a painful swelling, usually originating in the middle of your abdomen, that is coming from your appendix. At first, pain may come and go but will increase in intensity as the swelling worsens.
The appendix is connected to the large intestine, and when appendicitis occurs it can put pressure on the pelvis, causing pain. Most pain will present in the lower right-hand portion of the abdomen, and some acute pelvic pain may be present.
Constipation
Constipation, a bowel obstruction, or a bowel spasm can also cause pelvic pain. Common symptoms associated with constipation or bowel obstruction are abdominal pain and abdominal swelling.
Swelling in this lower section of the abdomen puts immense pressure on all surrounding organs and body parts, including the pelvic region. With the increased pressure and abdominal pain, some pelvic pain is possible with severe constipation or an occasional bowel spasm.
Acute pelvic inflammatory disease
Pelvic inflammatory disease can be both acute or chronic. It is usually a bacterial infection of the womb, ovaries, or fallopian tubes when it is acute. In most cases, the infection occurs after an additional infection of chlamydia or gonorrhea, which should be treated with antibiotics. Most localized infections like this cause inflammation, which then causes localized pelvic pain.
Peritonitis
The peritoneum is a thin layer of tissue that lines the abdomen’s interior, liver, kidney, bowel, and other organs in the abdomen. When this tissue becomes inflamed, it is known as peritonitis.
Peritonitis causes sudden and severe abdominal pain that requires immediate medical attention because inflammation of the peritoneum usually means the tissue is infected. Depending on the area, this infection may cause pelvic pain that subsides after the infection has been treated.
Pelvic abscess
An abscess is a collection of pus that can develop anywhere in the body. Abscesses are usually quite painful and are caused by a bacterial infection. A pelvic abscess is the collection of painful pus between the womb and vagina. These abscesses require immediate medical attention.
Pregnancy
Pelvic pain can occur during pregnancy for some women. This type of pelvic pain can be considered acute because it is associated with a temporary condition. However, it does have its own medical term: pregnancy-related pelvic girdle pain (PGP). There can be a more specific diagnosis of symphysis pubis dysfunction (SPD), but that is less common.
PGP is caused by your pelvic joints’ stiffness, or sometimes the joints moving unevenly at the back or front of the pelvis. Both cause pelvic pain.
Common chronic pelvic pain causes
Endometriosis
Endometriosis can also cause acute pelvic pain, but it is far more commonly associated with chronic pelvic pain because it is a long term condition. Endometriosis is a condition that occurs when small parts of the womb lining exist on the outside of the womb. This could be on the ovaries, and when that is the case, it causes extremely painful periods and pelvic pain.
Chronic pelvic inflammatory disease
As mentioned before, pelvic inflammatory disease can be either acute or chronic. The origins of both are the same, and it is a bacterial infection in the womb, ovaries, or fallopian tubes. The main difference is that when you have chronic pelvic inflammatory disease, you will also likely have chronic pelvic pain associated with it.
Irritable bowel syndrome
Irritable Bowel Syndrome (IBS) is a condition that affects the digestive system, causing bloating, cramps, diarrhea, and constipation. Symptoms associated with IBS will come and go with time and vary in severity.
For some people, symptoms could last for weeks or even months at a time. IBS’s exact cause is not yet determined, but for most people, it is a lifelong condition. Due to the intense abdominal pain and associated swelling, chronic pelvic pain is possible, especially during IBS flare-ups.
Inflammatory bowel disease
Similar to IBS, inflammatory bowel disease (IBD) groups two chronic conditions into one umbrella term: ulcerative colitis and Crohn’s disease. Both of these conditions affect the gut in several ways but also can cause inflammation and pelvic pain.
Fibroids
One of the less common chronic pelvic pain causes is developing fibroids or non-cancerous tumors that grow in and around the womb. Most women that have fibroids are unaware entirely, as the fibroids do not cause any symptoms. However, the tumors made up of muscle and fibrous tissue can twist or deteriorate with time. These complications have been known to cause pain, especially pelvic pain.
Trapped or damaged nerves
Many nerves surround the pelvic floor, and if they become trapped or damaged in any way, specific movements or activities can cause pelvic pain. Depending on the type of nerve damage, it could cause a sharp, stabbing, or aching pain that is usually localized to one area of the pelvis. Nerve damages or trappings are also often associated with tight hip flexor muscles due to the additional stress on the pelvis caused by the muscle pull.
Pelvic pain and muscle tightness
Pelvic pain and pelvic pain causes are different for everyone, but when one portion of the pelvic region is unstable, your hip flexor muscles will attempt to correct the issue.
In fact, in some cases, the iliacus muscle could actually be causing the pelvic pain.
Since the iliacus muscles lie on the pelvic bone’s inside surface, they are intimately involved in all pelvic movements and the general well-being of muscles and nerves associated with the pelvic floor.
The primary job of the iliacus muscle is to stabilize the hip and pelvic bones. When pelvic issues arise, the iliacus muscle tightens to protect and stabilize the pelvic area. While the iliacus muscle tightness could simply be a symptom, tight hip flexor muscles can also be one of the pelvic pain causes.
Many medical practitioners that look at the tightness of the iliopsoas in relation to pelvic pain often ask if the muscle tightening is the cause or a side effect of a different condition. In either case, tight iliopsoas muscles could be contributing to your pelvic pain.
Relieve pelvic pain with muscle release
Since muscle tightness seems to be associated with most types of chronic pelvic pain, whether it be a cause or a side effect, finding relief takes a bit of work. You may start to see a physical therapist to understand the root of the pain or find ways to stretch, relax, and release muscle tension.
Although stretching and relaxing your iliopsoas muscles can help, the most effective treatment for tight iliopsoas muscles is to use prolonged pressure to release the tension. To do this, use a targeted tool like the Hip Hook for a few minutes each day.
The Hip Hook is the only tool specially designed to target iliacus muscle tension at the source. Its unique angles design allows the tool to first release the psoas, then pivot to access the iliacus, reaching the inside of the hip bone and allowing the user to relax their body into the Hip Hook while releasing these key muscles.
Depending on the pelvic pain cause you are experiencing, a Hip Hook can be the ideal tool to help get you back on track to recovery quickly. Whatever your pelvic pain causes, releasing tight iliopsoas muscles can help relieve pelvic pain, whether acute to chronic.
FAQs on pelvic pain
Why are my pelvic muscles so tight?
The iliopsoas muscle is involved in everything from sitting to standing, bending to running. They are constantly active. They also tend to tighten to guard other injuries and issues in the pelvic area. Once the iliopsoas muscles accumulate tension, they often don’t release without manual pressure.
How do you release pelvic muscle tension?
Prolonged pressure is the most effective way to release these deeper muscles. It is difficult to access both the psoas and iliacus muscles, because the iliacus is attached to the pelvic bone and it takes a specific angle and depth to reach it. Skilled therapists use their hands to manually release these muscles for their clients, or you can use a tool specific to the job, like the Hip Hook
How do tight hip flexors affect pelvic pain?
The psoas muscle, and more specifically the iliacus muscle, are primary hip stabilizers. When there is dysfunction in the pelvic area, these muscles will tighten to protect the area. When these muscles are holding tension, they bring the entire region out of alignment, creating inefficient movement, twisting, and pain.

Everything You Need to Know About the Sacroiliac Joints and Sacroiliac Joint Pain
The sacroiliac joint (or SI joint) is a very important area of the body (located in the lower back) that is susceptible to pain and injury. It is estimated that up to 25% of cases of lower back pain may be caused from a problematic SI joint.
In this blog, you’ll learn everything you need to know about the sacroiliac joints and SI joint pain (also referred to as SI joint dysfunction), its common symptoms, and what you can start doing today to reduce pain.
- What are the sacroiliac joints? What do they do?
- What are some symptoms of sacroiliac joint pain?
- What are some causes of sacroiliac joint pain?
- Three muscles that affect sacroiliac joint pain
- Three ways to improve your sacroiliac joint pain
What are the sacroiliac joints? What do they do?
If you were to place your hands at the base of your lower back, you’d likely feel two “bumps” on the back side of your pelvis. Sometimes also referred to as “dimples” in your lower back, this is where your sacrum connects to the ilium bones and forms the sacroiliac joints. There are many soft tissues (muscles, ligaments, cartilage) that hold the SI joints in alignment and support the small, yet very important, movement that occurs in this joint with every single step that you take.
The SI joints provide stability in the body, helping to support your body weight and distribute external forces (e.g. lifting, picking up your kids) evenly across the pelvis to reduce pressure placed on the lumbar spine. They also absorb shock and impact (e.g. playing sports, stepping off of the sidewalk, landing each step during a run), helping to efficiently transfer energy between the lower and upper halves of the body.

What are some symptoms of sacroiliac joint pain?
The symptoms of sacroiliac joint pain may vary slightly from person to person.
The pain is often felt in the lower back and upper buttocks region, the immediate area around the SI joint. Some people describe the pain in this location as being dull and achy, while others may experience more of a stabbing, sharp pain in the lower back.
Other symptoms of sacroiliac joint pain include radiating pain down into the hips, groin, and back of the upper thigh. Additional feelings of tightness, stiffness, burning, tingling, numbness, or weakness may be present and describe some of the sensations felt on the painful side.
Certain activities or body movements typically performed on a daily basis may become more challenging and also increase the symptoms. Examples include: twisting or leaning back towards one side; lying down or sleeping on the affected side; going up and down stairs; stepping off of the sidewalk; and sitting, driving, standing, or walking for too long.
What are some causes of sacroiliac joint pain?
Common causes of sacroiliac joint pain include (but are not limited to) misalignment of the pelvis, traumatic events or past injuries, pregnancy, hypermobility, sports, and more. We’ll share our view on each of these potential causes in more detail below.
Misalignment of the pelvis (pelvic torsion and anterior pelvic tilt) can cause SI joint pain
Pelvic torsion is where one side of the pelvis rotates forward into an anterior position relative to the other side, creating a twist in the pelvis. This rotation changes the orientation of the sacrum and ilium bones, affecting the way that they move relative to each other. As these structures begin to rub each other the wrong way, the soft tissues of the SI joint wear away and become irritated over time.

Why is my pelvis twisted?
This misalignment happens as the result of muscle imbalances that develop and hold the pelvis in this off-balanced position, such as a tighter iliopsoas on one side. The iliopsoas is your body’s main hip flexor, consisting of both the psoas muscle and the often overlooked iliacus muscle — which you will learn more about as you keep reading.
A rotated pelvis is also a common contributor to other conditions, such as scoliosis, leg length discrepancy, and many single-sided pains in the body. Don’t blame these other “diagnoses” as the root cause of your sacroiliac joint pain. It all stems from the rotated pelvis caused by muscle imbalances around your hips.
Anterior pelvic tilt is a misalignment of the pelvis where both sides of the pelvis rotate forward into an anterior position, creating an excessive arch in the lower back. Some strain is placed on the SI joints in this position, with a lot more force being placed on the joints of the lumbar spine.
SI joint pain caused by traumatic events or past injuries
Traumatic events, such as a car accident or falling on your tailbone, can force the pelvis out of alignment and cause pain in the SI joints. Similarly, past injuries (or surgeries) to the foot, ankle, knee, or hip can lead to compensations in the way you move your body. Over time, this creates muscle imbalances (which we talked about above) that work their way up towards the pelvis, impacting its alignment and also the way movement occurs in the sacroiliac joints.
SI joint pain after pregnancy
A recent survey of 1,000 women found that a significant majority of them were unaware that sacroiliac joint pain is one of the leading causes of lower back pain in women 35 years and older who have been pregnant in the past.
When a woman is pregnant, a hormone called relaxin is released into the body. As you may have guessed by the name, this hormone helps the muscles and ligaments in the woman’s pelvis to relax. This supports a growing fetus and also allows for more laxity and expansion in the joints of the pelvis for the child to pass through the birth canal during delivery.
As amazing as pregnancy and childbirth can be, these events can later lead to developing sacroiliac joint pain. While the relaxin helps make childbirth possible, it also has the effect of increasing the instability of the woman’s pelvis (which is a naturally stable area of the body). Because relaxation of the pelvic joint ligaments (which include both the SI joints and the pubic symphysis) creates additional stretch and movement, the surrounding muscles and ligaments hold tension in an effort to create stability in those joints to protect the body.
There may even be pre-existing muscle imbalances or asymmetries in sacroiliac joint laxity on either side of the pelvis before the pregnancy, which later contributes to developing pain in the SI joint during and/or after pregnancy as the surrounding muscles and ligaments experience stress and hold tension.
SI joint pain caused by hypermobility
People who are hypermobile, or those who participate in sports and activities such as gymnastics or yoga, tend to have “looser” joints. Think about someone who can perform the splits. While they can move into a larger range of motion than the average person, the joints in their body are typically less stable. To protect the body, the brain sends signals to the surrounding muscles to hold tension to help stabilize the joints in these extended positions. This tension can compress the SI joint and contribute to muscle imbalances where one side of the body has more range of motion than the other.
SI joint pain from golf, baseball, or football
Collision sports (such as football or hockey) and rotational sports (like golf or baseball) can play a role in the development of sacroiliac joint pain in athletes.
Taking a hard hit in football or receiving a hip check in hockey when you are least expecting it can have an impact on the body. A collision such as this can have enough force to knock the structures of the pelvis and the body out of alignment, leading to the athlete experiencing pain in the SI joints.
The demands placed on the body during that of a golf swing or a baseball swing can be significant. There is a certain amount of rotation required to be coming from the hip joints and the thoracic spine during a “perfect” swing in order to protect the joints in the lower back and pelvis. When range of motion in these areas is lacking, movement must be created elsewhere (like in the lumbar spine and SI joints). These areas are meant to be stable, and this increased movement can place a constant shearing force on these joints, leading to pain developing over time after hundreds and thousands of swings irritating those areas.
These are just a few examples; other sports and activities can certainly contribute to developing pain in the sacroiliac joints. Think about what we’ve already talked about above and consider how it applies to the things you do in your life.
Three muscles that affect sacroiliac joint pain
While there are over 40 different muscles in the lower back, hips, and glutes that surround the sacroiliac joints in your body, we believe that the iliacus, piriformis, and quadratus lumborum muscles are among the most important ones for you to focus on first to improve your pain.
How does the iliacus cause SI joint pain?
The iliacus muscle lines the inside surface of the pelvic bone (or ilium) and connects to the iliac crest and iliac fossa on the ilium, the top edge of the tailbone (the ala of the sacrum), and the lesser trochanter (the inside of the femur near the groin).

The primary function of the iliacus is to stabilize the hip joint and the sacroiliac joint (or SI joint), keeping those two joints aligned and strong regardless if the body is stationary (such as when sitting or standing) or if the body is moving (such as when walking or running). Other secondary functions of the iliacus include assisting in hip flexion and hip external rotation.
Since the iliacus is active when sitting, standing, walking and running, it is being used constantly throughout the day, increasing the likelihood of this muscle becoming chronically tight. Tightness in the iliacus muscle pulls the pelvic bone forward into an anterior rotation, where the lower back is chronically arched.
This creates strain where the sacrum and ilium meet – the SI joint! The longer these structures are misaligned, the more unhappy they become, and the more likely you’ll develop pain or discomfort in this area.
How does the piriformis cause SI joint pain?
The piriformis muscle connects to the sacrum, the ilium, and the greater trochanter on the femur. Its primary functions include assisting with external rotation and abduction of the hip, as well as stabilizing the hip inside of the hip socket.
When the piriformis becomes tight, it pulls on the sacrum and ilium and can lead to compression or misalignment about the SI joint. As you continue to move your body with these supporting muscles not functioning optimally, the sacrum and ilium rub each other the wrong way and cause the soft tissues inside the joint to become irritated.
A tight piriformis muscle often goes hand-in-hand with tight hip flexors, like your iliacus and psoas muscles. This is because your body is searching for balance on each side of the hip. If the hip flexors on the front of the hip are tight and pulling the pelvis into an anterior position, the muscles on the back side of the hip (like the piriformis) will tighten up and play a game of tug-of-war. This combination of a tight iliacus and tight piriformis is very common among people who are experiencing SI joint pain.
How does the quadratus lumborum cause SI joint pain?
The quadratus lumborum muscle (or the QL muscle for short) attaches to the bottom of the 12th rib and the transverse processes of the L1-L4 vertebrae and connects to the iliac crest (of the ilium) and also the iliolumbar ligament, which helps to stabilize the sacrum and the sacroiliac joints.
The quadratus lumborum muscles function together to help extend the lumbar spine, and they can also function unilaterally to side bend the spine. With its connection to the bottom rib, the QL also functions to stabilize the diaphragm when you inhale with each breath.
A tight quadratus lumborum muscle pulls on the ilium and iliolumbar ligament that it attaches to. This may result in a rotation of the pelvis or a hip hike on one side of the pelvis, changing the alignment between the ilium and sacrum. As we’ve discussed with the other muscles, this ultimately affects the movement of the SI joints and can lead to pain.
Three ways to improve your sacroiliac joint pain
The key takeaway here as it relates to keeping your SI joints happy and healthy revolves around good alignment. Throughout the course of our lives, there are so many things that contribute to the development of muscle imbalances that pull us out of alignment and cause pain.
You absolutely must take care of the muscles that support the movement of the pelvis so that the ilium, sacrum, and other structures can move efficiently and work together as they were designed to do. The pelvis is part of the “core” of your body, and when it is well-supported and in good alignment, the rest of the body works better.
Do these 3 things to improve SI joint pain
1) Release the tight muscles surrounding your pelvis.
We already talked about 3 muscles that may be tight and contributing to your sacroiliac joint pain. Explore each of those muscles with muscle release techniques and stretches to reduce tension and tightness that has built up in them, likely over YEARS.
The piriformis and quadratus lumborum muscles can each be easily accessed by a massage therapy ball or lacrosse ball (or similar), as these muscles are more superficial. However, the iliacus muscle, one of your body’s main hip flexors (along with the psoas muscle), is a little bit different and is not easily accessed by a ball to truly get the right amount of pressure and precision needed for an effective release. For this, you need to see a manual practitioner or have a special tool that can do the job.
My favorite muscle release tool for the iliacus muscle is the Hip Hook. The Hip Hook was invented by Christine Koth, MPT, who was a physical therapist for 20+ years and noticed a common theme among the patients she worked with – tight hip flexors! When the hip flexors get tight, they can cause pelvis alignment issues and create tons of problems throughout the body.
The Hip Hook is designed to get into the hard-to-reach psoas and iliacus muscles (your body’s main hip flexors) to relieve tension, increase range of motion, and decrease pain. Other tools and therapy balls simply don’t address BOTH of these muscles, which may be key to long-term pain relief and improvement.

2) Strengthen the muscles surrounding your pelvis to improve muscle imbalances.
Reducing tension and tightness with muscle release work and stretching alone may not fully address the “root cause” of your sacroiliac joint pain. It is likely that these muscles are compensating and trying to perform the work done by other, larger muscles that have weakened (perhaps from too much sitting, inactivity, past injuries, etc.).
Some of these areas that often become weak on people (and maybe on you too) include the glutes, hamstrings, core, and smaller hip stabilizers around the pelvis. Try waking them up with some of these hip strengthening exercises and see how your body feels.

3) Work on exercises specific to improving your hip mobility.
Adding direct hip mobility exercises into your routine is another way that you can strengthen the muscles that support the movement of your hips and improve the active range of motion through which you can control your hip joints. This is not to be confused with stretching, which simply takes the hip through its passive range of motion.
These can be some really amazing hip mobility exercises that you can try to start improving how well your hips move, helping to keep your pelvis aligned in better position, and reducing the pain that your SI joints may feel.
Looking to learn more about your body?
You’ll get answers to your questions about tight hip flexors and learn how they can affect the functioning of your entire body. Discover the “3 Simple Steps” to realigning your pelvis and improving the way your body feels in the book “Tight Hip, Twisted Core – The Key To Unresolved Pain” by Christine Koth, MPT.
Frequently asked questions about sacroiliac joint pain
What do the sacroiliac joints do?
The SI joints provide stability in the body, helping to support your bodyweight and distribute external forces evenly across the pelvis to reduce pressure placed on the lumbar spine. They also absorb shock and impact, helping to efficiently transfer energy between the lower and upper halves of the body.
What causes sacroiliac joint pain?
Sacroiliac joint pain can be caused by several different factors, including (but not limited to) misalignment of the pelvis, traumatic events or past injuries that resulted in compensations, pregnancy, hypermobility, and sports.
How do I relieve sacroiliac joint pain?
Relieving sacroiliac joint pain centers around being able to improve the way the pelvis is aligned, which in turn helps the sacrum and ilium move better together and reduce pain. This can be achieved through a combination of muscle release and strengthening, stretching, and mobility exercises that address currently existing muscle imbalances around the hips and pelvis.
Three Steps to Reduce Lower Back Pain During Pregnancy
There is no dancing around the fact that motherhood can be painful. It is a beautiful and rewarding journey, but a woman’s body goes through some significant changes and traumas during the pregnancy and birthing process.
Having back pain during pregnancy is almost an expectation for most women. The thing is, that lower back pain from pregnancy often sticks around for months, and sometimes years, after your baby is born.
But it doesn’t have to.
The hip flexor muscles are major players in the anatomical changes a woman’s body goes through during and after pregnancy. Because of their deep connection to the hip and pelvis, it is not uncommon for tight muscles to become even tighter with the strain of carrying a baby.
The best way to avoid lower back or sacroiliac joint pain during pregnancy is to get ahead of it, especially since it is widely known as an issue for pregnant women.
Understanding how your body changes as your baby grows, during birth, and beyond will set the stage for three ways you can prevent or manage lower back pain from pregnancy.
Tailbone and lower back pain during pregnancy and beyond
The lower back pain that you experience during pregnancy can start before you even are pregnant, and can continue long after you’ve given birth.
Before pregnancy
The way your hips are aligned before you even get pregnant will influence if you have lower back pain during pregnancy – and how severe it is if you do.
The hip flexor muscles, or iliopsoas, take on the brunt of supporting the pelvis as it changes during pregnancy. So whether you have flexible hip flexors or tight hip flexors, even before you get pregnant, will impact how your body adapts and reacts during pregnancy.
Having relaxed hip flexors before pregnancy often means that your pelvis and hips are properly aligned, and will be fully prepared to handle the variety of physical changes that occur during pregnancy and birth.
Hypermobility also impacts many women and can mean your hip flexors are too relaxed to fully stabilize and support hip movement. A balance of strength and flexibility is necessary to prevent lower back pain in pregnancy.
During pregnancy
If there are underlying issues with your hip flexors before you get pregnant, that’s when you run into issues with sacroiliac and lower back pain during pregnancy. This is not just because your hip flexors were too tight to begin with; it’s also because your body is changing to prepare for giving birth.
One of the most prevalent changes that occurs during pregnancy is that your body releases a chemical hormone called relaxin. This hormone relaxes (hence the name) the ligaments in the pelvis and softens connective tissues surrounding the cervix.
The reason the body does this is to ensure your baby can easily leave the birth canal. Essentially, relaxin is your body’s natural way of creating elasticity and space for the baby during childbirth.
Obviously, loosening everything up for childbirth is extremely important, and you want that to happen. But ligaments are the fibrous tissue that connects bone to bone and stabilizes, in this case, the pelvis. The loosening of these ligaments that hold the hip and pelvis together is part of the reason why so many women experience back, tailbone, or hip pain during and after pregnancy.
The instability of the iliopsoas muscles and the continued release of relaxin hormones contributes to muscle tightness. It seems counterintuitive for your body to tighten muscles when relaxin is being released. But as the ligaments and other tissues loosen, your iliopsoas tightens to try to stabilize the pelvic region.
Women that have a genetic predisposition to extra elastin, or are naturally hypermobile, will experience even looser joints during pregnancy and, in turn, even tighter hip flexor muscles. This can lead to lower back pain in pregnancy.
Post pregnancy
As natural a giving birth may be, your body still experiences it as trauma. Your baby’s position, and the birthing position itself, puts your iliopsoas muscles into an extremely strained position.
During childbirth, the body will be hypermobile in the pelvic region regardless of your pre-pregnancy hip flexors. So for any woman, the iliopsoas is working hard to keep the pelvis stable during the birthing process.
Since the iliopsoas is strained and shortening during birth, it is normal for women to have hip and lower back pain post-pregnancy. Many women expect this pain to subside as their pelvis heals and returns to normal, but the issue is that once the iliopsoas has tightened, it doesn’t easily relax again on its own.
This continued muscle tightness is why many moms, even years after giving birth, continue to have the same sacroiliac and lower back pain after pregnancy as they did during it.
How your muscles can cause back pain
It can be hard to imagine that muscle tightness causes your sacroiliac pain or lower back pain during pregnancy. The fact is: From walking to sitting to running, the iliopsoas muscles (the primary hip flexors) are involved. They are engaged during almost every bodily movement that you make.
When the iliopsoas muscles are too tight, your joints and bones are pulled out of alignment. This in turn leads to more issues and pain over time.
The iliopsoas muscle is made up of two muscles: the psoas and the iliacus. The psoas originates at the vertebrae of your lower spine, and the iliacus originates on the inside of your pelvic bowl. The muscles both cross the hip joint and attach to the top of your femur (the thigh bone). Both the spine and the pelvis are responsible for lower back and sacroiliac joint alignment.
This relationship of the iliopsoas to these integral bone structures and joints means that when there is trauma or stress around the pelvis, the iliopsoas muscles step in to protect it. Their primary job is to stabilize, so if there is an irritant threatening to cause your hip region instability, they tighten to reinforce balance.
However, this also happens in reverse. When your hip flexor muscles start too tight, they can cause trauma or stress in that area. It is a domino effect: If one aspect is out of whack, it creates issues elsewhere. That’s why you experience lower back pain during pregnancy in addition to other bodily traumas.
So what can you do about your lower back pain during pregnancy? There are three helpful steps to releasing your tight hip flexor muscles, but you must be proactive if you want to enjoy the benefits of all three of them.
Three steps to healthy hip flexors
Working through all three steps to release your hip flexor muscle tightness and relieve back pain will only be possible before or after pregnancy. There are some ways to release the front of the hip during pregnancy, but they will not be as consistent or easily accessible.
1. Releasing the front of the hip
Releasing the front of the hip is by far the most difficult – and one of the most vital – aspects of improving your iliopsoas muscle health.
To do this, you need to reach the iliacus and the psoas muscles, which is tricky because the best release point is tucked slightly behind the hip bone. To reach this area, you need a physical therapist to help you or a tool like the Hip Hook.
Unlike other massage tools, the Hip Hook is specifically designed to access both the psoas and the iliacus muscle. The unique shape allows it to reach around the hip bone and press directly onto the iliacus muscle, providing a much-needed release.
Releasing both the psoas and iliacus are essential to healthy hip flexors. If you have really tight hip flexors, you can also use a tool like the Hip Release Ball. The size, shape, and density of the ball are perfect for releasing the front psoas muscle.
These tools cannot be used during pregnancy. Getting this muscle released isn’t impossible though. You may be able to work directly with a physical therapist to relieve your lower back pain during pregnancy, as they will know how to release the muscles in a way that will not be harmful.
If you are trying to get pregnant, it can help to start this three-step process before conception. This will prepare your body for all of the hormonal changes that influence lower back pain during pregnancy.
Once you’ve given birth and have had ample time to heal, you should begin with this front hip release once again.
As mentioned before, after the trauma of giving birth, your hip flexor muscles will have tightened even more. So, your lower back pain after pregnancy may be even worse than during pregnancy. Regular hip flexor release will help establish alignment and relax the muscles.
2. Releasing the back of the hip
Since the muscles in our bodies work in tandem, you need to balance things out and release the back of your hip as well. The Hip Release Ball mentioned in the last section is the perfect tool to do this.
Although you will not be releasing your iliopsoas muscle when lying on your back, you will want to release your piriformis muscle. This muscle is often related to sacroiliac joint pain and sciatica; learning to access and release this muscle during pregnancy can be a complete game-changer during pregnancy.
When your iliopsoas muscle is tight, it will pull on various parts of your body, including the piriformis muscle. If the piriformis muscle is tight, it will pull on the iliopsoas muscle. This tug of war will continue unless they are both released.
To do this, lay on your back and place the Hip Flexor Release Ball under your glute, near the center of one buttcheek. When you find a tight spot, relax into that; you want to put prolonged pressure on these spots for 30-90 seconds to help them release. Do this on both sides of your hip.
During most of your pregnancy, you should be able to release the back of the hip, which will relieve some of your lower back pain during pregnancy.
3. Realignment exercises
The last step in this process is to perform realignment exercises. These exercises can be done (and are effective) before, during, and after pregnancy. Once your hip flexor muscles are being released with the tools described above, begin integrating realignment exercise into the routine.
When your iliopsoas muscles are tight, they often will pull the hips, back, and tailbone out of alignment. So, helping your body realign during this three-step process will only have benefits for your body.
To enable you to do this even during pregnancy, you can do the exercise either on your back, standing, or seated.
Before you start, note that this exercise is only meant to be performed on one hip, unlike the muscle releases. So, you will need to decide which side of your body has the tightest iliacus muscle. The reason behind this is because the tightest side of your body is going to be pulling your hip forward slightly, causing misalignment.
You can watch this hip realignment exercise, but to give you an idea of what to expect, I will explain how the realignment exercise works when lying on your back:
- Lie down on your back
- Bring both knees up towards your chest so your feet are off of the ground
- Place a hand behind the knee on the designated side of your that is tighter and being pulled forward
- Squeeze your hand behind the calf by bending your knee
- Simultaneously push against your hand without moving, as if you are trying to push your foot towards the ground
- Naturally, your hand will resist this pressure. You don’t need to press too hard, so only apply a mild/moderate amount of force.
- The opposing leg will simply stay up off the ground during this time so it doesn’t accidentally push into the ground.
- You will hold this pushing motion with your hand for two seconds, or one deep breath
- Then, relax for a few moments
- Repeat 10 times
If you’d like to learn more about how to realign your hips properly and complete the three-step process, my book Tight Hip, Twisted Core breaks it down in detail, along with providing other necessary information about how tight iliopsoas muscles can impact your life – and how releasing them can free you from your lower back pain during pregnancy.
FAQs on lower back pain during pregnancy
Why does lower pain back occur during pregnancy?
Part of the problem includes tension in the hip flexors, which tighten to provide stability in the pelvis.
Is it normal to have lower back pain in pregnancy?
A pregnant body is changing daily, and the muscles and ligaments of the body are constantly compensating for the needs of the growing baby as well as preparing the body for childbirth. This creates stress and tension in different parts of the pelvis, and can often be relieved by releasing the tight muscles.
How can I relieve lower back pain in pregnancy?
Follow a three-step system: release the front of the hip, release the back of the hip, and realign the pelvis to release muscle tension. Releasing the front of the hip will require the help of a skilled practitioner if you’re pregnant, but you can still get relief by following the last two steps.
Torn Hip Labrum Symptoms: Finding the Cause of your Hip Pain
Hip pain and hip injuries can manifest in many ways. If you’re experiencing pain in your hips, it can often be difficult to know the root cause.
One of these causes may be a hip labrum tear.
A hip labrum tear might not always hurt at first, but over time you may start to notice a few differences in your hip mobility and ability to perform specific movements.
When you’re experiencing hip pain, you may be looking to find the one culprit – the too-soft mattress, the heavy grocery bags, the extra 50-miles on your bike. It’s important to remember that your hip structure is complex and has many moving parts that work together to create smooth, pain-free movement.
Understanding what your hip labrum is, where it is located, and what causes the labrum to become damaged over time is just as important as knowing how to treat it. You can then use this information to incorporate preventative care could help you avoid a hip labrum tear altogether. Or to help you spot potential hip labrum tear symptoms early on.
What and where is the labrum of the hip?
The hip labrum is a disc of cartilage that is strong and flexible enough to allow for the fluid movement of your hip joint. This durable cartilage rims the outer socket of your hip joint, deepening the joint surface and allowing for a wider range of motion. It also keeps the joint fluid in place. When the joint fluid is in the joint capsule, it reduces friction.
The hip labrum is located between the socket and the ball of your hip joint. It should cover the entirety of the ball and socket connection points on both hips, though everyone’s body is a little different. It then sits between these two bones to avoid direct contact with each other and protect them from friction when you are moving.
Beyond protecting the hip joint itself, the labrum helps to keep the ball and socket in correct alignment. You can think of your hip labrum cartilage as being like a rubber gasket. It keeps the joint’s ball and socket in place, and prevents damage during all of your movements.
What are torn hip labrum symptoms?
Recognizing that you have a torn labrum can be difficult because hip labrum tear symptoms can present similarly to hip arthritis pain symptoms.
If you suspect you have a torn labrum, or even if you’ve just strained it, your iliacus muscle will likely be tight. And it’s the pain from this muscle – or the sensation of tight hips – that might be your first indication of a bigger problem in your hip joint.
Your iliacus muscle is one of the two muscles that make up your hip flexors. Paired with the psoas, the muscles are known as the iliopsoas. Together, the iliopsoas muscles are what bring movement and stability to your hips, thigh bones, and pelvic bone. They allow you to make everyday movements like going from standing to sitting position, or lifting your knee up to your chest.
Another job of the iliopsoas muscles is to stabilize your core and protect the ligaments and bones in your hip joints. Therefore, the muscles may contract or overcompensate when there is a problem, such as increased friction, misalignment, or a labral tear, causing increased tightness and pain in your hip flexors.
Still, in many instances, those that have experienced such a tear may not actually experience torn hip labrum symptoms or pain. It may take time for the pain to manifest in the hip, as the iliopsoas muscles attempt to correct the injury on their own.
Although you might not have all (or any) of the most common symptoms of a labral tear, they could present as one or more of the following:
- Limited hip mobility and range of motion
- Pain in the hip (usually the groin area) that worsens with extended periods of staying in the same position
- Sensations like clicking, locking, or a feeling of catching when moving the hip joint
The way hip labrum tear symptoms present can also depend on the type of labral tear it is: anterior or posterior.
Anterior labral tears are by far the most common type of labrum tear. Located in the front of the hip, this part of the labrum is thought to be easier to injure because of the lack of blood vessels in that area.
Posterior labral tears are less common than anterior tears partially because they are located on the back of the hip. While this joint area still moves frequently, there isn’t as much motion creating contact on the labrum cartilage in the back as there is in the front.
If a posterior labral tear occurs, it is because more stress is occurring in the back portion of the hip joint. This could be from frequently performing a repetitive motion like frequently squatting with weights or partaking in other squatting and lunging sports.
If you begin to experience these symptoms during activities that normally don’t cause pain or discomfort, it is time to seek the help of a professional.
Diagnosing a hip labrum tear
As we mentioned, you may not always know you have a torn hip labrum. Symptoms are not always identifiable. But getting a proper diagnosis of any hip injury is important to ensure that you get the appropriate treatment.
In most cases, a physical diagnosis will include a variety of orthopedic tests, communication about your medical history, a rundown of your current fitness routine, a history of your past injuries (if any), and a general physical assessment.
It’s important to share all this because labrum tears are common with serious athletes that use their hip joints repetitively and aggressively. Participating in sports like dance, gymnastics, hockey, or soccer requires very specific hip movements and rotations. This can put extra stress and pressure on the hip joint itself, as well as extra strain on your iliopsoas muscles.
These labral tears can also be caused by hip joint abnormalities, such as hip dysplasia. The way your ball and socket fit together could result in added friction or pressure in specific areas, leading to damage and tears later in life.
Doctors and physical therapists alike will test for a labral tear in much the same way. During a physical examination, they will measure joint strength, flexibility, and range of motion. They’ll be checking to see if there is any obvious swelling and listen to your feedback about which movements are causing pain in your hip flexors, legs, lower back, and pelvic region.
If there is obvious pain for the patient when testing for these things, it can be a strong indication that the ball and socket of the joint are not adequately protected.
A standard test that doctors use to determine whether a labrum tear has occurred or not is called the FABER test. FABER stands for flexion, abduction, and external rotation. This specific test puts the hip joint into a position to expose anterior labral tears.
The FABER test works by having you lay on your back with straight legs. Then, you put one leg in a figure-4 position.
Your physical therapist or doctor will gently apply pressure to the knee of the bent leg. If there is groin pain on the side of the bent leg, it could be a hip labrum tear symptom. It is an indicator that there is a problem in your hip muscles, such as your iliopsoas muscles, or that there could be a joint injury.
Hip labrum physical therapy and other treatment options
Once you have identified torn hip labrum symptoms – and determined that your hip pain is indeed being caused by a torn hip labrum – now is the time to address it.
Repairing cartilage is a difficult task for the body, but it is not impossible.
The most common treatments for hip labrum tears include injections, anti-inflammatories, rest, and physical therapy. I always recommend that you begin with the least invasive treatment, opting for natural solutions such as rest and physical therapy that focuses on releasing and stabilizing your iliopsoas muscles. Only if those are unsuccessful should you move on to more aggressive treatments.
Anesthetic fluid injections
Depending on the severity of your pain and the other torn hip labrum symptoms you’re experiencing, a doctor may recommend an anesthetic fluid injection for pain management.
By mitigating some pain, you can integrate other movements and physical therapy.
However, this type of intra-articular injection is most often recommended if the pain and other hip labrum tear symptoms cannot be alleviated by a different treatment measure.
Non-steroidal anti-inflammatory drugs
Another common treatment is the use of anti-inflammatory medication, generally non-steroidal, to help control your hip labrum tear symptoms. Like the injection, this is meant to mitigate pain to allow for continued treatment of other kinds as opposed to being a complete solution in itself.
These non-steroidal anti-inflammatory drugs should also bring down the swelling caused by the friction and irritation of the damaged hip joint.
Rest and recovery
One of the best treatments for doing away with hip labrum tear symptoms is simply to rest for a while. This can be hard to do if you are an athlete, but giving your body time to heal is essential.
In most cases, though, this doesn’t mean all activities have to halt.
Many patients who experience hip labrum tear symptoms are only recommended to stay away from painful activities. So, if running is causing you pain, but walking isn’t, a doctor may recommend that you stop running for a short period of time to let the labrum rest and avoid pain.
You should also be incorporating very light stretches or movements designed specifically to release your hip muscles, which may reduce or eliminate hip flexor pain and restore natural alignment in your hips and pelvis.
Hip labrum exercises and physical therapy
Working closely with a physical therapist is a great treatment option for almost any type of hip pain, especially a labrum tear. A physical therapist can come up with individualized treatment plans that will help you to improve strength and stability in your hip joints.
Many physical therapists focus strictly on labrum hip tear exercises that help you build up the muscles surrounding your hips like the iliopsoas muscles, glutes, abdominals, and back muscles. Improving muscle strength in these areas is a proven way to help stabilize the hip joint and protect it from future damage.
The hip flexor and hip labrum injury
When a part of the hip structure is damaged, especially a part so integral to movement like the labrum, your muscles tend to try and pick up the slack and support the hip more intensely. With hip labrum tears, we often see this happening with the iliopsoas or hip flexor muscles.
Since the hip flexors engage with nearly every hip movement, it makes sense that a tight hip flexor often correlates with a labrum tear. Keep in mind that this can be both a torn hip labrum symptom, and a cause of a labrum tear.
A tight iliacus muscle can begin to pull your hip out of alignment, which directly opposes what the labrum does. One of the labrum’s jobs is to keep your hip joint aligned and in place.
So, with the extra pull of each movement, your labrum will be experiencing far more pressure than usual. Over time, this can lead to the cartilage wearing down and eventually tearing.
On the other hand, if you’ve experienced a trauma of some kind that tore your labrum, you may not notice any hip labrum tear symptoms until the iliopsoas muscle tightens more. This occurs because the iliopsoas is compensating for an imbalance of some kind in the joint structure.
Whatever the cause of the muscle tightness, one thing is for sure, if you have a hip labrum tear, more often than not, your hip flexors will be tight too.
And, to find long-lasting pain relief, you need to make sure to release your hip flexors.
Hip labrum pain relief by releasing the iliopsoas
Knowing your hip anatomy and how your body is meant to work together in unison makes it easier to understand where your hip pain is coming from. Living with and treating a hip labrum tear comes with many symptoms that often disguise themselves as arthritis or other issues.
Once you’ve been diagnosed, and treatment begins, it can be helpful to start looking at other contributing factors, such as your tight iliopsoas muscles.
Treating the iliopsoas muscles is two-part. There is the psoas, which can be massaged along the connecting point of your inner thigh and pelvis. But the iliacus muscles can be relatively difficult to release. It connects to the internal side of your hip bone and requires a precise angle and amount of applied pressure. Therefore, it is nearly impossible to reach with an average massage ball, foam roller, or your own fingers.
A skilled physical therapist is trained on iliacus muscle release, but you can’t do this effectively alone between sessions or as a preventative measure.
There is one self-massage option, though. The Hip Hook by Aletha is the only tool designed to reach the precise point where your iliacus connects to your pelvic bone, using body weight to apply the right amount of pressure.
It’s safe to use as a part of your daily routine. And, as your iliopsoas loosens, you’ll likely experience less pain, less tightness in your hip flexors, and less stress will be put on the cartilage of your hip joints.
Once you have rebalanced your hip joints, strengthened them through physical therapy, and given your hips the rest they need, any hip labrum tear symptoms you have been experiencing should decrease and may even disappear. And if you feel that familiar hip flexor tightness or hip pain start to flare up, you can easily use your Hip Hook at home.
If you’d like more information on targeted hip stretches and exercises, or would simply like a deeper understanding of your hip labrum, iliopsoas muscles, and the many other components of your hip joints, check out my book: Tight Hip, Twisted Core.
Armed with all your new knowledge, you’ll surely be able to kick your hip labrum tear symptoms to the curb.
Frequently asked questions about a torn hip labrum
What are common symptoms of a torn hip labrum?
Common symptoms of a torn hip labrum include: limited mobility and pain-free range of motion in the hip joint; pain in the hip or groin area that typically worsens with extended periods of inactivity; and sensations like clicking, locking, or a feeling of catching when moving the hip joint through certain ranges of motion.

Ultimate Guide to the Iliopsoas: What it does, why it hurts, and what to do about it
Your iliopsoas muscles are part of your hip flexors: when they are tight, you might experience lower back, hip, knee, or even foot pain. Learn how to lengthen and strengthen your psoas and ilThe iliopsoas is composed of two muscles that together connect your upper half to your lower half, provide stability for your entire lower body, and are chronically underappreciated.
You may not have spent much time thinking about your deeper core muscles – you can’t see or easily touch them, so they stay out of sight and out of mind.
We take a different angle: we know, from decades of experience, that tension in these deeper muscles is the root cause for many unresolved pains in the hip, back, knee, and even feet.
If these deeper muscles of your body are tight or imbalanced, it affects your entire body. Just because you can’t see them in the mirror doesn’t mean they aren’t playing a major role in your mobility, your strength, and your aches and pains.
Anatomy of the Iliopsoas
Let’s start by looking at all the parts, like an IKEA furniture diagram.

The bones and joints around the iliopsoas muscles
- Hip Joint: The hip joint is a ball and socket joint, formed between the pelvis and the head of the femur.
- Femur: The femur is the thigh bone, also the longest and strongest bone in the body.
- SI Joints: The SI joints are located between the iliac bones and the sacrum, connecting the spine to the hips.
- Lumbar Vertebrae: The lumbar vertebrae are the bones that make up the spine below the cervical and thoracic vertebrae, but above the sacrum/pelvis.
- Ilium: Ilium is made up of two large bones forming each half of the pelvis, after you take out the sacrum.
There are 2 main iliopsoas muscles
You have two iliopsoas muscles that originate on either side of your pelvis and low back. And each of the iliopsoas muscles are actually made up of two muscles: the psoas and the iliacus. They have different starting places, but both end at the top of the thigh bone (femur), like the letter “Y”.
One part of this muscle – the psoas– travels from your lower back, across the front of your pelvis, and attaches to the femur (thigh bone). Too often, we think of ourselves like paper dolls with a front side and a back side. But you’re 3-dimensional! This muscle crosses diagonally through your body in a direction we rarely think about.
The other part of this muscle (the iliacus) travels from the Iliac fossa (the pelvic bone) and crosses over the hip joint (directly affecting the SI joint) to attach to the femur. Take a Deep Dive into the Anatomy of the Hip Flexors here.
What does the iliopsoas do?
Short Answer: Stability and hip flexion.
Both muscles are responsible for general stability and for hip flexion (lifting the knee, as in marching or going up stairs). Due to its insertion to the spine (low back), the psoas is also responsible for arching your lower back. Picture the inside prong of the ‘Y’ as the psoas, and the outer prong the iliacus. Because of these insertion points, they pull on the thigh bone differently. A tight psoas will pull your low back towards your knee. A tight iliacus will externally rotate your thigh bone, resulting in your foot turning outward.
The psoas and the iliacus both contribute to hip flexion motion, but their primary job is to hold together the hip, pelvis, and lower back area.
What does the iliacus do?
Short answer: it’s the glue that holds your hip joint, SI joint, and femur together.
Primarily, the iliacus stabilizes the hip joint and the SI (sacroiliac) joint. Because it is relatively short and strong and crosses the two joints of the hip as well as the sacroiliac joint, it acts as more of a stabilizer. The iliacus keeps those two joints aligned and strong regardless of whether the body is stationary or moving. Long muscles have good lever arms for moving bones well. A good example of a long muscle is the quadricep, it goes from the hip to below the knee. Short muscles are built to hold parts in place. The iliacus, being more of a short muscle, was born to stabilize the hip and SI joint. Any situation that challenges these two joints will lead to a challenge to the iliacus muscle and possibly the development of chronic tightness.

Ever have a loose thread? What happens when you give it a tug? Usually, everything that attaches to that thread starts to get pulled along with it. You can think of the iliacus this way: if it’s tight, it’s going to pull the body into misalignment.

What does the psoas do?
Short answer: it connects the upper body to the lower body.
The psoas stabilizes the hip and SI joints just like the iliacus, but it is also responsible for the stability of the lumbar spine and flexion of the hip joint.
Similar to the iliacus, the psoas stabilizes the hip and SI joint, due to its connection to the lumbar spine. In addition, its close connection to the lumbar vertebrae and its attachment to the front and back of each vertebrae allow it to hold the lumbar spine in place. When there is any issue in the low back, the psoas grabs on for dear life to hold it all together, easily developing into chronic tightness. Its complex attachments at the lumbar spine also contribute to motion of the spine such as rotation, side bending, flexion and extension, but primarily its job at the lumbar spine is to stabilize.
Why do I have tight hip flexors? Why do my hip flexors hurt?
Happy muscles don’t hurt and short and knotted muscles are not happy.
The cause of tight hip flexors may vary: Perhaps you sit a lot, or you habitually cross the same leg over the other. Maybe you have to drive often and hover your foot over the pedal more than most. Maybe you played rotary sports like baseball, golf, or hockey that have you twisting primarily in one direction. Maybe your work from home (or work-from-couch) set-up is less than ideal, or your body is protecting past injuries. Any one of these can cause a contracted iliopsoas muscle. Most of us have more than one of these causes, making a perfect storm.
What can I do about my tight hip flexors?
Stopping the muscle contraction is the first step.
When we say contraction, we mean shortening (and not the buttery kind). Muscles can contract as a whole or only part of the muscle can contract creating what we refer to as a muscle knot. Bring your palm to your forehead; you just shortened your bicep. Now hold that position for at least 8 hours, 7-days a week, and you will have recreated the problem with the iliopsoas. When you sit for eight hours a day, you are contracting (shortening) the iliopsoas. Do this long enough, and the muscle gets stuck trying to hold this position, so that when you stand up or lay down, this muscle is trying to yank you back into that seated position. It’s not worth getting frustrated with the iliopsoas; it’s just trying to help you, and it needs some TLC and attention to relax.
The first steps to relaxing your hip flexors
Relax, then lengthen.
If you notice, we keep saying contracted and using (shortened) in parentheses. This is deliberate. Most practitioners (physios, chiropractors, personal trainers) will tell you to stretch a tight muscle. Which would make sense if it was short, but stretching isn’t enough if it’s short AND stuck in a contracted state.
You’ll need to stop the contraction before you can lengthen the muscle
When any part of your iliopsoas is contracted, stretching it is like walking up to a terrified person in the fetal position and trying to pry them out of it. A better tactic is to calm them down, rub their shoulders, and remind them to take deep breaths. That’s exactly the first step in releasing the iliopsoas.
How to release the iliopsoas
The best way to release the iliopsoas is by prolonged pressure: muscles relax first through pressure, then stretching.
Muscle tissue is smart, and the fascia – the connective tissue that surrounds and holds every organ, blood vessel, bone, nerve fiber and muscle in place – is even smarter. Muscles and fascia both have sensors called mechanoreceptors which means our tissue can sense even the slightest change in temperature, pressure, vibration, even noise. Think of these sensors as two fire alarms: the stretch and pressure alarms. If two alarms are going off and you only silence one, are you going to be able to relax? Probably not.
Why is pressure on the iliopsoas important?
Pressure helps to relax the muscle and surrounding connective tissue, and provide immediate relief, calming the area down. The tissue’s mechanoreceptors will send signals to the brain that it can relax and stop holding tension in the area. Only then can you begin to correct the issue with stretching and realignment exercises. If you jump right into stretching, you trigger only one of the receptors; by tomorrow you may be back where you started. This is why so many people are stuck on the stretching hamster wheel: the tightness builds back up, so they have to go stretch it out again. The missing ingredient for most tight psoas and tight iliacus muscles is prolonged pressure, best delivered through a massage or using a massage tool.
How to apply pressure to the iliopsoas
You can’t just dig into this area all willy-nilly. Not to mention how uncomfortable that would be, this area is crowded with organs, arteries, and nerves. This is a case of “location, location, location”. If you spend the time finding the tight spots in your psoas and iliacus, you will know how to release your own iliopsoas. And it’s so worth it.
There are many ways to access the psoas for psoas release. Some people prefer their physical therapists get in there manually, the DIYers may prefer a lacrosse ball (although that ball is too small), or a Hip Release Ball if you have a very tight psoas. Because the psoas is hard to reach and there is no ball or tool that can effectively reach the iliacus, I designed the Hip Hook for all of my suffering clients: the only muscle release tool targeting both the psoas AND the iliacus muscle. The iliacus can only be addressed through specific angular pressure, so finally having a tool that is able to hit those spots is magical.
The Hip Hook is unique because of its angular pressure
Once you have located the sweet spot, you simply lay on the Hip Hook, allowing it to sink into the psoas for 30-90 seconds. Once you have relaxed, it is time to push down on the lever and feel the tip pressing up and into the iliacus muscle, pinning it against the ilium. Apply this prolonged pressure again for 30-90 seconds while breathing and relaxing. While the pressure can feel intense at first, you’ll likely feel a shift and release after 30-60 seconds. Prolonged pressure is important here. You may feel the desire to move around and rub the spot but in the case of muscles holding tension, they don’t like to be rubbed and any benefit you may feel temporarily will be short term.
After releasing the hip flexors, don’t forget your back side
A tight iliopsoas creates misalignment, causing other muscles to work overtime to compensate. You’ll want to apply pressure to these muscles as well (plus, it feels SO good). This is where the Hip Release Ball comes in handy. Because the glutes, piriformis, and QL (quadratus lumborum) muscles are easier to reach and respond to perpendicular pressure, you don’t need an advanced tool to release them. A simple ball or even foam roller will do the trick if you know what you’re doing. (If you don’t, please check out this video on how to release the back of the hip after you have released the iliopsoas).
How to stretch the iliopsoas
After applying prolonged pressure to the iliopsoas and the posterior (back side) hip muscles, now it’s time to stretch! The lunge stretch is highly recommended because it stretches the iliopsoas, bringing circulation and length to that muscle.
Step one foot forward with your spine straight. You can do this stretch with your knee on or off the ground. With this stretch it’s important to engage your abdominal muscles or contract your glutes to eliminate the forward tilt of the pelvis while tucking your butt under you. This allows for the iliopsoas muscle to stretch fully over the joint while protecting your lower back from the psoas tugging on it while it’s being stretched.
You should feel the stretch in the front of your hip joint or the front of your thigh. If you’re not feeling it there or if you’re feeling it in a different spot, then stop. You can experiment with bending your spine to the opposite side of the leg you’re stretching to increase the psoas stretch.
To get lasting results from your hip flexor stretch, focus on using proper form and take generously deep breaths.
Developing a plan to take care of your tight hip flexors
Prolonged pressure and light stretching is hopefully all you need to find relief. However, if you have experienced this issue for a very long time you may have more work to do. In my book Tight Hip Twisted Core, I lay out the Three Simple Steps to understanding and relieving unresolved pain. If you want to know what caused your hip flexors to tighten in the first place (and take preventative measures) this is a good place to start.
In over 20 years of clinical physical therapy practice, I have seen that nearly every client on my table had some degree of iliacus tightness causing a twisted pelvis and resulting in misalignment throughout the body. Tight iliopsoas muscles are merely a side effect of modern living, and we all need to be masters of this area of our body to be well and strong. I hope this information has set you on your path to being one of a growing number of iliacus and psoas masters.
FAQs about the iliopsoas
What is the function of the iliopsoas?
The function of the iliopsoas is to connect the lower body to the upper body, maintaining stability, facilitating lumbar rotation, lateral flexion and hip flexion. If the iliopsoas is too tight, it can affect the functioning of the entire body.
How do I release the iliopsoas muscle?
The iliopsoas responds to direct and angular pressure, anywhere from 30-90 seconds. It’s a tricky muscle to access, and using a muscle release tool like the Hip Hook is the best way.
How do I stretch the iliopsoas?
A kneeling hip flexor stretch is the simplest way to stretch the iliopsoas and hip flexor complex. But it is most effective when followed by releasing the iliopsoas.

How to Get Lasting Results from a Hip Flexor Stretch
Most people think that simply stretching their hip flexors will solve their pain and tightness. We have a different angle. To get the best and longest-lasting results from a hip flexor stretch, we believe that adding in muscle release techniques, plus strength and mobility exercises, will take your routine to the next level.
Why do I have tight hip flexors?
It is extremely common to have tight hip flexors.
Take a moment to think about how much time you spend sitting down each day, on average. Between working at your desk, studying or attending class, driving your car, relaxing at home on the couch, eating meals, you can see how the hours add up quickly. And that’s just for one day!
Despite the health risks for sedentary behavior, many people spend up to 70% of their waking hours in a seated position each day. Here’s the math: that equates to about 11 hours of sitting each day (assuming that you sleep 8 hours each night).
Throw in the additional stay-at-home restrictions that many of us have experienced this year related to COVID-19, and the amount of time we spend sitting and not moving our bodies each day has further increased.
Sitting shortens our hip flexor muscles relative to their natural length when we are standing. When stuck in this shortened position for extended periods of time, the likelihood of developing tight hip flexors increases, especially as you repeat this pattern day after day.
Additionally, there are many other activities that we do on a daily basis that may contribute to tight hip flexors. When we walk or go for a run, our hip flexors are constantly being used to move one leg in front of the other. These muscles are very active when we are working out, helping to stabilize the low back and hips when doing exercises like squats, deadlifts, and lunges. Many sports involve a lot of hip flexion, such as cycling, kickboxing, and gymnastics.
Taking all of this into account, you can see how overworked your hip flexors may be and why it is so important to take care of these muscles with some TLC.
How can tight hip flexors impact the body?
Tight hip flexors can have a big impact on how the ENTIRE body functions.
Let’s begin to paint the picture by talking about the pelvis, the core, and how a tight hip flexor affects the way these structures of the body are aligned.
The pelvis is situated at the center of the body, making up a very important piece of your core. Yes, we are referring to the same “core” that many people assume simply consists of the abdominal muscles. Your core consists of much more than that!
Think of your core as a 3-D box with 6 sides:
- Front – rectus abdominis and transverse abdominals
- Back – spinal erectors, quadratus lumborum (QL), and other back muscles
- Sides – internal obliques and external obliques
- Top – diaphragm
- Bottom – pelvic floor muscles
The pelvis is a very important piece within this 3-D box, connecting the upper and lower body together. Looking deeper inside of the core and pelvis, there are two very important muscles that play a big role in supporting your body’s alignment – the iliacus and the psoas.
As depicted in the image, tightness and imbalances in the iliacus and psoas muscles twists the pelvis and twists the core. Due to its connection with the upper and lower body, this has a chain reaction effect above and below.
The pelvis connects to the spine, which twists and affects the alignment of the rib cage, shoulders, and neck. The pelvis also connects to the hips, where the way the femur moves within the hip socket is changed and affects the ways the knees, feet, and ankles work.
Now that you’re aware of the potential effects that tight hip flexors can have on your body, here are some helpful tips to keep your hip flexors (and the rest of your entire body) as happy as possible so your whole body can feel good.
Tips for getting the best hip flexor stretch
1. Gain an understanding of what the different hip flexor muscles are and where they are located.
Without first having a general understanding of which muscles in your body are hip flexors and where they are located, it is going to be more challenging to achieve the best hip flexor stretch possible to target the areas that are tightest.
The hip flexor muscle group includes (but is not limited to) the following:
Psoas Major – Connects to the lower thoracic and lumbar vertebrae (T12 through L5) and also to the lesser trochanter (inside of the femur near the groin region).
Iliacus – Runs along the inside surface of the pelvic bone, connecting to the top edge of the tailbone (at the SI joint) and also to the lesser trochanter.
NOTE: The psoas major and the iliacus muscles both cross the hip joint, where they join together and form what is known as the iliopsoas tendon.
Rectus Femoris – Also part of the quadriceps muscle group, this muscle connects to the anterior inferior iliac spine (lower part on the pelvic bone, or ilium), just above the acetabulum (hip socket), as well as down the leg where the quadriceps tendon inserts into the base of the patella (kneecap).
Tensor Fascia Latae (or TFL) – Connects to the anterior superior iliac spine (ASIS) and also the deep fascia of the iliotibial band (IT band). This muscle is right about where your pants pocket would be if you were wearing a pair of athletic shorts.
Pectineus – Connects to the pubic bone and the inside of the femur (thigh bone).
.jpg)
[Read More from Aletha: Deep Dive into the Anatomy of the Hip Flexor Muscles]
2. Pick an appropriate hip flexor stretch to effectively target the correct muscle.
There are many different stretches for tight hip flexors to choose from. So how do you know which one is the right one for you?
With your new understanding of the different muscles that make up the hip flexor muscle group and where they are located in the body, you may begin to see how you’ll need to perform stretches that target your tight hip flexors from multiple angles.
This helps you to focus on stretching each individual hip flexor muscle and give them the specific attention that each may need. This will be up to you to explore what your own body needs and determine which of these will be the best hip flexor stretches to help you achieve the results you are looking for.
[Read More from Aletha: The Best Hip Flexor Stretches for Tight Hips]
3. Perform the hip flexor stretches with proper form and technique.
After you’ve picked the best hip flexor stretch needed to target the right muscle in your body, it is time to get down onto the floor or on your yoga mat to perform the exercise.
The effectiveness of the hip flexor stretch is largely affected by using proper form and technique, which includes a focus on taking nice, big, deep breaths. This really helps to target the correct muscles and help the body relax, where the brain sends signals to the targeted tissues to let go of tension and lengthen.
4. Establish a consistent hip flexor stretching routine and stick to it.
You’ve gained an understanding of your hip flexors. You’ve picked the right stretch to use to target the correct muscle. You’ve performed the hip flexor stretch correctly and remembered to breathe. You are now feeling pretty good. That’s great!
So, what next?
If you’re a fan of feeling great and free of pain, this one time that you stretched likely isn’t going to help you long-term. Instead, setting up a regular routine to do some stretches for tight hip flexors or stretches for the rest of your body is a better idea to help you achieve this goal.
The routine that you set for yourself can be simple and easy. Perhaps you aim for 10-15 minutes of stretching your hip flexors each day (or every other day). You can do multiple sessions per day, splitting the time you stretch between the morning and afternoon. Maybe you even want to stretch out before bed, helping you fall asleep quickly and wake up feeling refreshed.
Routines are great and can help you stay feeling good over a long period of time. Find one that works for you and stick with it. Your hips and your body will thank you for it!
Other tips to make your hip flexor stretches more effective
If stretching your tight hip flexors alone isn’t enough to provide lasting relief or if you are really looking to take your stretching results to the next level, consider these additional tips to include in your routine to see how it makes you feel.
1. Add hip flexor muscle release techniques to your routine.
If your muscles aren’t relieved of tightness after performing your hip flexor stretches, it could be a sign that tension is being held in the muscles in the form of muscle knots. Applying direct and prolonged pressure (for about 30-90 seconds) to these areas first can be more effective at getting the muscle to release tension than simply stretching alone.
If you don’t have the luxury of having a roommate who happens to be a massage therapist or have the ability to see a practitioner in person on a regular basis, using a muscle release tool can be helpful. However, using the right tool for the different muscles to achieve the best results is an important factor to consider.
Muscles like the TFL, rectus femoris, and pectineus are closer to the outside surface of the body, making them much easier to access and target. Using something like a lacrosse ball (or a slightly larger ball) or a foam roller generally works for these muscles.
When looking to apply direct pressure to the deeper hip flexor muscles, like the psoas and the iliacus, the lacrosse ball and foam roller don’t have the ability to get deep enough to access these muscles and also don’t have the precision to target the correct location.
The Hip Hook is a muscle release tool designed specifically to get into the hard-to-reach psoas and iliacus muscles to deliver the best possible release of tension, helping your hips and body feel great.
2. Add muscle activation and strengthening exercises to your routine.
When your muscles and joints feel “tight” it is very common to think that these areas need to be stretched in order to make them better. While stretching may provide some relief in the short-term, these muscles may tighten back up over the next few days.
Why does this happen?
The muscles in your body are meant to control your joints to create movement and also to stabilize your joints to keep them safe. When you sit for longer periods of time, you don’t use or challenge your muscles.
With this inactivity, your hip muscles “turn off” and become weaker. This can then lead the brain to send signals to tighten these muscles up as a form of protection, essentially creating stability by holding tension because the muscles themselves do not have the strength to do so.
The saying “use it or you lose it” is definitely applicable here.
Getting some activation with hip flexor strengthening exercises can help increase the amount of blood flow and activity within the muscles, helping to build strength and increase the effectiveness of your hip flexor stretches over time. Additionally, targeting the other muscles around your hips and the muscles in your core with strength exercises can be a really good idea.
Try some of these hip strengthening exercises out and see how it makes your body feel.
3. Add direct hip mobility training to your routine.
Hip mobility exercises are another way that we can strengthen the hips and improve the active range of motion through which we can control our hip joints. This is not to be confused with stretching, which simply takes the hip through its passive range of motion.
These can be some really amazing hip mobility exercises that you can try to start converting your passive range of motion into an active range of motion, improving the function of your hips and improving the way that you feel.
Want to deepen your knowledge and your stretch?
You’ll get answers to your questions about tight hip flexors, how they affect the functioning of your entire body, and plenty of stretches and exercises to keep you out of trouble in the book “Tight Hip, Twisted Core – The Key To Unresolved Pain” by Christine Koth, MPT.
Frequently asked questions about tight hip flexors
What is the main function of the psoas?
The psoas muscle connects the upper and lower halves of the body. Its main functions are to stabilize the lower back and flex the hip. Other functions of the psoas include external rotation of the hip, as well as extension and lateral flexion of the lumbar spine.
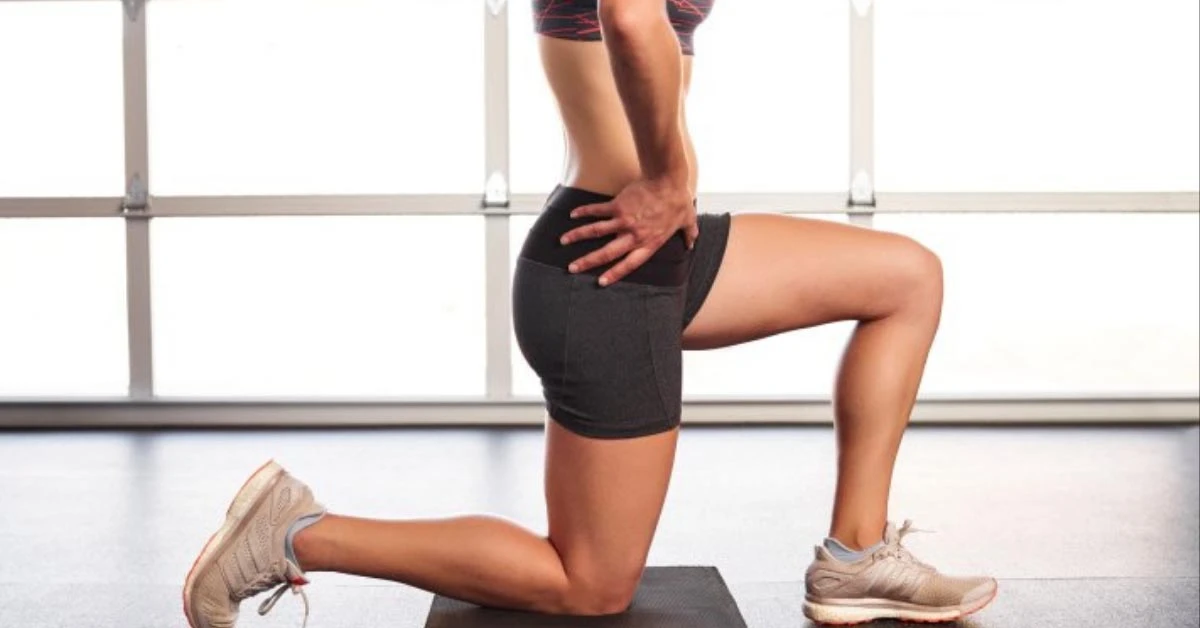
The Best Hip Flexor Stretches for Tight Hips
Are you only stretching one hip flexor? The “hip flexors” are actually a whole group of muscles that help you walk, kick, bend, twist, and stabilize your pelvis. Most people have performed a basic hip flexor stretch at some point in their lives. While it may have led to experiencing some relief, it can be more helpful to use targeted stretches for the muscles that are tight on your body (not your neighbor’s).
In this article, you’ll learn about why the hip flexor muscles become tight and practice several completely manageable hip flexor stretches for even the tightest of hips. These stretches affect your hips from all angles to relieve tightness and keep your whole body feeling strong and limber. One of the best parts about these hip flexor stretches is that the same movement can stretch different muscles, depending on the width of your stance and angle of your body. (So you really only have one stretch taking up valuable memory space.)
[Read more from Aletha: Deep Dive into the Anatomy of the Hip Flexor Muscles]
Why are my hip flexors so tight?
Whether you are someone who is physically active or not, the amount of sitting that the typical person does each day contributes to the development of tight hip flexors. Sitting places the hips into a flexed position, where the psoas muscle, iliacus muscle, and other hip flexor muscles find themselves in a shortened position.
Not only are your hip flexors likely spending longer periods of time in this shortened chair-sitting position (don’t get me started on the couch-sitting position), they also play an important role in helping to stabilize and support your lower back and pelvis in a stable upright posture.
When you throw in the additional demands placed on the hip flexor muscles when walking, running, cycling, working out, picking up kids (and everything they’ve dropped on the floor), and so many other activities we perform on a regular basis, you may begin to see how these very important muscles work overtime for our bodies day after day.
If you don’t take the time to help these muscles lengthen and recover, hip tightness develops over time and it can affect your hips, lower back, knees, and other areas of the body.
You don’t need to stop any of those regular activities (although I’ll evangelize about taking frequent breaks from sitting in front of your computer), but the next time you’re taking a chair-free break from work or getting ready for a workout, give a few of these stretches a try. Your tight hip flexors will thank you for it!
The best stretches for your tight hip flexors
To get the most effective and longest-lasting results from a hip flexor stretch, it’s important to pick the right stretch to target a specific muscle and also perform the stretch with proper technique. Here are several different hip flexor stretches; discover which ones work best for you while learning a little bit about your amazing body. (And if it doesn’t feel amazing right now, check in again afterwards.)
Best stretches for the iliopsoas muscle
The iliopsoas is your main hip flexor and consists of two muscles – the iliacus muscle and the psoas muscle. Depending on your personal preference, you can effectively stretch these hip flexors using a kneeling hip flexor stretch or a standing hip flexor stretch, both of which are described below.
Half-Kneeling Hip Flexor Stretch

- Get down into a half-kneeling position with your front and back knees at about a 90-degree angle. Your stance should be around shoulder-width apart and your pelvis should be facing forward.
- Squeeze the glute on the back leg and also engage your lower abdominals, trying to tuck the pelvis to flatten out your lower back. You may feel a stretch at the front of your hip on the kneeling side.
- Keeping those muscles engaged, gently shift your pelvis forward to increase the stretch.
- With the arm on your kneeling side, reach overhead and across towards the opposite side of your body, allowing your body to side bend slightly to lengthen the psoas muscle.
Standing Hip Flexor Stretch

- Place one foot about 2 feet in front of the other with the feet placed around shoulder-width apart. The front and back knee will have a slight bend in them. Keep your pelvis facing straight ahead.
- Squeeze the glute on your back leg and engage your lower abdominals to try to tuck the pelvis to flatten out your lower back. You may feel a stretch at the front of your hip on the back leg.
- To increase the stretch, gently shift your pelvis forward by pressing your foot into the ground to straighten your back leg. The front knee may bend a little more. Be sure to keep the glute and abs engaged.
- With the arm on the same side as the back leg, reach overhead and across towards the opposite side of your body, allowing your body to side bend slightly to lengthen the psoas muscle.
Best stretches for the TFL muscle and the pectineus muscle
The tensor fascia latae (TFL) is a hip flexor muscle located on the outside of the hip that also connects to the iliotibial band (IT band). The pectineus is a hip flexor muscle located on the inside of the hip in the groin region.
You’ll stretch these muscles using the same instructions as the kneeling and standing hip flexor stretches mentioned above, but will make two slight adjustments to change the angle of the stretch to target the outside of the hip (TFL) or the inside of the hip (pectineus). All of the other instructions remain the same.
To target the TFL muscle, the first adjustment is setting up with a narrower stance, around hip-width apart. The second adjustment is shifting the pelvis diagonally towards the back leg. (Note: you will feel the stretch in the outside of the hip on the back leg).
To target the pectineus muscle, the first adjustment is setting up with a wider stance, slightly outside shoulder-width apart. The second adjustment is shifting the pelvis diagonally towards the front leg. (Note: you will feel the stretch in the inside of the hip on the back leg).
Kneeling, it looks like this:

Standing, it looks like this:

Best stretches for the rectus femoris muscle
The rectus femoris is one of your quadriceps muscles, but is the only one of that muscle group that crosses the hip joint and acts as a hip flexor. The following stretching variations using a kneeling or standing position can effectively target the rectus femoris and the other quadriceps muscles on the front of your thigh.
Couch Stretch

- Get into a half-kneeling position about shoulder-width apart, where the front knee is at about a 90-degree angle. The back knee is bent with your back foot up against a wall, a couch, or being held in position by your hands reaching behind your body.
- Squeeze the glute on the back leg and also engage your lower abdominals, trying to tuck the pelvis to flatten out your lower back. You may feel a stretch at the front of your hip and into the front of the thigh.
- Keeping those muscles engaged, gently shift your pelvis forward to increase the stretch.
To help make it more comfortable on your knee, consider doing this on a softer surface or add a cushion or yoga mat underneath your kneeling side.
Standing Quad Stretch

- From the standing position, reach back to grab your foot or ankle and bring your heel towards your butt. Stand up nice and tall.
- Squeeze the glute on the back leg and also engage your lower abdominals, trying to tuck the pelvis to flatten out your lower back. You may feel a stretch at the front of your hip and into the quads.
While performing this stretch, you can lean up against a wall or hold onto something with your other hand for support. This removes balance from the exercise and allows you to focus entirely on the stretch.
Want to deepen your knowledge and your stretch?
You’ll get answers to your questions about tight hip flexors, how they affect the functioning of your entire body, and plenty of stretches to keep you out of trouble in the book “Tight Hip, Twisted Core – The Key To Unresolved Pain” by Christine Koth, MPT.
Hip flexor stretch FAQs:
What are hip flexors?
The hip flexors are a group of muscles in your body that assist in hip flexion, the movement of bringing the knee closer to the chest. This muscle group includes the iliacus, psoas, rectus femoris, tensor fascia latae, pectineus, sartorius, adductor brevis, adductor longus, adductor magnus, gracilis, and even part of the gluteus medius.
What do hip flexors do?
The hip flexors play an important role in moving your body. Every single time that you take a step, you are using your hip flexors to bring your leg forward. These muscles also help to stabilize and support your hips, pelvis, and spine.
Why are hip flexor stretches important?
Hip flexor stretches are important because they can help increase range of motion in the hip joints, reduce pain and tightness, and improve the way your body performs in your daily activities.
What problems can tight hip flexors cause?
Tight hip flexors can contribute to many different problems throughout the entire body, including hip pain, knee pain, back pain, foot pain, and more.

Are Your Muscles Roadtrip Ready? How to Avoid Hip Pain During a Long Drive
You may love road trips for several reasons, but hip pain probably isn’t one of them. Although you may be mindful and take plenty of breaks to “stretch” your legs while you drive, hip pain while driving is an increasingly common problem, whether it is during your morning commute or cross-country trip.
One thing for sure is that any pain, no matter the cause, should never be ignored. Without proper attention or treatment, hip pain while driving can lead to more issues down the road. Literally.
Just like when you sit all day at the office, if your body is in one position for too long while driving, then two small muscles are taking the brunt of the work.
Those muscles are your hip flexors.
More specifically, they are two connecting muscles: the iliacus and psoas, which together are often referred to as the iliopsoas. And, if you have hip pain while driving or hip pain after a long drive, that pain could be the result of these tight hip flexor muscles.
This article will help you better understand the function of your hip flexor muscles, and how these muscles could be causing you pain while driving. Plus, I’ll give you some tips and tricks to avoid hip pain during and after a long drive.
What causes hip pain while driving?
Although you may feel like sitting is a “resting” position for your body, your iliopsoas muscles are actually engaged the entire time. You see, the iliacus keeps your pelvis stationary and aligned with your thigh bone while your psoas holds your spine straight. They stabilize your entire body and allow you to maintain this position. Essentially, if your iliopsoas stopped working while you were sitting, you wouldn’t be able to sit upright at all.
The problem is, these muscles aren’t meant to be in this seated, shortened position for a long time. Eventually, your iliopsoas muscle gets cramped and starts to develop painful muscle knots. You may feel these in your hips or glutes, but you may also feel them in your lower back on either side of your spine, or even into your thighs. And these parts of your muscle stay contracted even after the rest of your muscle has relaxed.
This muscle shortening and hip pain can happen with any regular sitting positions, but tends to be exacerbated by the limited mobility when driving. Additionally, when driving, your right iliacus and psoas are experiencing even more strain because you’re constantly using your right leg to accelerate and brake. If you have a manual transmission, then both the right and left iliopsoas muscles are being engaged very frequently.
On a long road trip, you may benefit from using cruise control more often, but there will still be some strain on your hip flexor muscles because of your restricted seating position.
On top of all this, when you are on a long drive, it can be difficult to relax because you’re paying attention to the road and other drivers. After all, you need to be alert and able to react if you have to stop or accelerate. This extra tension can fatigue your hip flexors even more, making that tightness and pain even worse.
Unfortunately, hip pain while driving might not be the last of your worries either. Did you know that your tight hip flexors could actually create a whole bunch of other issues for your body?

How hip pain can lead to sciatica, knee, and back pain
A little bit of hip pain while driving might not seem like a big deal at the time. But, if you have noticeable pain and ignore it, it could spread and lead to something worse.
When your hip flexors, especially the iliacus muscles, are allowed to remain tight, it creates a domino effect with neighboring muscles, nerves, and joints.
Even if your pain after a long drive isn’t severe, or it’s simply presenting as some tightness, it could be contributing to other issues that impact your day-to-day quality of life. Sciatica, hip pain while sleeping, knee pain and back pain are all often connected, and it often starts at your hips.
Anytime your iliopsoas is knotted, tight, or contracted, it can pull your pelvic bone forward, throwing your pelvis out of alignment. When you have an anterior-rotated pelvis, it means that one of your pelvic bones, either the right or left, is rotated forward in relation to the opposite side. A rotated pelvis can create problems all the way down to your foot.
When tight hip flexor muscles get to the point of causing alignment issues, more strain is put on surrounding areas. For instance, when one pelvic bone is rotated forward, it puts strain on the tailbone connection, creating pain and tensions where they meet. This can cause sacroiliac pain.
You may feel pain in your hip joint first: when hip alignment is off, there is extra tension being put on the hip socket, and it won’t rotate or move correctly. The now ill-fitting hip socket can cause an internal rotation with your thigh bone, impacting how your leg functions from the hip down. The thigh bone’s internal rotation puts an unnecessary and unnatural strain on your knee because the kneecap doesn’t track normally anymore.
As your lower leg rotates inward, this can also cause your foot to pronate.
As you can see, a little bit of hip pain while driving may seem harmless, but if your iliopsoas is tight enough to impact hip alignment, it more than likely is impacting your knee and foot alignment as well.
Since your psoas is also an integral part of your hip flexor muscle group, it has a similar chain reaction when it is chronically tight. But, in the case of the psoas, this chain reaction moves up your body instead of down.
The psoas muscle connects from the front of your thigh bone to your spine and lower back. While tight psoas muscles can also move down the thigh to impact your lower extremities when tight, they are also likely to pull your spine into an arch, compressing and bending the side of your body that is tight.
As your psoas tightens, it will pull and pull on your spine and irritate the various structures in your lower back. Because the psoas and iliacus work together, the pulling of your iliopsoas can create pelvic rotation and tension that moves from your hips to your feet or your hips up to your shoulders and even your neck.
So, what may have started as just some slight hip pain while driving can cause you to eventually experience sciatica pain while driving, leg pain while driving or many other irritating issues.
Because it all starts with your hips, let’s take a look at some easy ways you may be able to avoid – and relieve – your hip pain while driving.
3 simple ways that could help you avoid hip pain while driving
If you have a long drive or road trip planned, it’s time to take some preventative measures to avoid hip pain while driving. There are only so many things you can do during your actual drive, so the time you spend on your hip health before and after you get in the car is important.
Here are three simple practices you can put in place before your next road trip or long commute:
1. Keep a healthy sitting position while driving
As I mentioned before, sitting for prolonged periods will always result in the shortening of the hip flexors. Still, there are some sitting positions that are worse for your hips than others. So let’s learn a thing or two about good posture for preventing hip pain while sitting in your car for periods of time.
First, do your best to sit as upright as you can. This may be hard in your car because of how the seats are constructed, but if you can, engage your lumbar support in your seat and put the seat back up. This is so when you are resting your back on the seat, your body is supported in the upright position.
Overall, you want to avoid slouching, even if it feels more comfortable in the moment. Try to find a seating position that allows your knees to be slightly past 90 degrees, and your feet to rest on the floor.
You should be able to reach the pedals without having to straighten your leg completely. A slight tilt forward can bring your hips above your knees, taking some strain off your iliopsoas muscles and reducing hip pain before and after you sit in your car.
So, before your trip, take some time to move your seat around and find the perfect position to support your hip flexor health.
2. Take breaks to stretch and move your hips
If you can, take breaks throughout your drive to walk around and stretch. Make use of the rest stops by adding a few extra minutes to do a deep lunge stretch or back stretch, a few hip flexor stretches, and to take a walk.
If you plan a long lunch break and it is a nice day, you can also choose to have an outdoor picnic, pack a yoga mat, and do a few more stretches before driving again.
Whenever you stop driving that day, you may be tempted to rush into your destination and collapse because you’re tired.
But it’s important to take a moment to stretch and move your hips before sitting down or lying on the bed. This will help you alter the shortening of your hip muscles and encourage other types of movement or engagement.
3. Relax and release hip flexor muscles after driving
Since your hip flexor muscles are engaged the entire time you are driving, one of the best things you can do post-road trip is take 10-15 minutes to relax your muscles.
The hip flexor muscles are difficult to relax because they are engaged when sitting and laying down.
One good way to relax the iliopsoas muscles is to find an ottoman or couch, lay on the floor with your butt up against the base of the furniture, and rest your lower legs and feet on top of it.
In this position, your legs should be at a 90-degree angle. With your calves and feet resting on the ottoman, you should have a chance to relax. This position will take strain and tension off of your iliopsoas muscles.
After you’ve given your hip flexors time to recoup in the resting position, then we hope that you packed a few helpful muscle release tools on your trip.
Especially if you have chronic hip pain, I always encourage people to make room in their luggage for muscle release and massage tools. After all, your body is going through atypical stress and will need a little extra love.
Packing a Hip Hook and Hip Release Ball will give you the relief you need to be prepared for another day of driving on your road trip – and enjoying your destination once you arrive!
The Hip Hook is a simple, compact hip flexor release tool that targets the source of your hip pain: muscle tension. By applying direct, prolonged pressure to the iliopsoas muscles, you can release trigger points and knots after a long drive.
The Hip Release Ball allows you to more gently release the psoas muscle and also address muscles like the piriformis on the back of your hip structure.
Remember: It is important to have balanced muscle release of both your iliacus and psoas muscles. If you release one and not the other, then they will play tug of war and keep pulling each other out of alignment.
One of the best ways to avoid hip pain while driving is to get to the root cause of your pain. Chances are, if you have hip pain while driving, you likely have hip pain during other life activities as well.
My book, Tight Hip Twisted Core, is an in-depth look at how your iliopsoas muscles impact your daily life. Not only do I provide the background knowledge you need to understand what’s happening anatomically, but I give you the tools you need to prevent hip pain while driving from becoming a recurring issue in your life.

FAQs on hip pain when driving
Can driving cause hip bursitis?
When any muscle is chronically tight, it’s endlessly pulling on both of its endpoints. Both the iliacus and psoas attach to the front of the hip near the groin area. These points where they attach to the bone can develop into tendonitis or bursitis from that muscle being constantly tight. So the tight muscles may be the cause, and driving puts those muscles in a contracted position for an extended time.
How do I stop my hips from hurting when I drive?
While posture and positioning matter, to prevent hip pain when driving you’ll want to learn to release those muscles causing pain during the moments you’re not behind the wheel. Your hip flexors are likely tight and pulling on your hip joints while you’re driving. Understanding how these muscles are affecting your hips, low back, and knees and applying direct pressure to release them will result in pain-free road trips.