Your cart is currently empty!
Category: Pain
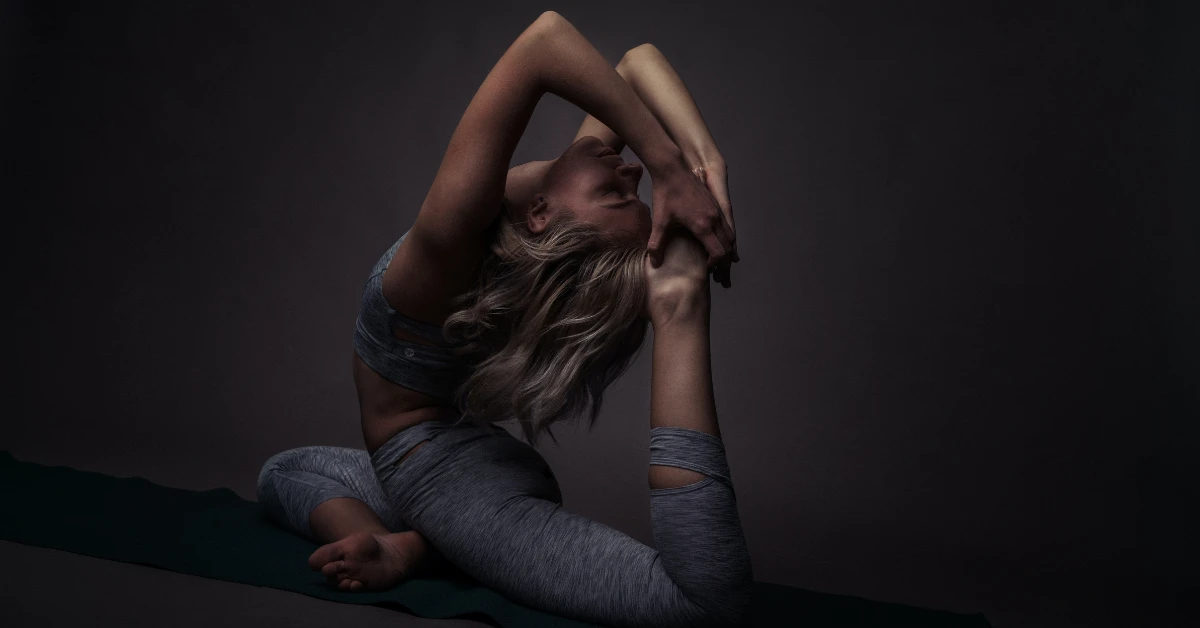
Understanding and Managing Hip Flexor Pain
Hip flexor pain can sideline even the most dedicated recreational athlete. These muscles, crucial for activities from running to yoga, are often tight and prone to injury. Let’s explore what you need to know to keep your hip flexors healthy and pain-free.
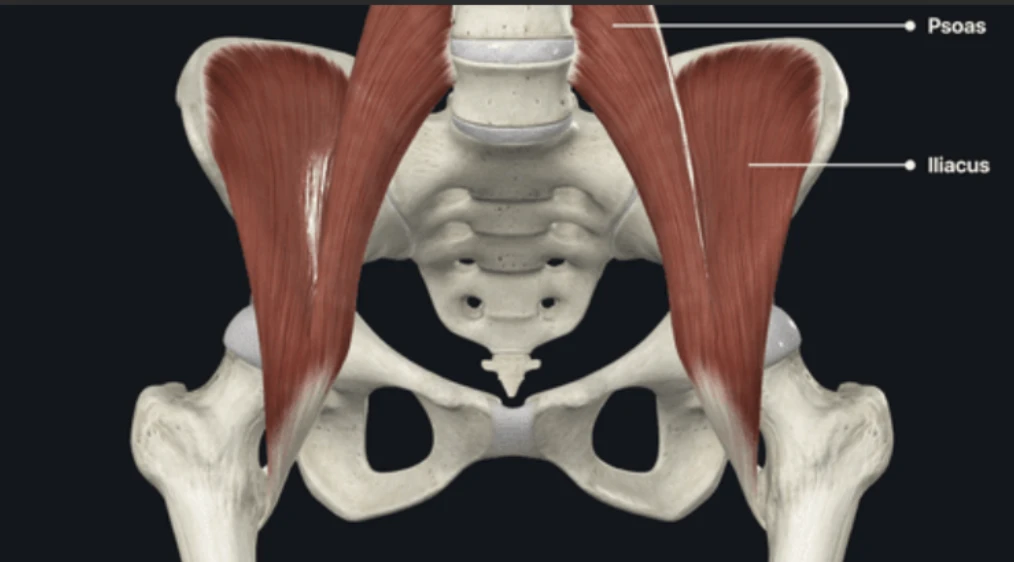
Where is your hip flexor? – Anatomical illustration of the hip flexor muscles
What are the Hip Flexors?
Your hip flexors are a group of muscles that allow you to flex your hip, i.e., lift your knee to your chest and bend at the waist. Key players include:
-
Understanding Your Hip Flexors: The Iliacus
When you think about lifting your knee or bending at your waist, a group of muscles called your hip flexors are hard at work. One of the key contributors to this movement is the iliacus. This powerful muscle is located in your iliac fossa, which is the inner surface of your hip bone (ilium). From there, it travels downwards and joins with the psoas major muscle (which we’ll discuss next) before attaching to your femur, the large bone in your thigh. Essentially, the iliacus plays a crucial role in directly pulling your thigh upwards, enabling that essential hip flexion movement.
-
Understanding Your Hip Flexors: The Psoas Major
Another vital muscle in the hip flexor group is the psoas major. This deep-seated muscle originates from the vertebrae in your lower spine (specifically the lumbar region). It then travels downwards through your core and pelvis, eventually merging with the iliacus muscle to form the iliopsoas tendon, which attaches to your femur. Because of its connection to the spine, the psoas major is not only important for flexing your hip but also plays a role in stabilizing your lower back and influencing your posture. It’s a powerful muscle that bridges your upper and lower body.
-
Other Hip Flexor Helpers
While the iliacus and psoas major are the primary powerhouses for hip flexion, it’s worth noting that other muscles also contribute to this movement. These include the rectus femoris, which is part of your quadriceps muscle group and also helps to straighten your knee, and the sartorius, the longest muscle in your body, which assists with both hip and knee flexion, as well as hip abduction and external rotation.
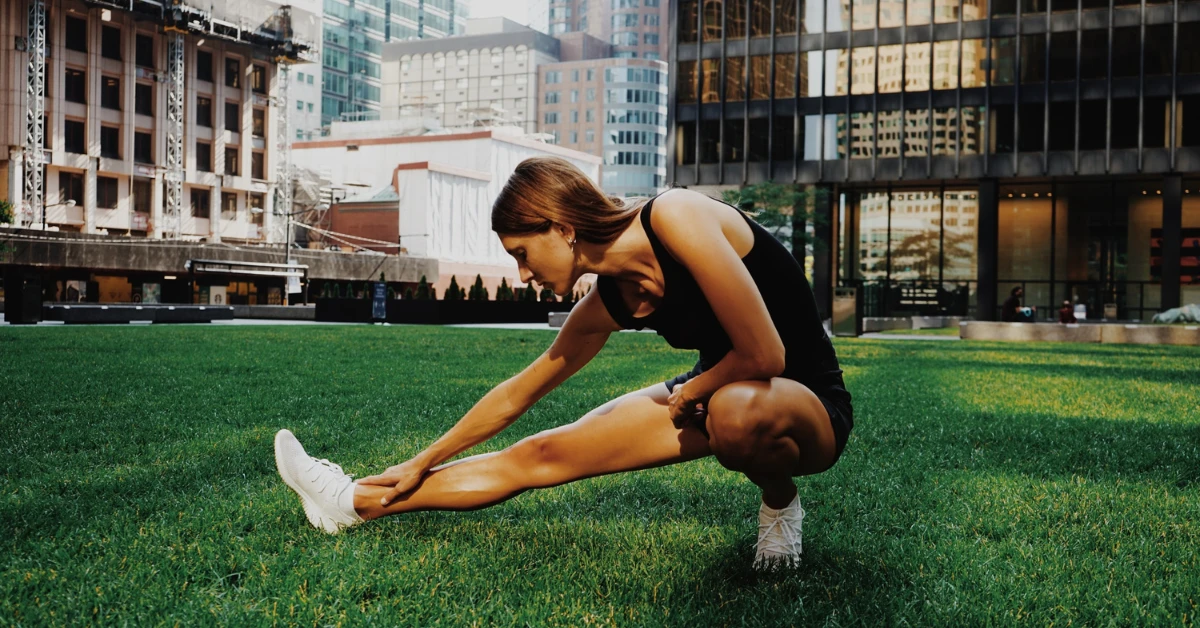
Where is Hip Flexor Pain Felt?
Pain typically presents in the front of your hip, groin, or even lower back.You can also feel pain in knee, ankle, and foot if these muscles are tight. You might notice it when:
-
Walking or running
-
Lifting your leg
-
Stretching
-
After exercise
Common Causes of Hip Flexor Pain
-
Muscle Imbalances and Weakness: Often, hip flexor pain isn’t solely due to tightness in the hip flexors themselves but rather an imbalance with weaker opposing muscles, particularly the glutes and core. When the gluteal muscles are weak, the hip flexors may compensate during movements like walking, running, or lifting, leading to overuse and strain. Research has highlighted the importance of gluteal strength in maintaining proper hip mechanics and preventing injuries. For instance, a study published in the Journal of Orthopaedic & Sports Physical Therapy emphasized that “gluteal muscle activation deficits are common in individuals with various lower extremity musculoskeletal disorders, including hip pain” (Powers, 2010). Similarly, a weak core can compromise pelvic stability, forcing the hip flexors to work harder to stabilize the trunk and pelvis during movement, contributing to their overload.
-
Prolonged Sitting and Sedentary Lifestyles: In today’s increasingly sedentary world, prolonged sitting is a major culprit in hip flexor issues. When you sit for extended periods, your hip flexors are held in a shortened position. Over time, this can lead to adaptive shortening and stiffness of these muscles. This shortened state reduces their ability to lengthen properly during activities, making them more susceptible to strain and injury when suddenly stretched or engaged. A review in Sports Health: A Multidisciplinary Approach noted that “prolonged static postures, particularly sitting, can contribute to muscle length adaptations and potentially lead to musculoskeletal pain syndromes” (Lynch et al., 2010). This shortening can also tilt the pelvis anteriorly, further exacerbating tension in the hip flexors and potentially contributing to lower back pain.
-
Repetitive Hip Flexion Activities (Overuse): Athletes and individuals engaging in activities that involve repetitive hip flexion are particularly vulnerable to hip flexor pain due to overuse. Sports like running, cycling, dancing, soccer, and martial arts constantly engage the hip flexors to bring the leg forward. This continuous contraction and eccentric loading can lead to micro-traumas in the muscle fibers, resulting in inflammation, pain, and reduced flexibility. The cumulative effect of these repetitive movements can overwhelm the muscles’ capacity for recovery.
-
Acute Injuries and Trauma: While less common as a chronic cause, acute injuries can directly lead to hip flexor pain. These often occur from sudden, forceful movements, such as sprinting, kicking, or rapid changes in direction, which can cause tears or strains within the muscle fibers. Direct impact to the hip area can also result in contusions or muscle damage. The severity of the pain and the recovery time depend on the grade of the muscle strain, ranging from mild discomfort in a Grade 1 strain to significant pain and loss of function in a Grade 3 tear. If you’ve sustained an acute injury to the hip flexor area, see your healthcare provider for assistance.
-
Poor Biomechanics and Movement Patterns: Inefficient or improper movement patterns can place undue stress on the hip flexors. For example, in runners, overstriding or a lack of hip extension can force the hip flexors to work harder to pull the leg through, leading to strain. Similarly, in weightlifting, improper form during exercises like squats or deadlifts can shift the load onto the flexors rather than the intended larger muscle groups. These suboptimal biomechanics create chronic overload on the hip flexors, increasing their susceptibility to pain and injury.
Tools for Deeper Hip Flexor Relief
Beyond traditional stretching, tools like the Aletha Health The Mark and Aletha Health The Orbit can help you achieve deeper relief by targeting specific areas of tension.
-
Aletha The Orbit: Use The Orbit first as a warm up to help improve overall blood flow and reduce generalized muscle stiffness. Gently roll the Orbit along the length of your hip flexor muscles and surrounding areas like your quadriceps and glutes. This can aid in recovery and prepare your muscles for movement.
-
Aletha The Mark (formerly Hip Hook): This tool is designed to reach the deep-seated iliacus and psoas muscles that make up a significant part of your hip flexor group. This is the first tool that can use the iliacus on its own. You can use the Mark by lying on your stomach and positioning the tool directly over the tender spot in your hip flexor. Slowly lower your body onto the tool, allowing its unique design to apply pressure and help release deep-seated tension. Hold for at least 90 seconds, focusing on relaxing into the pressure.
[ Include video on how The Mark works on the hip flexor: https://youtu.be/WhZiloNGYlQ ]
-
Finish up with The Orbit on the piriformis: After using the Mark on your hip flexors, return to The Orbit to further address the piriformis. This can help release any residual tension in the surrounding hip musculature and promote overall hip mobility. To target the piriformis muscle, which is located deep in your buttock and can contribute to hip discomfort, lie on your back with your knees bent and feet flat on the floor. Place The Orbit under your glutes on the side you want to target. Gently roll and find tender spots in the piriformis area, holding pressure as needed.
Leverage Exercises and Stretches for further Hip Flexor Relief
These exercises and stretches can help alleviate pain and improve flexibility in addition to using the tools:
-
Hip Flexor Stretch: Kneel on one knee, with the other foot forward. Gently push your hips forward until you feel a stretch in the front of your hip.
-
Half-Kneeling Hip Flexor Stretch: Similar to the hip flexor stretch, but focuses on a deeper stretch.
-
Lunge Stretch: Step forward into a lunge, keeping your back straight and gently pushing your hips forward.
-
Pigeon Pose: A yoga pose that stretches the hip flexors and rotators (If you have a knee injury, you may want to avoid this exercise).
Actionable Advice for Using Your Aletha Tools for Managing Hip Flexor Pain
To get the most out of your Aletha tools, try incorporating these practices into your regular routine:
-
Targeted Muscle Release: Utilize The Mark to address deep hip flexor tension effectively, leading to quicker relief. Pay particular attention to areas where you notice tightness or experience tenderness.
-
Gentle Stretching: Incorporate gentle stretches that target the hip flexor muscles. Following your stretches, you can further enhance relief by using The Mark on any lingering tight or tender spots.
-
Strengthening Exercises: Building strength in your hip flexors and surrounding muscles can provide better support and stability. Consider incorporating these exercises:
-
Marching in Place: Stand tall and lift one knee towards your chest, then slowly lower it and repeat with the other leg. Focus on controlled movement.
-
Standing Hip Flexion: While standing, lift one leg straight forward, keeping a slight bend in your knee. Lower it slowly and repeat on the other side. You can add resistance with a light ankle weight as you progress.
-
Seated Knee Raises: Sit upright in a chair with your feet flat on the floor. Lift one knee towards your chest, then slowly lower it. Repeat with the other leg.
-
Leg Raises (Lying Down): Lie on your back with your legs straight. Keeping your core engaged, lift one leg a few inches off the ground and slowly lower it. Repeat with the other leg. For a more challenging variation, lift both legs simultaneously.
-
Consistent Application: Regular and consistent use of your Aletha tools can be a valuable strategy for preventing discomfort, enhancing flexibility, and supporting your body’s recovery after physical activity. Remember to pay attention to your body’s signals, begin with light pressure, and gradually increase the intensity as you feel more comfortable.
Learn more about Aletha Health’s Story on our website and follow us on Instagram to see the tools in action, making an impact on thousands of people.
References:
-
Lynch, T. L., Whiteside, D., & Kelly, M. (2010). Prolonged static postures and their effects on musculoskeletal health. Sports Health: A Multidisciplinary Approach, 2(4), 310–317.
-
Powers, C. M. (2010). The influence of altered lower-extremity kinematics on the development of musculoskeletal pain and injury: a review of the literature. Journal of Orthopaedic & Sports Physical Therapy, 40(2), 42–56.
-
How to Improve Lower Back Pain When Cycling
Aletha Health’s Founder, Christine Koth, MPT was featured in Bicycling Magazine’s latest article on lower back pain when cycling. This is a common injury experienced by cyclists, yet it can be prevented with the right approach.
Christine explains how the hip flexors, specifically the iliacus muscles, are overused and become shortened and tight when seated on the bike. This tightness influences the alignment of the lower back, pelvis, and hips and can lead to pain or injury over time. The good news is that this pain and tightness can be addressed through targeted muscle releases, stretches, and exercises.
A tool that can help with releasing tightness in the hip flexors is the Mark (formerly known as the Hip Hook), the only one that can address both the iliacus and psoas muscles. Using the Mark only a few minutes per day and before you ride can make a big difference in how you feel on and off the bike. Learn more about the Mark here.
What is IT Band Pain and How do I Fix it?
Iliotibial band pain (or IT band pain) is a condition that causes lateral knee pain (pain on the outside of the knee). While it is often thought of as an overuse injury because it is common in sports with a lot of repetitive lower body motion (like running or cycling), IT band pain can affect anyone.
If you’ve ever been to the mobility area of your gym, you’ve likely noticed people trying to stretch their IT band or use a foam roller to massage this painful area on their outer thigh. Perhaps you’ve even tried doing this yourself. Unfortunately, stretching and foam rolling the IT band is doing nothing to address the root cause of IT band pain on the outside of the knee.
The key to addressing IT band pain in the long term is achieved through 3 steps. First, you must release the tension in the muscles that connect to the IT band, thereby reducing the pull on this area, as well as any other muscles that may be contributing to the issue. Second, you must improve the alignment of your body. Third, strengthen key muscles that support the healthy function of the IT band.
Anatomy and function of the iliotibial band
The IT band is a thick band of fascia that runs along the outside of the thigh and down towards the knee. The IT band originates near the hip joint and is influenced by the deep fascia of the gluteus maximus, gluteus medius, and tensor fascia latae (or TFL). The IT band continues along the outside of the leg before inserting into Gerdy’s tubercle on the outside of the knee at the tibia.
The IT band supports movement of the hip and also stabilizes the hip and knee during activities like walking and running. Because the IT band plays an important role with movement and stability of the lower extremities, it is an area of the body more susceptible to pain and tightness.
Is the IT band a muscle?
No, the IT band is NOT a muscle and it does not contract and stretch in the same way that your hamstrings or other muscles do. Instead, the IT band is a fibrous connective tissue that is supported by its surrounding muscles that connect to it.
What are the symptoms of IT band pain?
As we’ve just discussed, the IT band is a common area to develop tightness and pain. Some of the most common symptoms of a tight IT band include:
- Outer hip pain – this is due to inflammation caused by the friction of the IT band repeatedly rubbing near the greater trochanter towards the top of your femur, potentially leading to hip bursitis.
- Outer knee pain – the repeated rubbing of a tight iliotibial band increases friction in the knee when you flex and extend, causing inflammation of the tendon and pain on the outside of your knee.
- A sensation or feeling of clicking, popping, or snapping on the outside of the knee or hip.
- The inflammation can cause noticeable redness around your knee, and your skin may feel warm to the touch.
IT band pain is frequently the result of a tight IT band that rubs excessively against the femur or iliotibial bursa on the outside of the knee. When you repeatedly bend and extend your leg, the movement can cause irritation, leading to inflammation and pain of the iliotibial band and adjacent tissue. A tight IT band can also compress the tissue and impact the nerves beneath it, causing pain.
What causes the IT band to become tight?
It’s clear that tightness in the IT band coupled with repetitive bending and extending of the knee are usually linked to IT band pain. But what causes the IT band to become tight in the first place?
As we talked about earlier, the IT band is not a muscle. However, there are 3 key muscles that insert into the iliotibial tract and influence the tightness in the IT band. These muscles are the tensor fascia latae (or TFL), gluteus maximus, and gluteus medius.
When these muscles are tight and not functioning properly, they pull on the IT band and cause the increased friction and rubbing that happens between the IT band and the outside of the hip, thigh, and knee. As this happens over time, this is what causes irritation and outside knee pain.
Some potential signs and symptoms of dysfunction in the TFL and glutes that are contributing to IT band issues include:
- Excessive foot pronation – when you walk, your foot and ankle roll inwards too much. This contributes to the knee moving inwards, where the IT band is placed under more stress to support and stabilize the knee.
- Knee valgus – when standing, walking, running, squatting, or moving, your knee tends to cave inwards. Again, the IT band is placed under more stress in this position and rubs more on the outside of the hip, thigh, and knee.
- Hip abductor muscle weakness – abduction of the hip is when your hip moves away from your body. A weakened ability to use these muscles might cause your iliotibial band to be tight. Hip abductor weakness significantly impacts pelvis, hip, and leg stability and is a component of many lower extremity issues and even back pain.
- Anterior rotation of the pelvis – anterior rotation is where the alignment of the pelvic bone (or ilium) is tipped forward relative to its neutral position. This impacts the alignment of the pelvis, the movement of the hips, the relative length of your legs, and the function of the surrounding muscles. Anterior pelvic tilt contributes to issues with the lower back, hips, and knees.
- Limited hip rotation – the hip joints are supposed to be a very mobile joint in the body. The ability to flex, extend, adduct, abduct, internally rotate, and externally rotate allows for the full recruitment of the muscles needed to stabilize the pelvis and hips. Tight hips can cause knee pain (such as IT band pain) and other lower back related issues to develop.
Additionally, several other lifestyle factors or workout habits can make a person more susceptible to a tight IT band that rubs against the bones and causes outside knee pain, including:
- Excessive amounts of sitting – sitting places the hips into a flexed position for longer periods of time, which often leads to tightness and weakness developing in many key muscles responsible for the alignment of the pelvis, movement of the hips, and stability of the knee. Tightness and weakness in the hip flexors, TFL, gluteus medius, and gluteus maximus affect the IT band.
- Improper or inadequate warmup for exercise – failing to prepare your body for a run or workout that involves your hips and knees (or any other part of the body) increases the chances that your body will look to compensate for pre-existing tightness or movement restrictions, potentially placing more stress on the IT band.
- Improper or inadequate cool-down from exercise – failing to help your body relax following your workout (such as with stretching or other light active body movement) may impact recovery and lead to the muscles utilized developing tightness, which may tug on the IT band if your hips and glutes remain tight.
- Overuse and lack of recovery – repetitive stress placed on the hips and knees (without adequate rest) leads to overuse of the tissues and does not allow them to recover, which may increase the risk for IT band tightness, pain, or other injury.
Now that you know many of the possible contributing factors to IT band pain or IT band tightness, let’s talk more about what to do to begin improving that pain on the outside of your knee.
Stretching or foam rolling the IT band is NOT the solution
Again, the IT band itself is not a muscle that can be stretched or released. It is a piece of connective tissue with the purpose of holding things tightly together. While it might feel painful and give you the illusion that it “hurts so good” when pressing directly on the IT band, it is not doing you any good.
Any relief that you get will be temporary, and the pain and tightness on the outside of the knee will soon return because the tightness and/or weakness in the TFL, gluteus medius, and gluteus maximus has not been addressed. Instead, you should focus on the muscles in the surrounding area.
The muscles you should focus on to improve IT band pain
To more effectively treat IT band pain, you should focus your attention on the muscles that directly insert into the iliotibial tract – these are the TFL, gluteus medius, and gluteus maximus muscles.
Because we spend so much time sitting down, these muscles are prime candidates for becoming tight and weak, causing them to pull on the IT band. You can improve the health and functioning of each of these muscles (and lessen their pull on your IT band) through targeted stretching, releasing, and strengthening exercises.
You may even consider adding attention to your main hip flexor muscles, the iliacus and the psoas, due to their function in the body and their relationship with the TFL, gluteus medius, and gluteus maximus that impacts tightness in those areas.
IT band pain exercises for the TFL muscle
The tensor fascia latae (TFL) is a muscle located on the outside of the pelvic bone and inserts into the iliotibial tract near the greater trochanter at the outside of the hip. The TFL helps to stabilize the hip and knee, performing several functions including: internal rotation, flexion, and abduction of the hip and lateral rotation of the knee.
A great TFL stretch for IT band tightness can be performed as follows:
- Start in the half-kneeling position with your hips and knees around 90 degrees. The side with the knee down is the side of the TFL that you will be stretching.
- Squeeze your glute on the kneeling leg, tucking your pelvis under you.
- Slightly shift your body weight forward over the kneeling side. This is moving your hip into extension.
- Slowly shift your body weight towards the kneeling side. This is moving your hip into adduction.
- Reach your arm overhead to intensify the stretch.
- Hold this position for 30-60 seconds and take deep breaths. Repeat 2 times.

When stretching alone isn’t enough to help, you may consider releasing the TFL first by applying direct pressure to the muscle using a ball. Here’s how you do it:
- Start lying down on your side. Line up the ball with your TFL muscle and roll your bodyweight over the ball.
- Move your top knee to the ground with your hip and knee bent. You will be part on your side and part on your stomach. This will help to manage the amount of pressure being applied to your TFL.
- Once you find a tighter spot, hold this pressure (don’t rub around, just stay there) and take deep breaths for at least 90 seconds.

To strengthen the TFL muscle, you can do so from either a standing or supine position. Add a light loop resistance band around your feet for an added challenge. Here’s how you do it:
- Start in a standing or supine position with a band around your feet.
- March one knee towards your chest, trying to keep your pelvis level.
- With your knee in the air, now move your hip into internal rotation by moving your foot away from your body, but keep your knee still.
- Hold this position for 5-10 seconds. Repeat 5 times.

IT band pain exercises for the gluteus medius muscle
Similar to the TFL, the gluteus medius is a muscle located on the outside of the pelvic bone and inserts into the greater trochanter near the iliotibial tract at the outside of the hip. The gluteus medius helps to stabilize the hip and knee, is the primary abductor of the hip and also assists with internal and external rotation of the thigh.
A great gluteus medius stretch for IT band tightness is the Figure 4, which can be performed as follows:
- Lie down on your back with your knees bent.
- Cross one ankle over the opposite knee.
- Use your hands to grab behind your knee and pull it towards your chest to intensify the stretch.
- Remember to breathe and relax as you hold this stretch for 30-60 seconds. Repeat 2 times
Releasing the gluteus medius muscle will be done with a lacrosse ball in the same way we described for the TFL, but the placement will be slightly different. The TFL is towards the front side of the outside of the pelvic bone, whereas the gluteus medius is more in the middle of the outside of the pelvic bone. Find a tight spot and maintain the pressure (without rubbing) for at least 90 seconds as you take deep breaths.

Among the best exercises to strengthen the gluteus medius includes the clamshell, which is a simple yet challenging exercise when performed correctly and with intention. Here’s how you do it:
- Lay on your side with (or without) a loop resistance band around your thighs. Bend your knees to about 90 degrees and position them slightly in front of your body.
- Lift your top leg using your outer hip and glute muscles, keeping your top knee aligned over your bottom knee. This is key because if you go for more range of motion, you will be recruiting other muscles and decrease the focus on the gluteus medius.
- Perform 10-15 reps. Repeat 3 times.

IT band pain exercises for the gluteus maximus muscle
The gluteus maximus is a muscle located primarily on the back side of the pelvis, having muscle fibers that insert into the greater trochanter near the iliotibial tract at the outside of the hip. The gluteus maximus helps to stabilize the hip and pelvis, and is a primary extensor and external rotator of the hip.
A great gluteus maximus stretch for IT band tightness is the seated knee to chest stretch, which can be performed as follows:
- Sit on the ground with your legs straight out in front.
- Bring one knee up and cross it over the opposite straight leg.
- Hug your knee to your chest.
- Twist your upper body and press on the outside of your leg to intensify the stretch.
- Hold this stretch for 30-60 seconds and take deep breaths. Repeat 2 times.
When it comes to releasing the gluteus maximus, there is a lot more area to explore within the muscle than for the TFL and gluteus medius. Use a lacrosse ball (or a larger ball) and position it anywhere along the back side of your pelvis. Search for a tight spot and hold pressure there (without rubbing) with the ball for at least 90 seconds. Remember to take deep breaths and relax.

To strengthen the gluteus maximus, an easy exercise you can perform is a glute bridge. You may add a loop resistance band around your thighs to increase the difficulty. To do this:
- Begin lying on your back with your knees bent and with your heels about an arm’s length away.
- Lift your hips up using your glutes and be sure to keep your core muscles engaged to avoid arching the lower back. At the end range of motion, you should be able to draw a line between your shoulders, hips, and knees.
- Perform 10-15 reps. Repeat 3 times.

What role do the hip flexors play in IT band pain?
We’re all about trying to get to the root cause of an issue. By now, you’ve learned that pain at the outside of your knee, hip, or thigh is a symptom of irritation to the IT band that is caused by tightness in the TFL, gluteus medius, and gluteus maximus muscles that attach to the iliotibial tract.
But is there a root cause somewhere else that is creating tension in these muscles that is ultimately contributing to IT band pain or tightness? It’s very possible.
If you’ve tried everything we’ve already talked about to improve your IT band tightness, then it’s time for you to consider the potential impact that tightness in your hip flexors have on your IT band pain.
Your body’s largest and strongest hip flexor is called the iliopsoas which is made up of 2 separate muscles: the iliacus and the psoas. The iliopsoas muscles are deeper within your core and actually are the only muscles that connect the upper and lower halves of your body. This muscle serves a critical function as a mover and stabilizer for the lumbar spine, sacroiliac joints, pelvis, and hips.
When these hip flexor muscles are tight, they pull the pelvic bone forward into an anterior rotation. This affects the movement of the hips and can lead to compensations occurring in the surrounding muscles. Tightness in the iliacus and psoas muscles inhibits the function of the gluteus medius, glute maximus muscles, and TFL muscles (among others) and can create tightness in these areas – the same exact areas that typically pull on the IT band and cause pain.
3 steps to improving IT band pain
In addition to tightness in your TFL, gluteus medius, and gluteus maximus muscles, tension in your iliacus and psoas muscles could be the missing piece to address to help you make long-lasting improvements with IT band issues. The best approach will give attention to each of these key areas and perform them in a sequential order that accelerates your progress.
Step 1: Release your muscles
Releasing tension is an important first step to help reduce the pulling force that tight muscles are having on your pelvis, hips, and IT band. Use direct and prolonged pressure to your tighter spots for at least 90 seconds, remembering to take deep breaths to help your muscles to relax and let go.
We feel that the iliopsoas has the biggest potential impact on your IT band pain, so we recommend releasing the iliacus and psoas muscles first. From there, move onto releasing tension in the TFL, gluteus medius, and gluteus maximus.
This can be followed by some gentle stretching to help increase circulation to these areas, but stretching alone will not be as effective, especially if there are muscle knots or trigger points in your muscles.
Step 2: Realign your hips and pelvis
After releasing tension in the key muscles around your hips, you have a good opportunity to improve a pelvis misalignment issue that could be affecting your IT band pain. Many people have one side of their pelvis that is more anteriorly rotated than the other because of muscle imbalances. If you know which side of your pelvis this is, you can perform the pelvic realignment exercise only on the side of your pelvis that is more anteriorly rotated.
Step 3: Remember to strengthen your muscles
Tight muscles become weak muscles. Once you’ve released tension and aligned your pelvis, you are in a great position to begin strengthening exercises to improve stability, range of motion, and support your body in a better position. This will enable you to move better in your body and use the right muscles, which allows your IT band to make progress and heal over time. Focus on the muscles we talked about earlier in this blog post, as well as your core. And yes, you can even strengthen your hip flexors.
A message from the Aletha Health team
We hope you found this article helpful and we’d love to support you on your healing journey. Our customers have experienced lots of success improving pain-related issues in their body using our products and methods, including IT band pain, SI joint pain, lower back pain, and more. We hope that you can achieve the same level of success. We encourage you to reach out to us directly at hello@alethasupport.com if you have any questions and we’ll do our best to help you out!
How to Get a Trapezius Knot Release
Productivity is important, but it can be harder than it needs to be when you’re experiencing sore, stiff neck, shoulder, and back muscles. If you are like many of us who are sitting at a desk for 8+ hours per day, you may experience tight, achy knots in your upper trapezius muscles that can interfere with your life and make it more difficult to stay focused and do the things you need to do.
We’ll help you better understand what causes muscle knots in your upper traps and share some strategies for successfully getting a trapezius knot release at home!

Why Do I Have Muscle Knots in My Traps?
The average day can put a surprising amount of stress on your upper trap muscles, especially if you work in an office in front of a computer. A lot of this has to do with the effects of sitting in poor posture and a lack of movement. Many people:
- Constantly lean in with forward head posture to see their computer screen
- Spend hours each day looking down at their phones and other devices
- Don’t have the most ergonomic setup at their desk
- Are inactive for longer periods of time
Each of these are physical factors that are among the most common reasons for neck pain. Tension and tightness may also develop in the upper trapezius as a result of psychological stress factors, too.
When experiencing stress consistently over a longer period of time, the body’s natural reaction is to tighten up. This creates the perfect environment for your upper traps to develop areas of the muscle that remain at least partially contracted, something more commonly referred to as a muscle knot or trigger point.
Common Ways to Relieve Tight Upper Traps
While there are many different ways to relieve tightness in the upper traps, some options may work better than others for helping your muscles to finally relax and stay relaxed for a longer period of time. Hopefully you’ll learn about something new to try and see how it works for you.
Stretches for the neck and upper traps
Performing stretches for your neck and upper traps is one of the fastest and easiest ways to get some relief from that tight feeling in your muscles. Stretching can be done whether you’re at your desk or on the go.
All you need to do is gently bend your head and neck towards the side to feel a stretch. Explore different angles that you bend your neck or rotate your head until you find a stretch that is targeting the right spot.
While stretching may feel good while you’re doing it, it does not get a tense muscle to “release” fully for a long-term effect. Think of it as a shorter-term solution that helps until that tight feeling comes back. Knots in your upper trapezius cannot be stretched away.
Self massage for the upper traps
Similar to stretching, massaging your upper trap muscles can provide some nice relief when you need it. You can massage your muscles on your own using something like a lacrosse ball or massage gun, or have it done professionally by a massage therapist.
Massaging muscles typically involves using broader, rhythmic strokes along the length of a muscle, where the goal of this is to increase circulation and more range of motion into an area to provide some relief. While self massage may be more effective than simple stretches, rubbing on a muscle knot also does not fully release it.
Apply prolonged pressure to release a trapezius knot
While stretching and massaging or rubbing your upper trap muscles can provide some relief, holding the affected area for an extended period of time tends to be much more effective in “releasing” a muscle.
This technique involves the application of direct, consistent pressure on the affected area for at least 90 seconds. At first, the pressure felt on the knotted section of muscle may be intense. After about 30 seconds, these feelings should reduce and the muscle will continue to soften, indicating that the tension is finally releasing.
You may search along the length of the upper traps for other tighter spots, looking for more areas to apply pressure. Once the muscle is released, then you may find that you have an easier time stretching and moving your head and neck through a fuller range of motion, where you’ll get a better result compared to when you only stretched it.
The Best Way to Release the Upper Trapezius
As we just discussed, the most effective way to get a trapezius knot release is by applying direct and prolonged pressure to the trigger point for 90 seconds or more. With this approach, you have a better opportunity for creating change in the pattern that the brain is choosing to hold tension in the muscle.
As you maintain the consistent pressure and take deep breaths, you help communicate to your brain that you feel safe, there is no threat, and there is no need to tense up the muscle to protect against anything. The muscle then softens, is able to receive more blood flow, and has a better opportunity to heal more quickly.
Using the Nuckle to get a trapezius knot release at home
If you are searching for an at-home method for getting rid of tight, sore upper trap muscles at home that actually works, look no further than the Nuckle.
Created by a physical therapist who has treated and resolved this issue in many patients, this innovative tool replicates the amount of pressure and angles needed to get into those muscles for an effective release. The tips of the Nuckle allow you to target the smaller, knotted sections of your muscles with precision, making it much more effective compared to other larger or rounder tools.

Keep your upper traps relaxed, improve your posture, and move more
Consider using the Nuckle as part of your weekly routine to help you continue to make progress in releasing tension in your upper traps, especially if you are someone who sits down a lot and works on a computer.
The Nuckle can also be used to release tension in your neck at the base of your skull and also around your chest and shoulders. Releasing all of these areas can help you use the proper muscles to improve your posture and reduce the stress that builds up in your upper traps.
Ensuring that all 3 of these muscles remain happy and free of tension will keep your Secondary Core functioning at its best. To make it easy for you, here’s a simple 3-step sequence we recommend you follow:
- Release the suboccipital muscles at the base of your skull.
- Release the pec minor muscles in your chest.
- Release the upper trap muscles between your neck and shoulders.
Spend at least 90-120 seconds on each muscle and feel free to explore a couple of different tighter spots within the same muscle.
Lastly, get up and move your body more. Even when sitting at your desk in “perfect posture” for 8+ hours, your muscles can still become tight. Your upper traps are constantly working to stabilize your head, neck, and shoulders as you have your arms out in front of you.
Take some breaks throughout the work day to move your body and get some motion into your head, neck, and shoulders. This should help reduce the frequency that you experience knots and pain in your upper traps.
Secondary Core
This blog post is part of the Secondary Core education where we teach you how to release tension in the muscles around the head, neck, chest, and shoulders. To learn more about our upcoming courses and certification programs, please reach out to us at hello@alethasupport.com for more information.
5 Common Signs That You Have Tight Hip Flexors
Having “tight hip flexors” is a buzzing phrase that you’ve probably heard before, whether it be while talking to a friend at the gym or a co-worker in the office.
The hip flexors, also known as the anterior hip musculature, can tighten and lack mobility. They can hugely impact your lower and upper body functioning and contribute to many different orthopedic diagnoses.
You may be wondering “are my hip flexors really tight?”
Those who can confidently answer this question probably stretch and leverage tools or other exercises to make the stretches more effective. But if you don’t know it, you’ll want to learn the potential impact that tight hip flexors can have on your body and implement the appropriate remedies before these muscles cause pain or an injury.
Why You Should Care if Your Hip Flexors Are Tight
Hip flexor tightness is extremely common, and its origin mostly comes down to lifestyle factors. The primary causes include a sedentary life where you’re seated all day, intense workout sessions or activities that use the hip flexors a lot, or compensations and muscle imbalances that developed after a prior injury.
Tight hip flexors can significantly hinder the muscles responsible for hip extension, which is when your leg and hip go behind your body (such as when walking or running). The gluteus maximus is one of these muscles that becomes inhibited by a tight hip flexor.
The glutes are very important as it relates to the function, movement, and alignment of your body. They are large and powerful muscles that provide stability for the hips and pelvis, which also supports the alignment of the lower back and knees.
When movement is lacking from the hips, the body looks to make up for this movement in other ways. Typically this comes from areas that shouldn’t have excess movement, like the lumbar spine and knees, and this could increase the risk of pain or injury.
In addition to affecting body functions, tight hip flexors can also alter a person’s posture and cause hip pain when driving or hip pain when sleeping.
Top Five Signs That You Have Tight Hip Flexors
There are several tests that can help you determine whether your hip flexors are tight or not. It’s important to note that while many people might suspect tight hip flexors are the problem, there may be other reasons contributing to the sensations they’re experiencing.
While the best option is to visit a medical practitioner for an in-person assessment, you can still find out for yourself. Here are 5 signs that indicate you have tight hip flexors (see video here).
1. Misalignment of the leg when standing
Tight hip flexors affect the alignment of the pelvis and the leg where they connect at the hip joint.
When the iliacus muscle is tight, it will pull the pelvic bone forward, thus changing how the hip bone fits into the socket and how your femur (thigh bone) and tibia (lower leg) align. This will cause the knee to rotate inwards and even hyperextend on that side.
Further down the same leg, the foot and ankle will typically rotate inward. This creates what is known as over-pronation of the foot, something that increases your chances for developing a bunion on the affected foot.
2. Tenderness when pressing into the hip flexors
You can also quickly tell how tight your hip flexors are simply by touching the spot while you are lying down. Happy muscles don’t hurt when pressed on. The hip flexors should be relaxed when you’re at rest, but this won’t be the case if you have a tight psoas and iliacus muscle. Instead, they’ll remain at least partially contracted and it may feel like your lower back is arching too much off of the ground.
So lie on your back. Place your fingers on the front of your pelvic bone, and then start moving them inwards and press down into your body. If you feel tension there, it could signify that your hip flexors are tight and causing discomfort in the region.
3. One Foot Tends to Rotate Out More Than the Other
Checking your body posture when lying down is another effective way to tell the signs of hip flexor tightness. So stay flat on the ground and relax, letting your legs and feet turn out to the sides. Look down at your feet to see their positioning. If one of your feet seems to face outward more than the other, it could signify that side of your body has a tighter hip flexor.
In addition to hip flexion, the iliacus and psoas muscles help with external rotation of the hip joint. Tension in these muscles typically also creates tightness in the piriformis muscle, another hip external rotator that is located on the back side of your hip. Together, these muscles turn the leg out when at rest when lying on your back. The foot will also turn out more in the swing phase of the affected leg when walking or running.
4. You feel a pinch in the hip joint when bringing your knee to your chest
Laying down and drawing one of your knees towards your chest can help you find out if there are any problems around your hip joint. When making this leg movement in a resting position, a pinch is a critical indicator of a tight psoas and iliacus.
Tight hip flexors cause a forward rotation of the pelvis, which effectively closes off the joint space in the hip socket. This reduces the range of motion the hip can move into flexion. As a result, you’ll get a pinch at the end. Releasing the tension in the hip flexors will diminish the pinch when re-performing this test.
5. You feel popping, clunking, or clicking in the hip when moving your leg
The final way to determine whether you have a tight hip flexor is to check for a pop or clunk during simple exercises like raising and lowering your leg (or both) as you lay on your back. This clunk typically happens when you move your hip through different ranges of motion or in circles.
A healthy hip flexor is able to contract and relax in a way that allows the hip joint to move smoothly within the hip socket. The snapping hip sensation shows that the hip flexor muscles can’t lengthen out sufficiently to glide over your moving hip joint.
Next Steps: How to Reduce Tightness in Your Hip Flexors
How did each of the 5 tests go? If any of them led to a positive test, it could be a sign that your hip flexors are tight. Having many positive tests could mean that the muscles have been tight for a longer period of time. Thus, it would be best to begin working on that as soon as possible to avoid further compensation, discomfort, and the potential for future pain or injury.
Several recommended approaches can help you reduce your hip flexor tightness. For instance, you might start by adding some hip flexor stretches into your daily routine to help improve blood flow in the region. During the day, taking breaks from long working hours to walk and move around can help.
If you find that your stretches and work breaks are more short-term and the tightness keeps coming back, it may be time to consider applying pressure to your hip flexors first, which can help make your stretches and exercises more effective.
Leveraging a hip flexor release tool such as the Hip Hook allows you to apply pressure to both your psoas and iliacus muscles in a way that lacrosse balls and other tools simply can’t. The tip of the Hip Hook mimics that of a skilled therapist’s thumb, and the tool’s ability to rotate allows you to access your hip flexor muscles from all of the best angles needed for an effective release.


Is Your Jaw Pain Being Affected by Your Posture?
Have you ever felt tightness or stiffness in your jaw? Or how about an ache that seems to radiate from your ears and across your cheeks or scalp? The cause of this TMJ pain—named for the temporomandibular jaw joint—can be a mystery.
In the past, orthodontic treatment was often the first line of treatment for anyone who experienced jaw pain. However, the medical community is split on whether a bad bite is the source of TMJ problems. Some sources say there is not enough scientific research to support the idea that misaligned teeth cause TMJ discomfort.
When most of us think of pain, we think the culprit is wherever the pain is located. If my jaw hurts, there must be a problem or abnormality with my TMJ joint or mouth. But remember that your bones and muscles all work together. The root of the problem may not be your jaw, but your posture.
TMJ jaw pain: Causes and symptoms
Before we do a deep dive into TMJ issues, let’s address some symptoms that are harmless. It’s considered normal to experience a painless “click” or a “pop” when you chew or yawn. However, if jaw movement brings on any pain or discomfort, you should take note.
A few of you out there already know the exact cause of your jaw pain. Perhaps you took an elbow to the face back in your soccer-playing days, or were in a car accident. Maybe you grind your teeth when you’re stressed out or when you sleep. Or, you were diagnosed with TMJ osteoarthritis. But for many people, it seems like this intense pain and discomfort comes out of nowhere, with no obvious explanation.
In addition to localized pain right at the TMJ joint, you may also experience an ache that spreads throughout your neck and face. Your jaw may feel stiff or even lock in place at times. And when you go to eat a triple cheeseburger, is it just your imagination or is your jaw not opening quite like it used to?
Home remedies for TMJ jaw pain
According to the National Institute of Dental and Craniofacial Research, approximately 11 to 12 million adults experience TMJ pain. It’s difficult to eat, drink or even be happy if you have jaw issues. Luckily, there are simple home remedies that can provide some relief.
If your jaw hurts, save the peanut brittle, gum chewing, and steak for another day. Give your TMJ joint a break and reach for a high protein smoothie, a bowl of oatmeal, or some pureed/mashed foods. In addition to eating soft foods, you can also alternate applying heat and ice packs to the area. And if you need to, you can take ibuprofen. Massaging or even lightly rubbing your TMJ joint can feel good, too. You can do this yourself, or ask someone to pamper you.
These home remedies will reduce your pain temporarily. But don’t be surprised if the pain returns, because you haven’t addressed the actual cause of your TMJ pain. Before you stock up on baby food and OTC pain relievers, consider how your posture affects your jaw pain.
Is poor posture and muscle tension affecting your jaw pain?
Raise your hand if you spend several hours a day looking at a computer or other device, with your shoulders rounded and your neck bent forward. No judgment here, because digital devices are a fact of life these days. And, so are the tight muscles we get from using them.
This literal pain in the neck (and jaw) is affectionately known as “tech neck.” And the cause is often tight muscles, which in turn lead to poor posture.
If you want good posture, you have to do more than walk around a room while balancing a book on your head. And yes, you can force your shoulders down and back, but the muscles won’t stay that way if there is underlying tightness.
What does your posture have to do with your jaw?
Imagine for a minute that you’ve landed on an episode of The Magic School Bus. Today, Mrs. Frizzle will take you on a tour of someone’s torso, neck, and jaw muscles. The first thing you’ll notice is that these muscles are dependent on each other. If one muscle is tight, the muscles surrounding it are affected. For example, if your pec minor muscles are tight, your shoulders will pull forward. And that creates a chain of issues all the way up your body, with your jaw being the last link, so to speak. Even the TMJ Association recognizes that these issues are “a complex medical condition” and “more than just a jaw or dental problem.”
You may find temporary relief through the home remedies we mentioned earlier. But the best way to undo those tight muscles is through prolonged pressure release.
Need a solution for TMJ jaw pain? Meet the Nuckle
The Nuckle tool was designed by a physical therapist with over 20 years of experience. It’s your effective home remedy for TMJ jaw pain, no appointment needed. Unlike ice packs and massages, the Nuckle eliminates the cause of your TMJ pain. This tool allows you to provide prolonged, direct pressure to your pec minor muscles, neck muscles, and upper trap muscles. Once the tension is released in these muscles, you’ll notice it’s much easier to stay in better posture. This can help to keep your jaw in better alignment and reduce pain.
You can also use the Nuckle to apply direct pressure to your jaw muscles (refer to the video above). Just take it easy. You should experience a “hurts so good” sensation, not intolerable pain.
Many people believe that TMJ pain will go away on its own. We’ve got a different angle. We believe that you need to do more than treat symptoms. You need to get to the root cause of your TMJ pain. Engage in some self-care and align your posture today.

Hip Hook Featured in Runner’s World
The Hip Hook was featured by Runner’s World as a tool to help runners relieve tightness and stiffness in the iliacus muscle. The iliacus (along with the psoas) is one of your main hip flexor muscles that is used constantly throughout the day, whether you’re sitting or running. See the full feature in either of the below article links.
(Note: The video at the top of the Runner’s World article is available to all, but the rest of the article is behind a paywall. If you subscribe to Apple News or Runner’s World, you’ll be able to read the full piece.)
When it comes to addressing tightness in the hip flexors or other injuries around the hip, many people think about the psoas muscle. Perhaps they aren’t even aware of the iliacus muscle or its importance as a stabilizer of the hips and pelvis with every step and stride that you take. While stretches can help relieve some tightness in the iliacus, the muscle responds best to direct pressure (especially if your hips have felt tight for a long time). Applying pressure to the iliacus for 60-90 seconds at a time can help “release” the tightness and help you feel better as you go out for your next run.
Designed by Christine Koth, a holistic physical therapist, the Hip Hook is a muscle release tool designed to address your hip flexor muscles, specifically your psoas and iliacus. When tight, these muscles can contribute to pain experienced in the lower back, hips, and knees. Using the tool for just a few minutes per day can make a big difference in how your body feels. Learn more about the Hip Hook here.
Is Foam Rolling Not Helping Your Tight Hamstrings?
Have you been suffering from tight hamstrings that don’t seem to be getting any looser? Foam rollers, stretching, and massage are the most commonly recommended treatments. However, they may provide only temporary relief.
If you’ve constantly been foam rolling or stretching your tight hamstrings with no long-term relief, it’s likely that you haven’t been addressing the root cause of the hamstring tightness to begin with. Perhaps it is time that you try to release your tight muscles using sustained, direct pressure.
Yes, the hamstrings can be released, but there are two other muscles that you should consider releasing as well to achieve the best long-term results to relieve your tight hamstrings.
Tight Hamstrings: Causes and Symptoms
The hamstrings consist of three muscles that run up the back of your thigh and include the biceps femoris, semimembranosus, and semitendinosus. The hamstrings are large, powerful muscles that help to flex the knee, extend your hip, and support your bodily movements like jumping, walking, and running.
These muscles need to be relaxed because tight hamstrings cause stiffness and limit your mobility, making your daily activities and movements more challenging. Tension in the hamstrings negatively impacts the muscles ability to contract or stretch, which can make you more susceptible to a hamstring injury (such as a hamstring strain or a hamstring tear).
Causes of Tight Hamstrings
Common causes for tight hamstrings include:
- Participating in sports or other strenuous forms of exercise that use the hamstring muscles a lot (such as running, sprinting, deadlift, etc.)
- Sitting at your desk for many hours or being inactive for a longer period of time
- Starting a new workout routine after not working out in a while
- A previous hamstring injury
- Weak or underactive glute muscles
- Overstretching your hamstrings
- Poor posture and misalignment of the pelvis
You can see that you may experience tight hamstrings whether you are someone who is active or inactive. Many of us may tend to be both because we sit all day at work and then like to workout or be active in our free time. If we don’t take care of our muscles properly and let them recover, this presents a nice opportunity for your hamstrings to become tight and stay tight.
Poor posture as a potential cause for tight hamstrings deserves its own callout because you might not have considered this in the first place. When you sit a lot, the hip flexor muscles and lower back muscles become tight because they are constantly working to help hold your body upright when sitting. This can cause the pelvis to rotate forward into an anterior pelvic tilt.
The hamstrings attach to the bottom of the pelvis and, when the pelvis is being held in an anterior posture, the hamstrings are actually longer than their ideal position. This over-lengthening of the hamstrings can create a tightness sensation at the back of the thigh and even up near your sit bones.

Common Symptoms of Tight Hamstrings
The most common complaint from someone with tight hamstrings is a feeling of stiffness and being less flexible, such as when bending down to touch your toes. The stiff feeling comes about because tight hamstrings affect your bodily movements.
Other symptoms of tight hamstrings include: cramping during exercise, tenderness in different spots throughout the muscle (such as trigger points), inflammation and pain, and possibly some swelling or bruising if there has been an injury. Tight hamstrings may even contribute to stiffness or aches and pains felt elsewhere in the body, such as the lower back, knees, and feet.
Using a Foam Roller for Tight Hamstrings
Foam rolling your tight hamstrings can have several benefits. Foam rolling may help relieve your muscle tightness, inflammation, and soreness. It also helps ease muscle pain and increase the joint range of motion. Foam rolling can even help with muscle recovery following a tough workout by lessening muscle fatigue and soreness.
What if foam rolling is not helping hamstring tightness?
If you’ve used a foam roller on your hamstrings and have found that the results were only short-term, then that’s an indicator that there is another piece of the puzzle that you have yet to uncover. The tightness in your hamstrings may actually be just a symptom of another issue. In this case, foam rolling is not a permanent or long-lasting solution for improving your tight hamstrings because it does not directly address the underlying root cause of the muscle tension in the first place.
Understand that this doesn’t mean foam rolling the hamstrings is “bad” and that you should completely avoid it. You may choose to continue to use a foam roller for short-term relief or to help get warmed up before a workout or activity, but you should also consider focusing more attention on the root cause to achieve more effective results, helping save you time and frustration from tight hamstrings.
What could be the root cause of hamstring tightness?
As we referenced earlier, an underestimated potential root cause of tight hamstrings is poor alignment of the pelvis (anterior pelvic tilt) that results from tightness in the hip flexor muscles, also known as the iliopsoas.
The iliopsoas is your body’s main hip flexor muscle and is actually made up of 2 separate muscles – the iliacus and the psoas. The iliacus muscle is connected to the pelvic bone and then blends with the psoas muscle, forming the hip flexor.
Tightness in these areas causes the anteriorly tilted position of the pelvis, which ultimately places the hamstrings in an over-lengthened state. The hamstrings become engaged in this game of “tug-of-war” and become tight to prevent the pelvis from tilting forward even more.
By foam rolling or even stretching the hamstrings in this state, you are essentially helping the hip flexors win the “tug-of-war” short-term, after which the tightness in the hamstrings returns shortly thereafter.
Releasing tight hip flexors helps relieve tight hamstrings
Because the hip flexors are short & tight and the hamstrings are long & tight, releasing tension in the psoas and iliacus muscles can help rotate the pelvis back into more of a neutral position, and this also helps the hamstring muscles return to a more optimal length. This finally puts an end to the game of “tug-of-war” and the hamstrings will function better, where they can contract (engage) and relax (lengthen) much more efficiently.
Can a foam roller be used to release the hip flexors?
No, a foam roller is not an effective tool for releasing the hip flexors. Think about the shape and size of a foam roller – it is large and bulky. Those characteristics make it best for targeting larger muscles that are at the surface of your body (like the hamstrings).
The psoas and iliacus muscles that you need to release are smaller muscles (relative to the size of the hamstrings) and are located deeper within your core and pelvis, so we’ll need to consider a foam roller alternative. You would need a different tool, one that is still tall enough to reach the muscles yet small enough to be able to change angles and press into the hip flexors with precision.
Seeing a physical therapist or massage therapist can be great because they could release these hip flexor muscles for you using their own fingers. The only potential downside is that this can become expensive if this is a recurring treatment that you need to relieve tension.
More and more self-release tools are becoming available for at-home use that you may consider. A tool like the Hip Hook is among the best hip flexor release tools because it is the only one that targets both the psoas and the iliacus muscles. It helps get into these harder-to-reach areas to provide an effective release of tension in the hip flexors, which can help reduce the tightness in your hamstrings long-term.
If you’ve been foam rolling your hamstrings and haven’t seen true results, it’s time to start addressing this potential root cause of your tight hamstring problem (your tight hip flexors) using the Hip Hook.
Untight
Aletha is committed to providing you with the tools and education to get rid of muscle tension and improve pain. Through our Learning Lab blog posts, product How To hubs, YouTube videos, as well as our upcoming courses and certification programs, learn how to live Untight. Please reach out to us at hello@alethasupport.com for more information.
How to Release Tight Hip Flexors: The Best Tools to Use
In recent years there has been increasing awareness of the importance of the hip flexor muscles and how to care for them. It feels like we learn something new about tight hip flexors and their impact on the rest of the body every other day!
There are many different tools, balls, and devices meant to help you release tightness in your hip flexors at home, all by yourself. There’s clearly a desire for muscle release tools like this, and there’s certainly a need. How can you tell which tools are best at actually releasing hip flexor muscles, though? Our guide to muscle release tools will help you get started!
Which hip flexor muscles do I need to release?
First, we need to understand which muscles we’re actually referring to when we say “hip flexors.” The main muscles that flex the hip include:
- Iliopsoas
- Rectus femoris
- Sartorius
- Tensor fascia lata (TFL)
- Pectineus
Of the hip flexors listed above, the iliopsoas is the one that stands above the rest and has the most significant potential impact on the body. Not only is the iliopsoas the body’s largest and strongest hip flexor, but it also functions as a mover or stabilizer for the lumbar spine, sacroiliac joints, pelvis, and hips. The iliopsoas is also the only muscle that connects the upper and lower body together, making it a very important muscle that has the potential to impact the alignment and function of the entire body when tight.
When it comes to releasing the iliopsoas, it’s important to note that it is actually composed of two separate muscles: the iliacus and the psoas. When releasing the hip flexors, you want to be sure to address BOTH of these muscles to achieve the most effective and longest-lasting results. Releasing one, but not the other may produce some nice relief in the short-run, but don’t be surprised when that tightness feeling comes back sooner than you’d like.
How do I release my hip flexors?
When we say the hip flexors need to be “released” what we are referring to is that the psoas and iliacus muscles are holding tension, where the muscles are remaining at least partially contracted, even when not being used (at rest). This is tension tightness – think of like a muscle knot or trigger point – cannot simply be stretched away. Stretching helps to improve motion tightness, but does not produce the neurological change in how the brain chooses to contract or relax the muscle. It simply helps the muscle stretch into a greater range of motion than it could before. The contracture of the muscle still exists, and that’s why your hip flexors may feel tight again later in the day.
The best way to get your psoas and iliacus muscles to finally relax is through the application of prolonged and consistent pressure placed directly on the muscles. The amount of time needed to feel a muscle begin to release is generally at least 30-90 seconds, but it can be longer. Precise pressure is more effective than broader pressure, as you can really zone in on those tighter areas within the muscle tissues. While broader pressure may hit a larger portion of the muscle at once, the amount of pressure being applied to any one section of the muscle is much less and therefore not as effective.
What is the best hip flexor release tool?
As someone with tight hip flexors that once experienced chronic pain because of tension in these muscles, believe me when I tell you I’ve tried every tool out there. Before I get into what the specific tools do, though, we need to understand where the iliacus and psoas are in the body, as their location affects how we access them.

Psoas – situated relatively deep within the pelvis, where you’d need to work through several inches of tissue in the belly and abdominal area; best accessed with perpendicular pressure
Iliacus – lines the inside surface of the pelvic bone (or ilium) on the sides of your pelvis, where you’d need to work through those same layers of tissue; best accessed with angular pressure
Is a lacrosse ball (or tennis ball) the best tool to release my hip flexors?
A lacrosse ball (or tennis ball) is something you might have lying around at home and perhaps you’ve already given it a try to release your hip flexors. A ball is an object that is going to apply perpendicular pressure to a muscle across a broader surface area.
Given this, a ball may be able to press into the psoas, but not the iliacus which requires angular pressure. However, because the psoas muscle is located deeper within the pelvis, the smaller ball will press into the general region but likely won’t get deep enough to provide enough pressure to the psoas muscle for an effective release.

But you can just move the ball lower…right? Not so fast…
While you may be able to put a ball that size just underneath the ASIS of the pelvis and hit a tiny sliver of the iliopsoas, in that location it is more of a tendon (no longer a muscle) where it attaches to the lesser trochanter of the femur. Tendons cannot be released in the way a muscle can. You must release the muscles that attach to the tendons to reduce the tension felt on them.
Go ahead and try it to see for yourself. While you might feel some initial benefit simply because doing something feels better than nothing (perhaps a little placebo effect), the tightness will likely come back very soon because you aren’t addressing the tightness that still exists in the rest of the psoas and iliacus muscles.
Additionally, the positioning of the ball just beneath the ASIS is beginning to approach the hip crease region (or the inguinal line). Here, there are many more nerves, blood vessels, and arteries that you’d be better off avoiding putting too much pressure on which could cause irritation, numbness, throbbing, tingling, etc.
Is a softball (or similar) the best tool to release my hip flexors?
A softball (or a similar larger ball like the Hip Release Ball) is definitely an improvement over the lacrosse ball or tennis ball. Because of the increased height of these balls, you can get through enough of the body tissue to be able to apply perpendicular pressure to the psoas muscle.
The larger surface area of the bigger ball also means that you can apply broad pressure (as opposed to precise pressure) into the general psoas region. Because of its round shape, any kind of ball will be unable to effectively target the iliacus muscle, providing minimal, broad, and indirect pressure (if any at all).
The relief felt when using a softball or another ball similar in size will be better than using a lacrosse ball or tennis ball because you can place more pressure on the psoas, but the results may be shorter-term in nature since the iliacus (the other half of the iliopsoas) remains unaddressed.
Is a foam roller the best tool to release my hip flexors?
Given the bulkiness and odd shape of a foam roller, paired with the harder-to-reach location of the psoas and iliacus muscles requiring precise and direct pressure for the best release, this is not a great option to release the iliopsoas.
Foam rollers are much more effective at applying broader pressure to larger muscles near the surface of the body. You’d be better off using your foam roller to target some of your quadriceps, hamstring, calf, and lat muscles (to name a few).
Is the Pso-Rite the best tool to release my hip flexors?
The Pso-Rite was one of the first tools specifically created to try to help people release their tight hip flexor muscles. The shape and height of the tool makes it good at applying perpendicular pressure into the psoas muscle.
The design of the two prongs provides more precise and more direct pressure when compared to a ball, making it more effective at releasing the psoas than the aforementioned lacrosse balls, softballs, etc. You can use both prongs of the Pso-Rite at the same time (assuming that its fixed width fits the anatomy of your body), or you can use one prong at a time.
While the Pso-Rite is definitely better than a ball at releasing the psoas muscle, we must remember that it is important to also release tightness in the iliacus muscle. After all, these muscles work together to perform similar functions for the hips and pelvis, so tightness in one will almost certainly affect the other.
Since the prongs of the Pso-Rite cannot angle in towards the inside surface of the ilium bone (this is where the iliacus muscle is), the iliacus muscle remains unaddressed and the hip flexor tightness may return a lot faster than we’d like it to.
Is the Hip Hook the best tool to release my hip flexors?
The Hip Hook is one of the newer tools on the market designed specifically for releasing the hip flexor muscles. Created by Christine Koth, a physical therapist who perfected manual techniques for releasing the psoas and iliacus with her own hands, the Hip Hook mimics the shape of a practitioner’s thumbs and has the ability to rotate and press into the muscles from different angles.
The height and shape of the Hip Hook makes it really good at applying perpendicular pressure into the psoas muscle when the platform of the tool is flat on the ground as you lay over it. Then, when you press down on the handle of the Hip Hook, it is able to rotate on its pivot piece and be able to apply angular pressure into the iliacus muscle on the inside surface of the pelvis. The patented design of the Hip Hook makes it the only tool capable of pressing directly into this previously inaccessible spot when using a self-release tool.
The height of the tip on the Hip Hook is around the same height as a softball, yet not as tall as the prongs on the Pso-Rite. By relaxing your core when lying over the tool, the Hip Hook is able to get deep enough to apply a firm amount of pressure to your psoas and iliacus muscles. The narrower thumb-like tip allows for greater precision and more direct pressure when compared to other tools like the Pso-Rite or any kind of ball.
With enough patience and practice using the Hip Hook, you’ll be able to maneuver it to different locations within your pelvis to get an effective release of tension in both your psoas and iliacus muscles, leading to better and longer-lasting results.
Is a massage gun the best tool to release my hip flexors?
Among the many tools out there to help relieve tight muscles, we must not leave out the massage guns. You may have heard of the Theragun or the Hypervolt, just to name a few. These tools use either vibration or percussion therapy to promote circulation to an area of the body and reduce tightness.
Both smaller muscles and larger ones can be targeted by using the interchangeable tips of different shapes and sizes that come with the massage guns. However, the best results with a massage gun are likely going to be achieved when addressing muscles that are closer to the surface of your body.
The psoas and the iliacus muscles are situated too deep within the pelvis for a massage gun to effectively reach. Additionally, the vibration and percussion that these tools use would not allow you to apply the prolonged and consistent pressure directly on the hip flexor muscles to experience the most therapeutic release of tension.
With that being said, massage guns can be super effective for use in other areas of the body. For example, they can be great for targeting muscles on the back side of the pelvis like the glutes and outer hips, or even in the lower back for the quadratus lumborum (or QL) muscles. There are many more locations that you can use the massage guns, but the glutes and lower back are areas commonly tight along with the hip flexors that the massage guns do a great job with.
The best tool to release tight hip flexors is the Hip Hook
Of all of the tools we considered above, the Hip Hook stands out above the rest. The Hip Hook checks all of the boxes when looking at what is needed for the most effective release of tension in the hip flexors.
- Tall enough to reach the psoas muscle deeper within the pelvis
- The ability to apply pressure to reach both the psoas and iliacus muscles
- Has a tip that provides direct and precise pressure to tight spots within the muscles
- Has a sturdy base when lying over the tool to provide consistent and prolonged pressure for a long enough duration for the muscle to release

Prep Like a Pro
This blog post is part of Aletha Health’s Prep Like a Pro education, where we teach you how to release muscle tension in the most important areas of the body, which leads to more effective outcomes. Learn about our Foundations for Practitioners course here or reach out to us at course@alethahealth.com if you have questions.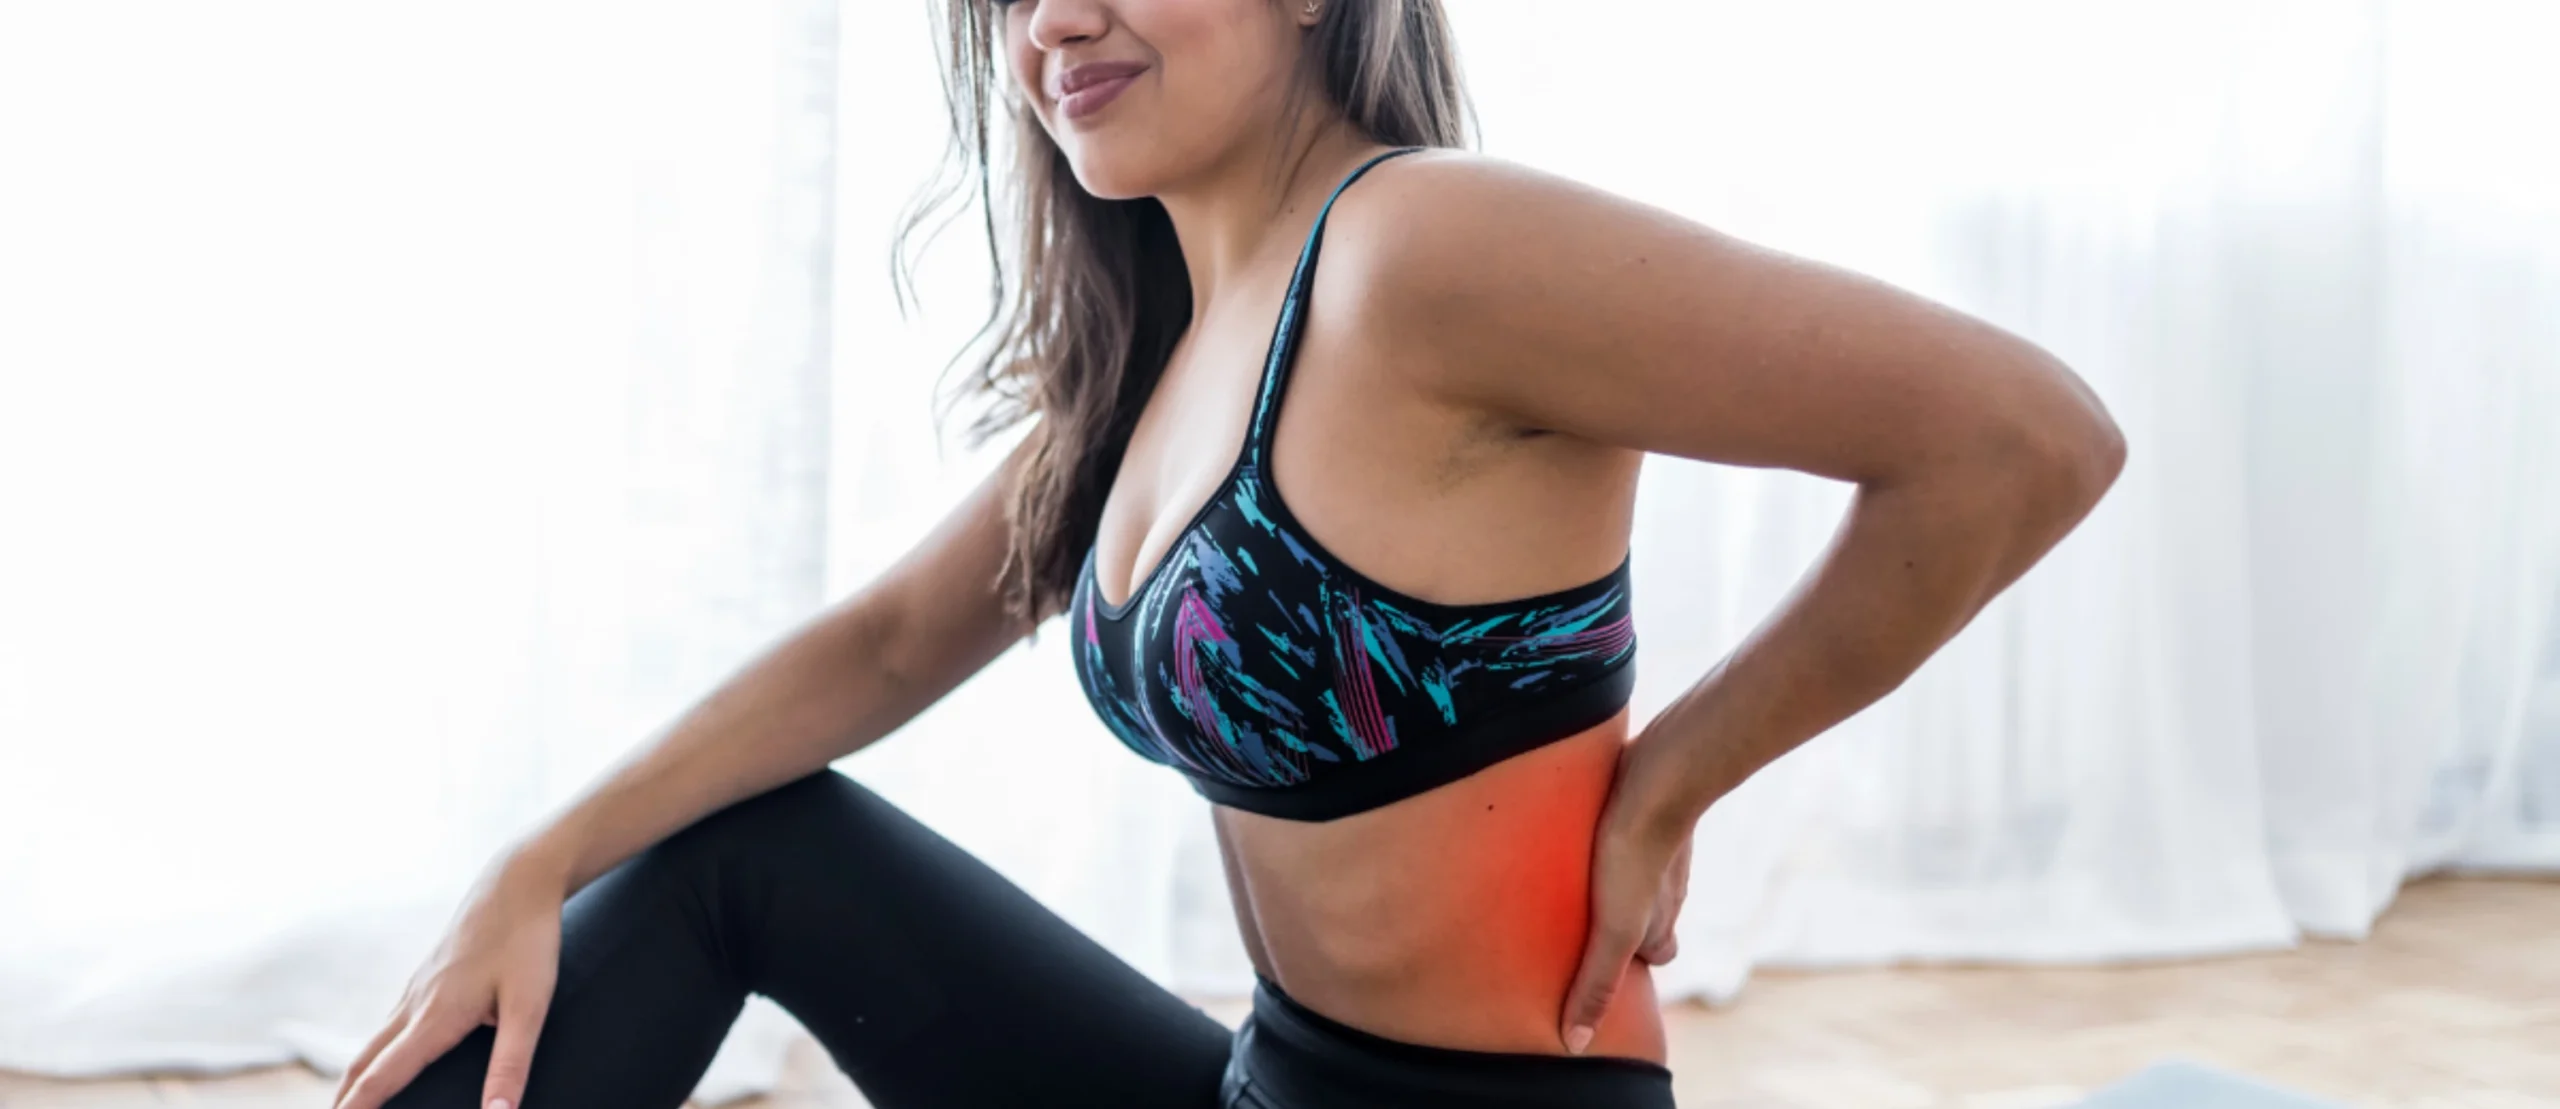
Sciatica Pain: Immediate Relief, Cure Sciatica Permanently
Is sciatica really curable? Sciatica nerve pain afflicts over 40% of the American population, lowering the quality of life. Characterized by hip and lower back pain, sciatica turns mundane tasks such as walking, sleeping, and sitting into a nightmare.
Sciatica nerve pain is a condition often results when you carry too much tension in some critical muscles in your lumbopelvic hip region (which is your lower back, pelvis, and hips). Tension in these key muscles may be the main culprit behind your sciatic nerve pain.
Targeting these muscles with specific stretches and direct, prolonged pressure helps relieve the tension. Eliminating muscle tension and restoring alignment in your body provides a permanent solution to this painful condition.
What is sciatica and what causes it?
Sciatica is nerve pain that results when the sciatic nerve is irritated or injured. Originating from the gluteal area or the buttocks, the sciatic nerve is the thickest and longest nerve in the body.
It comprises five nerve roots – two that originate from the lumbar spine and three from the sacrum. The five nerve roots merge to form a right and left sciatic nerve. The sciatic nerve extends from your hips, buttocks, and down your thigh to terminate just below the knee on each side of your body.
The nerve further branches into other nerves that run down your legs to your leg, foot, and toes. While an actual injury to this nerve is rare, sciatica often describes any pain originating from inflammation, irritation, compression, or pinching of the sciatic nerve.

People with sciatica experience mild to severe pain that mirrors the sciatic nerve path. You can experience pain anywhere from the lower back, buttocks, hips, and down one or both of your legs. Sciatica causes numbness and weakness in your legs, weak muscles in your leg and foot, and unpleasant sharp and painful tingling sensations in the lower limbs.
The type of sciatica pain you experience depends on its cause. Some patients describe it as sharp jolts of pain shooting down the leg. Others describe it as electric, burning, or stabbing. The pain is usually more severe in the legs than in the lower back.
Sciatica is not a medical condition but a symptom of an underlying spinal disorder. Common causes of sciatica include:
- Tight iliopsoas muscles
- Tight piriformis muscles
- Herniated or bulging disc
- Trauma
- Bones spurs
Since there are multiple causes of sciatica, the treatment option depends on the underlying cause.
Coping with sciatica
The pain associated with sciatica spans across the entire pain scale. It ranges from mild to severe back pain that radiates to your legs. Patients often compare severe sciatic nerve pain to being repeatedly hit with a cattle prod. Experiencing a dull throbbing pain, a burning sensation, numbness, or weakness in your legs can be highly inconvenient.
While there are many ways of coping with sciatica pain, we believe in working towards longer-term solutions. Instead of managing the pain, you can fix sciatic nerve pain by addressing the root of the problem.
Typically, inflamed or strained piriformis muscles and iliopsoas muscles are involved with your sciatic nerve pain. Releasing the tension in these muscles can help reduce the irritation and compression on the nerve and permanently fix this problem.
Will sciatica pain get better on its own?
Sciatic nerve pain requires active intervention because sciatica does NOT go away on its own. Usually, sciatica is a symptom of underlying conditions such as tight and weakened hip flexors and the piriformis muscles. It could also result from a bulging or herniated disc, trauma to the spine, or misalignment of the pelvis.
If left untreated, this condition could worsen and subject you to excruciating pain. The severity of your sciatic pain could also increase with time if you fail to address the root cause of the problem. The pain can lower your quality of life by affecting your ability to sleep, sit, or even walk.
Get better sleep, even with sciatica
People with sciatica often have trouble enjoying a whole night’s rest because their pain increases when they lay down. Lying down places additional pressure on the damaged nerve, further irritating it. The severity of the pain depends on your choice of mattress and sleeping position.
Picking an optimal sleeping condition is the fastest way to improve your ability to sleep with sciatica. First, you need to ascertain which side of your body is affected by the hip pain and avoid sleeping on that side.
You should also avoid sleeping on your stomach because it causes your back to arch toward the mattress. Sleeping with a pillow between your legs also helps to relieve sciatic pain while sleeping by allowing your hips to remain in a neutral position.
Opting for a medium-firm mattress is preferable when sleeping with sciatica pain because it improves spinal alignment. Softer mattresses enhance the curvature in your spine to compound your sciatica pain.
Sitting with sciatica pain
Prolonged sitting is a leading cause of sciatica and lower back pain because it compresses your spinal column, which increases the likelihood of a nerve injury. Still, sitting causes hip flexor tension which creates a tug-of-war between the front and back of your hip, resulting in sciatic nerve compression.
To avoid exacerbating your sciatica pain when sitting, you should avoid sitting for more than half an hour (if possible). Stand up, stretch, and walk around every 30 minutes to rest your hip flexor group and increase blood circulation to your other muscles.
3 simple hacks for sitting with sciatica
- Pick a chair that suits your body and ensure it’s set at the correct height. The best chair keeps your knees below your hips and allows your back to maintain its natural curve.
- Never sit with your legs elevated on the coffee table or an ottoman. Stretching your legs out in front of you while watching TV might seem relaxing, but it may hurt your nerves. You’re stretching all the nerves in your posterior chain in this position. Unlike muscles, nerves don’t appreciate being stretched for this long.
- Keep both your feet flat on the floor and avoid crossing them while you sit. Also, sit squarely in your chair and avoid leaning to one side.
Sciatica pain when pregnant
Sciatic nerve pain is common during pregnancy because the additional weight in your abdomen places further strain on your back and hips. The weight of your growing baby, hormone-induced hip shift, enlarging uterus, and baby’s position are leading sciatica causes in pregnancy.
These changes in your body may cause your hip flexor muscle to engage in a tug of war with the piriformis muscles in your gluteal region. An irritated piriformis muscle is often directly responsible for sciatica pain in pregnancy.
Combining gentle stretches, light exercises, and targeted muscle release is an ideal way to combat sciatic pain during pregnancy. Yoga poses such as modified child’s pose and camel pose, half pigeon, butterfly, and cat-cow effectively relieve hip pain in pregnancy.
Short term solutions to relieve sciatica pain
Short term solutions to relieve sciatica pain
Stretches, massages, and rubs offer short-term relief when dealing with sciatic nerve pain. They can soothe the muscle to increase blood circulation to give some form of relief.
Stretches for sciatica pain relief
Stretching tense muscles is a great way to relieve sciatica pain and there are a variety of helpful sciatica pain stretches to help you deal with this problem. You can also take some yoga poses and modify them to suit your flexibility needs and get pain relief from sciatica.
Figure Four Stretch
There are two variations to this effective sciatica pain stretch that targets the piriformis and other deep hip rotator muscles. You can do it while sitting or lying on the floor.
- Sitting: Sit on the edge of a chair and rest the ankle of your left leg on the knee of your right leg. Gently press the elevated knee downward for 30 seconds and take relaxed breaths. Then switch legs and repeat.
- Lying down: Lie on the floor with your legs bent at 90-degrees with your feet firmly on the ground. Place your left ankle over your right knee and then interlock your fingers behind your right leg. Gently pull the figure four towards your torso and hold for about 30 seconds and breathe. Switch legs and repeat on the other side.

Crossover Stretch
Lie flat on your back and cross the leg affected by the sciatic nerve pain over the other leg. Try to keep your upper back flat on the ground as you cross the leg over and rotate about the waist. You should feel a gentle stretch in the outside of the hip, and perhaps even the lower back too. If you feel a pinching in your hip joint or in the lower back, don’t go as far into the stretch and consider bending the knee on the leg that is crossed over the other. Hold the stretch for half a minute and remember to breathe, then switch legs.
Standing Hamstring Stretch
Tight hamstring muscles tend to pull your pelvis, increasing the stress on your lower back, which may irritate your sciatic nerve.
- Stand with your legs shoulder-width apart, then place your left leg in front of your right and ensure they’re about 3 feet apart.
- Ensure that your shoulders and hips are facing forward and are level.
- Send your hips back as you bend forward at the waist. It is okay for the knee on the back leg to bend, but the front leg should remain straight. Feel free to reach your arms forwards towards the toes on the front leg to intensify the stretch, but do not let the lower back round. Keeping the back straight helps keep the stretch more isolated to the hamstrings on the back of the front leg.
- Hold the stretch for 15 to 30 seconds and repeat with the other leg.
- Aim for 3 to 5 sets on each leg.
Will stretching cure sciatica permanently?
No. Stretching is typically the go-to solution when looking to relieve sciatica pain, but it’s not the most effective solution for long-term results. If you have sciatica pain caused by tight muscles, it’s likely that there is built-up tension (such as muscle knots or trigger points) that developed over a longer period of time that is contributing to the issue.
While stretching helps to lengthen the muscles leading to improved range of motion, blood circulation, and muscle repair, stretching a knotted muscle elongates the muscles but does not relieve the tension. Typically, the muscle will remain contracted and return to its original length and state of feeling tense soon after you stop stretching it.
Similarly, rubbing or massaging a knotted muscle produces short-term relief. Like stretching, massaging a tense muscle improves blood circulation and pliability, but doesn’t directly address the tension being held in certain spots within the muscle. The muscle fibers will elongate slightly but revert to their contracted state after you stop manipulating the muscle.
While you’re guaranteed to feel good when massaging, rubbing, or stretching a muscle, these benefits are typically more short-term in nature because these manipulations do little to release the tight and contracted areas of your muscles. Finding these contracted areas and holding prolonged pressure on the muscle knot to produce a “good hurt” is the most effective way to release tense muscles and improve sciatica pain.
How to get rid of sciatica for good
A sound understanding of sciatica is critical to combating pain. The condition results when the muscles in your lumbopelvic hip region carry too much tension, which negatively impacts the alignment of your body, increases tension on the discs and joints, and pinches on or creates compression around the sciatic nerve.
If muscle tension, poor alignment, and increased compression on the nerves is what causes sciatica to develop in the first place, then we must undo and improve each of those things to get rid of the sciatic pain for good. As was discussed previously, tightness in both the iliopsoas and piriformis muscles typically has something to do with the development of chronic back pain and sciatica.
Releasing muscle tension to relieve pain
The best way to eliminate muscle tension is to “release” it. This is achieved by the application of prolonged pressure to the muscle for at least 90 seconds (or longer). Sustained, consistent pressure is most effective because it engages the brain in a different way.
During the first 30 seconds, pressing into the muscles might feel sensitive or uncomfortable. As you continue to take deep breaths and relax, the brain begins to realize that it is holding tension and that releasing the muscle poses no danger to your body. As you approach 60 to 90 seconds (or more), the brain will instruct your muscles to relax and stop contracting as much, and the tension you previously felt will begin to fade away.
For the best results, we recommend following this 3-step process (outlined below) to help release tension in the muscles on both the front and back sides of your pelvis and also perform a realignment exercise.
This process, when performed with consistency, helps to reduce the tightness in your muscles, decrease compression on the joints and discs, and improve the alignment of the spine and pelvis to ultimately reduce irritation of the sciatic nerve and get rid of your pain.
Performing these steps will also put your body into a better position to begin adding in other corrective exercises to help strengthen and stabilize around your lower back, pelvis, hips, and core to make your sciatica pain a thing of the past.
Step 1: Release tension in the iliopsoas to relieve sciatica pain
The iliopsoas muscle is your body’s main hip flexor muscle and attaches to the lower back, pelvis, and hips. A tight iliopsoas can create a misalignment of the pelvis, causing the lower back to arch too much. This poor position of the lumbar spine combined with the tightness in the iliopsoas creates a lot of downward pressure on the discs and joints in the lower back, which may play a role with a pinched nerve or a disc injury that presses on the sciatic nerve and causes pain.
The iliopsoas muscle is actually composed of 2 separate muscles that lie deeper within the pelvic region. The psoas muscle is several inches deep within the abdominal area and is best accessed by applying perpendicular pressure (straight up and down) as you lie over a tool to help release this muscle. The iliacus muscle is a little bit hidden, tucked away on the inside surface of the pelvic bone. Because of this, you can’t access it with a tool that goes straight up and down – you need a tool that can curve in there at an angle to press directly on the iliacus.
Many people think that using a lacrosse ball can get the job done. In reality, it is too small to reach the psoas muscle. You would need a larger massage ball of about 4” in diameter to press into the psoas, but even that has its limitations. The round shape and size of the ball won’t allow it to apply direct and precise pressure to the iliacus muscle, no matter how close to the pelvic bone you try to force it in there. Releasing the psoas and not the iliacus is another method (like stretching) that falls under the category of shorter-term relief.
Addressing BOTH the psoas and iliacus muscles is going to yield the best and most effective results when it comes to releasing tension in your hip flexors to make the longest-lasting impact. Seeing a trained professional (like a physical therapist or massage therapist) who has worked on these muscles and understands their importance is likely the best option. But if you’re looking for the best tool to use for sciatica pain relief that you can use on your own, then the Mark (Hip Hook) is going to be what you’re looking for.
The Mark is a patented tool designed by a physical therapist to replicate the skillful touch of a trained professional. When you first position the tool with the platform flat on the ground, the tip is able to apply perpendicular pressure to your psoas muscle. Then when you press down on the handle, the tip of the Mark rotates and is able to apply angular pressure to your iliacus muscle. The Mark empowers you to release both of these important hip flexor muscles and deliver the right amount of pressure at the right angles to experience the best release of tension.
Step 2: Release Tension in the Piriformis to Relieve Sciatica Pain
We’ve already discussed how the hip flexors and the piriformis muscles like to play tug of war with each other. After releasing the psoas and iliacus on the front side of the pelvis, you would then address the back side of the pelvis by releasing the piriformis muscles, as they could still be tight and compressing on the sciatic nerve.
Although the piriformis lies deeper within the gluteal region, releasing this muscle is easier than what we just did in the first step. With a ball or a foam roller (or maybe some other type of tool), you can release muscle tension in the piriformis muscle to target sciatica trigger points, decrease compression around the sciatic nerve, and eliminate the pain.
Roll the ball or foam roller along the length of the piriformis muscle to find the sore spots. Once you find a knotted spot, hold the pressure on that spot and apply pressure for 90 seconds. Breathe in and out normally and feel the muscle relax as you release the pressure. Repeat the process on other parts of the body that feel tight and sore.

Step 3: Realign the pelvis to relieve sciatica pain
When you have had tension in the muscles around your pelvis, there may be a higher likelihood that a pelvic misalignment could also be playing a role in your sciatica pain. When releasing your muscles in Steps 1 & 2, you may find that one side is tighter than the other and this could be creating a twist in your pelvis. If you are someone that typically only has sciatica down one leg, then there is likely one side of your pelvis that is rotated forward more than the other
Follow the tips in the video linked here to learn more about how you may be able to determine which side of your pelvis is rotated with the Supine to Sit Test. The embedded video below will take you through the pelvic realignment exercise that you will perform on the “shorter” leg that you determined just before.
After performing these 3 steps, you now have the pelvis in a better alignment where the surrounding muscles are also more relaxed. If you just performed them, hopefully you are feeling pretty good, too! Feel free to add in any other corrective exercises with a loop band you want to help strengthen and stabilize your hips, core, and pelvis in this improved position. Now would be the perfect time to do so!
It is important to understand that doing these 3 steps just one time is not going to fix your sciatica pain permanently. Your muscles have likely been tighter for a longer period of time and continue to have a certain “muscle memory” that could later cause your muscles to tighten (as you sit or move around with your other daily activities) and pull your pelvis back out of alignment.
Instead, it will be through a consistent routine of releasing tight muscles, realigning your pelvis, and strengthening the weaker muscles that helps to “undo” the old muscle memory that once caused you sciatica pain and establish a better way for your muscles to function and support your body and ultimately relieve your sciatica pain permanently.
Frequently asked questions about sciatica pain
What causes sciatica pain?
Sciatica pain is the painful condition that results when the sciatic nerve, the longest nerve in the body, becomes inflamed, compressed, or irritated. The condition results when the key hip muscle carries too much tension and changes how they function.
How does stretching, massage, and exercise help sciatica?
Stretches, massages, and exercises are great ways to address tight muscles. They help improve blood circulation, elongate short muscles, and increase its range of motion. However, these popular muscle relaxation methods do little to relieve muscle tension. Their effects wear out after a while, and the muscle resumes its original tense state.
What’s the best way to get rid of sciatica for good?
Pressure release is the best way to get rid of sciatica pain for good. Applying direct, prolonged pressure on the muscle knots in your hip muscles for 30 to 90 produces permanent results. Using specialty tools such as the Hip Hook produces the best effect than a tennis ball or a foam roller. A hip hook actively targets the iliacus muscle and lets you deliver just the right amount of pressure to permanently cure your sciatica.

