Your cart is currently empty!
Category: Pain

Podcast: Hip Flexor Health with Christine Koth, MPT
Christine Koth was recently featured on the AtoZ Running Podcast with Andi and Zach discussing how the hip flexor muscles work and how to keep them healthy.
Podcast notes: Christine and AtoZ hosts Andi and Zach dive into why runners often have hip flexor issues and what we can do about it. Holistic licensed physical therapist Christine Koth, author of Tight Hip, Twisted Core and inventor of the Mark (formerly the Hip Hook) discusses how those hip flexor muscles work and how to keep them healthy.
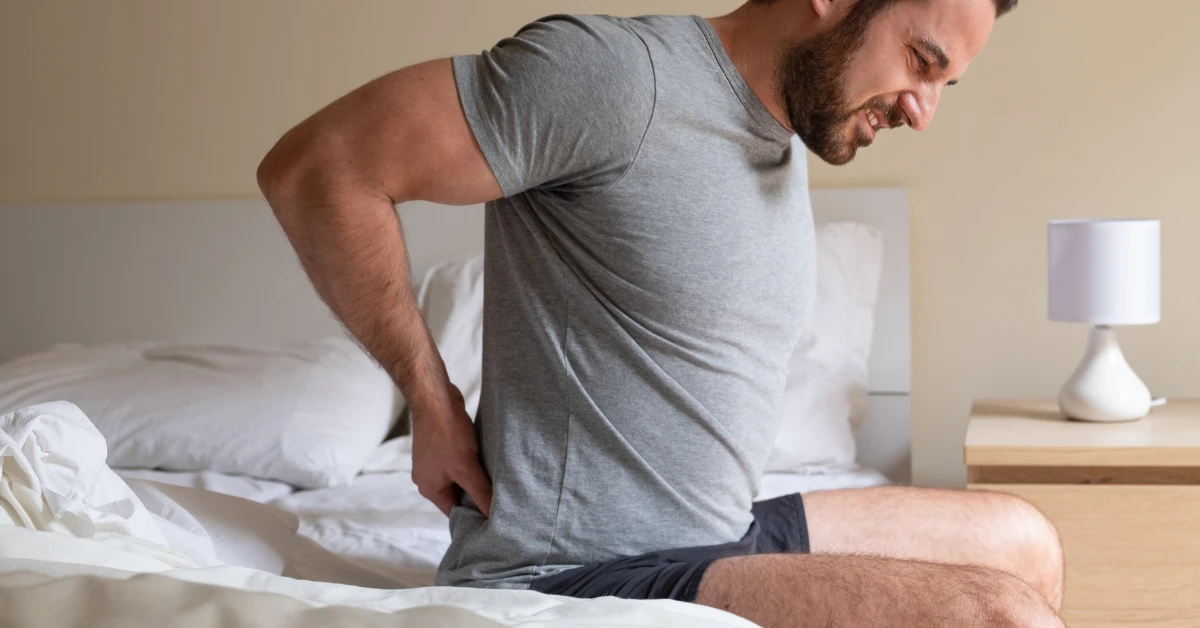
How to Sleep Better with Low Back Pain
Due to its complexity and how much your body depends on it, it’s no surprise that the lower back is the top hotspot for pain that may deprive you of a good night’s sleep. Research indicates that eight out of ten people experience back pain in their lifetime, and lower back pain is one of the most common reasons people visit the doctor.
Back pain ranges from short-lived to long-lasting and severe, and if you experience pain, you’re likely to experience poor sleep. Lower back pain makes it harder to find a comfortable sleeping position and get a good night’s sleep. But, how do you eliminate back pain for better sleep?
Understanding the link between lower back pain and sleep offers various approaches to finding relief and quality sleep. So, if you’re having trouble sleeping due to lower back pain, check out these tips that will help you ease pain and make your sleep much better.
3 Tips to Sleep Better With Low Back Pain
Not getting enough sleep, or getting poor quality sleep, generally makes you more sensitive to body pain. Quality sleep helps reduce lower back pain, and having a good mattress, adopting stretches, as well as knowing which sleeping positions to be in can help you cope with lower back pain. Bear in mind that these tips might be more temporary fixes that will help you manage your lower back pain before you eliminate the true root cause.
Find the Right Sleeping Position: How to Sleep With Lower Back Pain and Sciatica
The link between lower back pain and sleep can be tied to how your sleeping position interferes with spinal alignment. If you adopt sleeping positions that involve putting pressure on or twisting your lumbar spine, you’re likely to experience stiffness and pain in your lower back. It’s best to find a perfect sleeping position that’s comfortable for you. Try these sleeping positions to make your sleeping much more effortless.
Try sleeping on your side, place a pillow between your knees, and partially bend your knees towards your chest. Slightly bending your knees will help balance your body and reduce pressure or stress on your lumbar spine. Adding a pillow between your knees makes this sleeping position more comfortable, improves the alignment of your hips and pelvis, and can reduce pressure on nerves, thereby helping to relieve sciatica pain while sleeping.
If you’re a back sleeper, consider using a pillow under your knees or legs for support. You can also roll up a towel and place it under your lower back to support your natural spine curve and reduce pressure on the joints and discs in the lumbar spine.
If you’re a stomach sleeper, consider a thin pillow for your head, and use a more supportive pillow for your abdomen and hips. This way, you’ll prevent your lower back from obtaining a U-shape that disorients your spine from its original alignment. However, if you can avoid sleeping on your stomach, please do so because the position exerts more strain on the lower back (possibly contributing to SI joint pain when sleeping) and can also cause neck pain.
Consider a Mattress That Helps Relieve Your Lower Back Pain
The choice of your mattress plays a crucial role in reducing or even preventing lower back pain. A mattress in good condition helps support the body and ensures proper spinal alignment for a good night’s sleep. A medium-firm mattress improves pain among patients with chronic low back pain. Even though research recommends a medium-firm mattress to manage pain in the lower back, the appropriate firmness of a mattress generally depends on each person’s body type and preferences. For instance, body weight, sleeping position, and your comfort preferences will determine the kind of mattress that will work best for you.
Experts indicate that you need to evaluate your mattress every six to eight years. Consider changing your optimal support and comfort to help you improve your lower back pain. And if your budget allows, don’t be afraid to test a few mattress options to find what works best for you. Ensure that the mattress you choose supports you well and maintains your spine position.
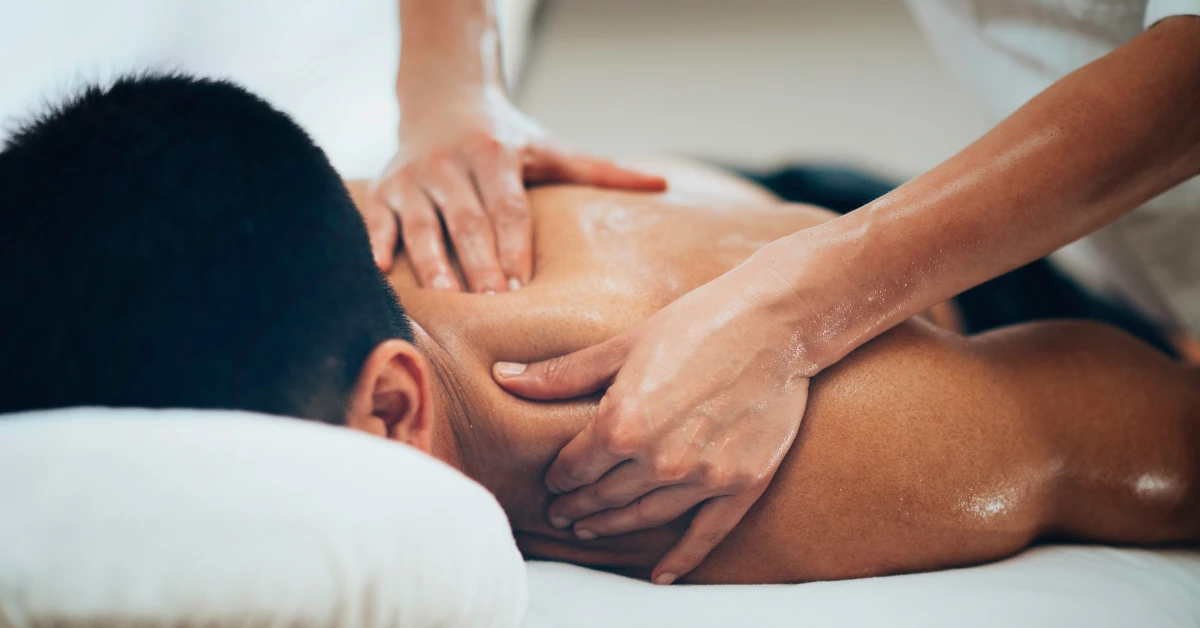
Try Stretching and Massage to Ease Lower Back Pain
Back pain disrupts the ability to sleep well, which generally affects your daily activities and productivity. Poor sleep also exacerbates pain symptoms and contributes to other health issues like diabetes and weight gain. Back pain can also be linked to tension and stress, and incorporating stretching or yoga helps reduce lower back pain, relieve stress, and helps you sleep better. Massages, on the other hand, help loosen your muscles to ease the pain. All these practices will help you stretch your muscles, lift your mood, and help you relax to ensure you properly manage your lower back pain.
Confirm with a professional on safe poses that will help you reduce the pain rather than make your back pain worse. Practicing stretches or yoga under an expert instructor will also ensure you practice the poses and breathe correctly – which is the secret behind relaxation. For more detailed information about stretching, check out the Tight Hip Twisted Core, which clearly demonstrates helpful information about stretching and muscle release. In the book, you’ll be able to understand how muscle knots develop, and how you can handle them to reduce pain.
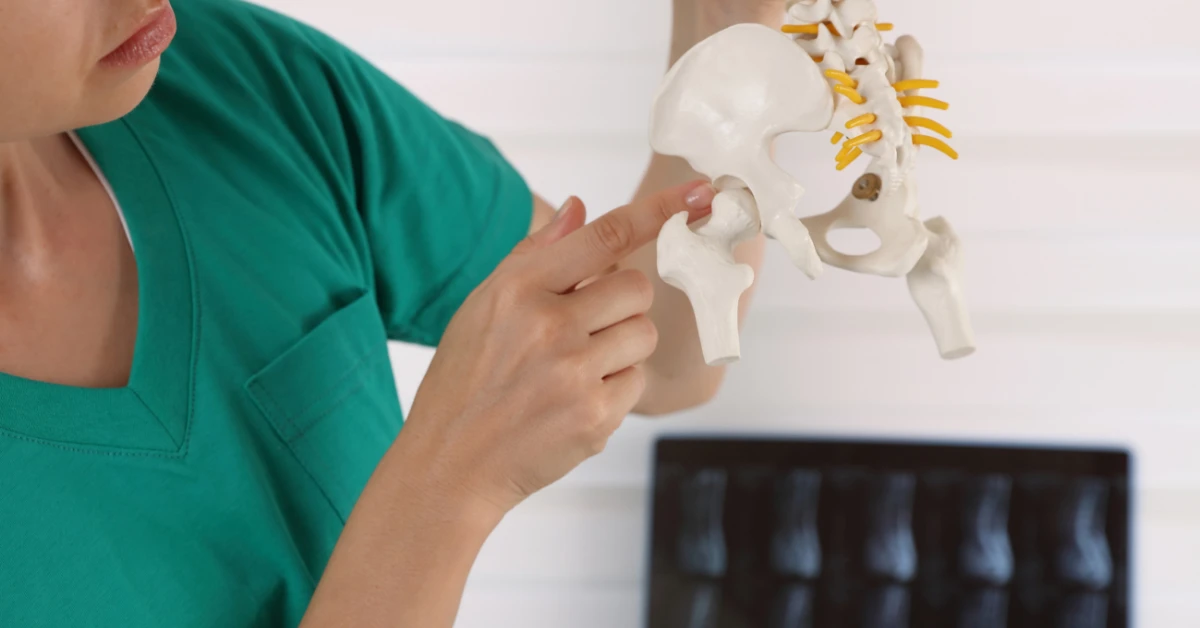
Release Muscles to Solve Low Back Pain for Good
Chronic lower back pain is a common and frustrating problem. According to a study conducted by the CDC, approximately 39% of adults in the US experienced back pain during that year. Some of the problems people encounter include nerve pain due to knotted and tensed muscles, posture problems due to tight muscles, and lower back pain from tightness in the hips. Even though working on your posture or sleeping position, getting a good mattress, and doing stretches help ease your lower back pain, all these are temporary fixes. If you can’t sleep due to lower back pain and are looking to solve the problem for good, you need to eliminate the root cause, often chronically tight muscles.
So, do you want to eliminate back pain for better sleep? The secret to your problem may be the Hip Hook. The Hip Hook tool is an excellent solution to releasing chronically tight muscles to eliminate the pain at its source. The device is specifically designed to release or relieve tension in your iliacus and psoas, two of your hip flexor muscles (together known as the iliopsoas muscles) that connect to your lower back, hips, and pelvis.
The unique design of the tool allows you to apply precise perpendicular and angular pressure to the otherwise hard-to-reach psoas and iliacus muscles in a similar way that an experienced practitioner could work on your body. Therefore, using your Hip Hook for a few minutes each day helps you release tension, realign your pelvis and spine, and eliminate your back pain.
FAQs About Sleeping Better With Low Back Pain
What Causes Low Back Pain at Night?
Low back pain at night indicates a potential problem with the spine. Low back pain at night can be caused by problems with your spine, chronically tight muscles, fractures, or sprains. However, if you wake up each morning with low back pain, the problem might be your sleeping posture or using an unsupportive mattress. Other causes of low back pain at night include doing too much exercise without adequate recovery or getting out of your bed improperly.
How Can I Sleep Better With Low Back Pain?
The best way to sleep better with lower back pain is by finding the proper sleeping position. For instance, when sleeping on your side, try a slight bend in the knees with a pillow between the knees. By making some simple changes in your normal sleeping posture, you can eliminate strain from your lower back and spine.
In addition to your sleeping position, choosing the right mattress will help you sleep better with lower back pain. When selecting a mattress, avoid mattresses that are too hard or too soft. The hard mattresses are too stiff and may worsen the pain. On the other hand, the softer mattress may seem more comfortable but provides less support. For instance, the sinking of a softer mattress may hold your spine in an arched position.
Lastly, consider a foam mattress topper to provide additional support if you have a spring mattress. You can also opt to place a plywood board under your soft mattress to increase firmness. These are the main ways to help you sleep better if you have lower back pain.
What’s the Best Way to Get Rid of Low Back Pain?
Low back pain can affect your sleep as well as your daily routine, and disrupting or not having the ability to have quality sleep makes everything worse. Even though you can incorporate tips to ease your pain, having a solid solution is essential. The best way to get rid of lower back pain is by tackling the root cause of the pain. You can achieve long-term pain relief through using the Hip Hook, a tool that’s specifically designed to release tension in your iliopsoas muscles, which are often the main cause of lower back pain.

How to Get Long-Term Relief for Sciatica Pain in Your Leg
With the world becoming more and more digital and people’s daily habits changing as a result, new types of health ailments are popping up all over. You might be thinking that no one can relate to your intense back pain, but it’s actually the opposite! Plenty of people (especially those who do sitting jobs) deal with physical ailments like back pain, sciatica, SI joint pain, and more. The sad thing is the majority of them think that long-term relief for their pain is impossible.
Sciatica pain is a common ailment characterized by a tingling or shooting pain feeling from the lower back or glute down the back of the leg, right where the sciatic nerve is. Getting immediate relief for sciatica pain isn’t easy, and if you overlook its underlying cause – chronically tight muscles – it’s going to be quite hard. To help you out, we’ve curated a simple guide that will help you to get long-term relief from sciatica pain in your leg.
What causes sciatica pain in the legs?
When the sciatic nerve gets pinched it leads to intense pain running from the back and going to your legs. Knowing the underlying cause behind your intense pain will help you treat the symptoms effectively.
- Disc injuries – If you’ve experienced slipped discs in the past, it can cause increased compression of your nerves. When a herniated or bulging disc happens, it might press on the sciatic nerve, and result in sciatica pain down the legs.
- Degenerative disk disease – A disease in which the disks wear out, and ultimately their height gets shortened. As these nerves leave the spine, the vertebrae pinch the nerve roots and this can cause sciatica pain.
- Spinal stenosis – A narrowing of the spinal canal, which can compress part of the sciatic nerve and lead to pain down the leg.
- Spondylolisthesis – A spinal condition where one vertebra slips forward over the vertebrae beneath it, which can pinch the sciatic nerve can create pain down the leg.
- Piriformis syndrome – This muscle deeper in the glute and pelvis area can compress the sciatic nerve, especially if they are tight from chronic over- or under-use, or if the alignment of your pelvis is off.
Self-massage, exercises, and stretches for sciatica nerve pain
If you’re experiencing sciatic nerve pain due to chronically tight muscles, your first step should be to ease the tightness. Relieving the compression being placed upon the sciatic nerve will help you get immediate relief for sciatica pain. Here we’ve listed a few easy ways to help you get relief from pain, including exercises, stretches, and self-massage techniques that target the piriformis and other muscles that can cause sciatica.
Self-massage for sciatica pain using a ball or foam roller
Take a ball and place it near the center of your glute on the back side of your pelvis. This should be in the general area of your piriformis muscle, which runs from the sacrum to the top border of the greater trochanter of the femur. Lay your bodyweight over the ball and search for a tighter spot.
Once you find one of these tighter spots, remain still and maintain pressure with the ball in that spot for at least 30-90 seconds until you feel the tension fading away. If the placement of the ball causes an increase in the sciatic pain, there is a chance you may be pressing directly on the sciatic nerve. Simply move the ball to a slightly different spot to avoid direct pressure on the nerve.
You may continue to move the ball slightly along the length of the piriformis muscle, searching for additional tight spots to apply pressure to release tension (again, holding for 30-90 seconds in each tight spot). You can also use the ball on the other side of the pelvis, searching for more tightness or muscle imbalances that may be contributing to your sciatica pain.
A lacrosse ball or tennis ball may be something you can try; however, a larger ball that also has a little more “give” to it (such as the Hip Release Ball) when you lay over it might feel better and also provide the level of pressure needed to effectively release the piriformis muscle. Using a foam roller is another possible option. Try them all and find what works best for you!

Reclining pigeon pose
This is one of the best piriformis stretches to get rid of sciatica pain. This will help you relieve those tight muscles to get relief from long-term sciatica pain in the leg.
- Lay flat on your back on the floor or yoga mat.
- Bend one of your legs, sliding one heel towards your buttocks.
- Lift your other leg and cross your ankle over your knee on the bent leg. This is the leg that we’ll be stretching the piriformis muscle.
- Wrap your fingers to grab the back of the thigh (or your hamstring) on the bent leg, just behind the knee.
- Gently pull both legs towards your body. Don’t force it.
- You should feel a gentle stretch on the back side of your hip in the glute. This is where the piriformis muscle is. You may also feel a stretch on the outside of your hip. This is good!
- Hold for a minimum of 30 seconds. Relax and take some deep, relaxing breaths.
- Switch legs and repeat the process. Do 3-5 reps on each side, alternating.
Knee to the opposite shoulder stretch
This is another exercise that will help you to stretch your tight piriformis muscles. Follow the below-mentioned steps and get started with getting rid of sciatica pain.
- Lay on the floor with your back straight.
- Keep your legs outstretched and toes up.
- Lift your right leg and then bend at the knee, placing your heel on the ground.
- Use your hands to grasp your knee.
- Pull your right leg towards your left shoulder without lifting your back.
- Maintain the position for 30 seconds. Relax and take some deep, relaxing breaths.
- Repeat the process with the other leg. Do 3-5 reps on each side, alternating.
You may try some other piriformis stretches for sciatica, too. Continue these exercises and self-massage techniques to get relief for sciatica pain. If you don’t get the best results from the DIY methods, it is best to seek professional help.
Muscle release for long-term sciatica leg pain relief
The above methods may only offer temporary relief from sciatica caused by muscle tightness and postural issues. To make sure the pain goes away, releasing both your tight piriformis AND tight hip flexor muscles may be the key for long-term sciatica relief.
You might be thinking “But the hip flexors are on the front side of the body. How does that impact the sciatic nerve and cause sciatica pain down the leg?” That is a great question, and here’s why.
When the hip flexor muscles (like the psoas and iliacus) become tight from too much sitting, overuse in sports or activities, from prior injuries, and more they tip the pelvis forward into an anterior pelvic tilt. This can compress the discs and joints in the lower back and potentially pinch on a nerve.
Additionally, this anteriorly tilted position of the pelvis lengthens the muscles on the back side of your pelvis (such as the glutes and hamstrings), making them more difficult to engage properly. When these larger muscles are not activating well enough, the much smaller piriformis muscle tries to pick up the slack. As you may imagine, the piriformis is quickly overworked and tightens up to where it may compress upon the sciatic nerve.
In this scenario, releasing only the piriformis might help in the short-term, but there is the potential for it to tighten back up again if the hip flexor muscles are not addressed. Since they are on opposite sides of the pelvis, these piriformis muscles like to play a game of tug of war with the hip flexors.
Make your pelvis and your sciatic nerve happiest by releasing BOTH the hip flexors (your psoas and iliacus) and your piriformis.
What are the best muscle release tools for sciatica pain relief?
When done well, releasing tight muscles is a precise process that produces very good, very real, and longer-lasting results for sciatica pain relief.
As we discussed earlier, something like a lacrosse ball or foam roller may be sufficient to help find muscle tension in the piriformis muscles and effectively release it. While it would be super convenient if those tools could also target and release the hip flexors, sadly that isn’t the case. But we have a recommendation for you!
You can’t just pick up any old household object and expect it to release your hip flexors to help provide sciatica relief. Items like tennis balls, lacrosse balls, and foam rollers lack the precision needed to reach the iliacus and psoas muscles that are deeper within your pelvis – both of which contribute to many different postural and sciatica-related problems.
The Hip Hook is a patented tool that is designed specifically to release those hard-to-reach psoas and iliacus muscles (aka your hip flexors). When paired with releasing and stretching the piriformis muscle, this is a great muscle release tool to help get rid of sciatica leg pain for good. Not only was it designed by an experienced physical therapist of 20+ years, but over 50,000 people have already used it to alleviate their pain.

Frequently asked questions about sciatica pain in the legs
How do you relieve sciatic pain in your legs?
To relieve sciatic pain, we must determine the root cause of the issue that is pressing on the sciatic nerve and causing the nerve pain down your legs. The issue may be a pinched nerve or a disc injury in the lower, or it could be from a tight piriformis muscle compressing the sciatic nerve that runs right through this muscle.
Using a combination of stretches, self-massages, or muscle release techniques can be used to target the tighter muscles responsible for causing these structural or muscular issues that are contributing to the sciatica pain going down your leg.
What triggers sciatica pain?
Sciatica is triggered by compression of the sciatic nerve, which runs through your lower back and backside of the pelvis before it travels all the way down your leg to the feet. Compression on the sciatic nerve can be from a structural misalignment of the spine or pelvis, a disc injury that is protruding into the spinal canal and pressing on the nerve, or a tight muscle that is compressing the nerve.
How long does sciatica leg pain last?
Sciatica pain down the leg can last for a shorter period of time (weeks) or can last for a longer period of time (months or years). In most cases, sciatica pain can be improved by addressing the tighter muscles in the lower back, pelvis, and hip region that are compressing the sciatic nerve and/or holding the body out of good alignment, which can also irritate the sciatic nerve. In more severe cases, surgical intervention may be needed to help alleviate the pain.
How to Give Yourself an Amazing Shoulder Massage
In a world where we never remember to turn off notifications and the news channels take pride in a 24-hour cycle of uninterrupted updates, we can find it very hard to switch off, breathe properly, and reset our minds.
It should be no surprise, then, that our shoulders feel the same way.
Knots in the levator scapula (a muscle that allows our shoulders to shrug) form when they don’t properly turn off either. Worst of all, knots we thought we’d gotten rid of have a nasty habit of coming back when we least wanted it.
You see, muscles just do the work that our brains ask them to do. Their functions are quite binary. Switch them on (contract the muscle) and it allows motion and movement of the bones that they’re attached to. Then, when you don’t need movement in that area anymore, switch them back off again (loosen the muscle) and motion will only happen through external forces (usually gravity).
No (shoulder) muscle is an island
Our neck, shoulder, back, and hip muscles are lined up in a complex order to allow movement in all the different angles that human beings can shape themselves into. When you think about the range of movement we have compared to any machine, it’s quite remarkable how we’re still so far ahead. You can thank your muscles and joints for that one.
But when your shoulder muscles are tight, that range of motion is limited. So knowing how to give a good shoulder massage and having the best shoulder massage techniques suddenly become a hot commodity.
But any complex system comes with unwanted complications and muscle knots are not part of the plan when it comes to motion. They add unwanted pressure to delicate areas (for example, the base of your skull where your brain stem lives) and restrict the range of motion in your muscles and joints (like reaching overhead with your shoulder and arm). They can obstruct clean circulation and can cause discomfort.
What is a shoulder muscle knot?
Shoulder muscle knots are parts of the muscle that didn’t hear the signal to stop working. These fibers have remained “switched on.” And, well, that’s because they assumed that (given how much they were in use), they’re hardly worth powering down for a rest.
Perhaps you can relate if you find it difficult to take time in your day for a moment for yourself. You feel like you have the weight of the world on your shoulders and you don’t want to fall behind by slowing down.
Your muscles are just doing the same thing. And this often causes shoulder tightness and pain that leads to issues in other parts of your body.

Shoulder massage vs shoulder stretches
So, how do we find time for ourselves and time to power down our overworked and underpaid muscles?
How often should you get a massage?
Is a shoulder massage better than stretching?
Well, stretching is going to be a good place to start – and should be a part of your shoulder pain prevention routine.
Stretching aids circulation and tries to break the rut of a muscle being stuck all in one place. It also gives it a break. A common misconception that many of us have is that stretching is using the muscles when actually it’s the opposite.
Contracted muscles don’t stretch. And that is why we recommend a gentle self-shoulder massage and muscle release if the shoulder tightness and pain have already started.
We do have some handy exercises and stretches for tight shoulders, but for a stronger dose of lasting shoulder pain relief, we should think about a more hands-on approach.
The benefits of a shoulder massage
Massage.
Good for body, mind, and human connectivity (if you make it a social activity). Our bodies love touch, even though we are sometimes a little too shy to admit it. And a shoulder massage – coupled with the best shoulder massage techniques – is going to go deep into those overworked muscles to knead out those nasty knots.
Let’s say you’ve taken a moment for yourself and are looking for some shoulder massage relief. With the shoulders and neck being on your back and out of our field of vision, this can be a little tricky to get into. It also doesn’t help that our range of movement for our arms and hands is much more limited here.
How to give a good shoulder massage to yourself
Thankfully, we can all reach over our opposite shoulders to find the muscle on the top of the shoulder (called the upper trapezius). And that means we can all learn how to give a good shoulder massage that relieves shoulder tension and pain.
So let’s get started:
- Take whichever one of your fingers (or a combo of 2) that feels strongest – often your middle and pointer finger – and move down the top inside corner of your shoulder blade.
- Work in small circles on the muscle at the top of your shoulder (fancy name: levator scapulae).
- Take note of any knots that have formed, and put concentrated pressure on those specific areas for up to one minute.
- Mindfully inhale and exhale throughout the shoulder massage.
The aim is to relax and manually override any tightness that’s accumulated from day-to-day activities, sports, injuries, and more.
Middle finger to the world: massaging your neck
The best shoulder massage doesn’t stop at the upper traps and levator scapulae muscles. Those same fingers can also work their way up the sides of the neck and get near the base of your skull to work on your suboccipitals.
The suboccipitals are the small muscles that extend from the base of your skull to the top of your neck (attaching to the C1-C2 vertebra in your cervical spine). And they’re probably going to feel tense if you haven’t been stretching recently, but they’re also potentially the cause of those tension headaches that have been ruining your afternoons.

Your secret weapon: a lacrosse ball in your handbag for your middle back
If you’re not a handbag-toting human, maybe this is your backpack, briefcase, suitcase, or a drawer in your desk at work (or all of the above).
But why?
The answer: a body massage aid. A small, firm ball of any description – like a lacrosse ball – allows you to roll over a muscle that’s hard to reach for yourself. They are perfect to help you get to the muscles in your middle back in between your shoulder blades (called the rhomboids).
It’s a sigh of relief in the middle of a stressful day and may even literally do away with that pain in your mid-back. Here’s what to do:
- Stand against a sturdy wall or door.
- Using the weight of your body against the hard surface, hold the ball against your back and lean toward the wall.
- Roll your body over the ball. Stay between your shoulder blades, following the pattern of your muscles.
- Again, stop at areas that have knots, breathing through any discomfort (but never pain – pain means STOP), with deep, meaningful breaths.
- Avoid putting pressure directly on major joints, like directly on your spine.
If you’ve ever tried this you’ll know how good it feels. If you haven’t, maybe it’s time you made room in your bag for one.
Other muscle release tools for shoulder tightness
While the lacrosse ball (or tennis ball) can help reach some areas, it won’t effectively hit all of the areas to give you the best relief possible. This is because a ball is too large and too round to hit some of these tinier muscles with enough precision and direct pressure.
Your own fingers may give you a little more precision and directness, but the angles and positions at which you are pressing on yourself make it harder to achieve enough pressure at the best angles and for a long enough period of time for it to truly be effective. Some spots may even be unreachable with your own fingers, and that’s where the help of a massage therapist comes into play.
A newer muscle release tool for tight shoulders that we love is called the Nuckle. It has 3 sets of tips at different widths and angles, allowing you to apply precise pressure to many areas around your head, neck, and shoulders. Anatomically designed to fit the shapes of these smaller and harder-to-reach muscles, the Nuckle provides an amazing release of tension and tightness in your upper body.
Don’t stop there: treat the whole body
We’re focused on the neck and shoulder massage, but it’s also really important to remember that the body doesn’t work in isolation.
If you recall the song, “the hip bone’s connected to the…” – don’t worry, I won’t sing to you. But how that relates to this idea of muscle tension is that tightness in one area of the body can affect how other areas of the body move and hold tension as well.
We can call this referral pain or a movement pattern compensation, where misalignment or tension in your shoulders can impact your lower body. Misalignments in your hips and pelvis (aka the center and “core” of our body) can then cause hip pain when standing up, hip pain when sitting down, hip pain when running, and more.
That’s why my book Tight Hip Twisted Core begins with a very thorough explanation of two very underappreciated muscles: the Iliacus (ill-ee-yak-us) and the iliopsoas (ill-ee-o-so-as) on the inside of the hips.
You’ll want to take care of these muscles, too because they may be an overlooked part of what’s contributing to shoulder pain or other tension in your upper body.
Massage is a great tool, but it’s not the only one
It is key to remember that physiotherapy goes beyond just a shoulder massage.
I’m here to tell you that a massage feels good and is recommended for general wellness. But a full and complete muscle release in those tight areas is the only surefire way to actually rid yourself of longstanding shoulder knots and pain.
The good news is that there are therapist-designed tools that you can use at home to apply that kind of pressure on demand.
Many of my patients and our customers feel tremendous relief after just one or two sessions with the Hip Hook, a hip flexor release tool I created to release the iliacus and psoas, and the Nuckle, a tool I designed to offer relief for aching head, neck and shoulder pain.
With easy-to-follow instructions, you will place the respective muscle release tool on the exact area(s) you need to release. And, instead of using your fingers (like with the shoulder massage), you’ll use your own bodyweight to add pressure for 30-90 seconds or more.
There are times when you will still need to see a physical therapist (for example, with athletes and/or sports injuries), but you can certainly use these tools in conjunction with your in-person treatment.
However, these are the best tools for finding the release and relief you need for a better quality of life. Plus, the beauty of these tools is that you can literally take them anywhere (much like that lacrosse ball you just added to your Amazon cart).
More massage tips and neglected massage-ready areas
You’ve probably heard of the pec (or pec major) muscle. That’s a large muscle that spans either side of your chest and attaches near the shoulder. A smaller, and potentially more important, chest muscle that you might not have heard of is the pec minor.
The pec minor muscle is not to be overlooked during your self-massage and muscle release practice. Here’s why.
The pec minor, although situated on your chest, is the muscle that brings your entire shoulder forward. It’s the muscle that you are constantly using as you round your shoulders forward while typing on your computer or phone
Think of all the other activities that you do with your hands out in front of you. Your pec minor will be playing a not-so-minor part in allowing that to happen, too.
This muscle doesn’t complain quite as loudly as others, but it also gets tight and it also gets knotted. It can be responsible for referring pain to other places and restricting movement that leads to trigger points in your rotator cuff (on the back of the shoulder).
Fortunately, being on the front of the body, this is a muscle that you can work on with your own two hands. Intentional, direct pressure, held for 30-90 seconds (or longer) until you feel the muscle release, will provide the longest-lasting results.
Take a couple of fingers and try it now to see what I’m talking about. Or for the ultimate pec minor muscle release, use the Nuckle. Just remember to unclench those shoulders first and relax.

Partner-assisted shoulder massage
Getting or giving a massage to someone else is also a great way to relax your shoulders and reach those areas you can’t yourself.
But there’s always that underlying thought that whoever gets the shoulder massage first is missing out. Maybe because your massage will be so relaxing they’ll fall asleep – or because you’ll be out of free time.
So my first tip is a practical one, vocalize that and switch it up.
“You massage my back and I’ll massage yours – but not always in that order.”
Communication is key
Your partner can help get to places you and the lacrosse ball may be struggling with. But, as I shared above, they can’t read your mind.
Like in any team, good communication is going to be the key to success. When you’re giving a shoulder massage, explore the area gently and search for knots. Muscles should feel like a steak (it is just meat after all) and shouldn’t have tension while relaxing.
It’s important that when you find a knot, that you also consider the area immediately around it too. But you’re not a therapist, so don’t burden yourself with the responsibility of fixing your partner’s shoulder tension or neck pain completely. You’re just providing some positive relief and immediate relaxation.
So when the person you’re massaging says higher, go higher and check in with them. “Is that good?”, “like that?”, and “how does it feel there?” These are all simple clear questions you should be using constantly to build up a map of the areas you should be targeting in your shoulder massage.
The other piece of advice to get good shoulder massage relief is to give a good shoulder massage to others.
If you can teach these good communication habits to a friend or partner you’re helping out, it becomes a ripple effect. They use them on you, and you get a better shoulder massage out of it, too.
And if they don’t listen, find a partner who’s willing to – or skip right back up to the top of this article and enjoy a self-massage as your self-care routine.
There’s no time in this world for a massage partner who’s an added pain in the neck.
Come at the neck from a new angle
One more quick tip about massaging the neck of your partner or yourself is to consider meeting the muscles from a different angle.
Instead of having them on their front, put your partner on their back. Then, stand on the other side of them. If you’re doing this on a bed, then consider switching things around a bit because you need to be standing where your headboard would normally be.
The benefit of this position is that you can take the weight of the skull into your hands while you massage the neck muscles that are finally getting the break they’ve been asking for. (You can also gift them a neck massage tool that takes the weight off).
If you’re doing a self-massage, experiment with doing it both standing and sitting. Move the angle of the elbow of the arm you are massaging with for different sensations.
Remember the goal: relaxation
It’s worth repeating.
A shoulder massage is not physiotherapy, per se. It’s just a part of it, albeit a very enjoyable one.
Massage is also a handy tool physiotherapists use to relax muscles. But your tense and tired muscles may need next-level treatment if they are repeatedly sore or causing pain in other areas of your body.
That’s when you should consider tools like the Hip Hook or the Nuckle. While you’re waiting for yours to be delivered, a fun, relaxing shoulder massage is going to put your mind and shoulders at ease for the day, and you’ll be glad you found the time to do it.
Frequently asked questions about shoulder massages
What is a shoulder and neck massage?
Attention to sore muscles through gentle circular motions of your fingers or thumbs or another tool. Direct, prolonged pressure works best for muscle knots. The goal is to help you, your tight shoulders, and your neck relax after a long day hunched over your devices.
Can you give yourself a shoulder massage?
Absolutely yes! You won’t be able to completely switch off like you can in the spa, but you can give your tense shoulder muscles some much-needed relief. For your pec minor go right ahead because it’s on the front of your body (just under the collar bone). For harder-to-reach places, you’ll need an angled massage tool and a flat surface like a wall or a floor.
How often can I give myself a shoulder massage?
You’re in control, so if you want to call in that long-overdue me time then go right ahead. A gentle self-massage right before bed is a nightly routine worth having. However, if your shoulders and neck are giving you consistent pain then this is a job for specialist tools like the Nuckle, or a visit to your local physiotherapist.

6 Reasons You May Have Hip Pain When Kicking
Do you have unmanageable hip pain after going to the gym for martial arts or kickboxing class? Do you experience hip pain when kicking a soccer ball or a football?
You’re not alone. In fact, as a physical therapist, I see ‘kickers’ in my office all the time. Hip flexor pain when kicking is common.
The truth is, when you participate in any kicking activity repeatedly (liake soccer, football, martial arts, or kickboxing) it can put a lot of strain on your hip flexors, quads, tendons, and joints. And, the bigger and/or more unnatural the motion, the more likely you are to be feeling some soreness or tightness afterward.
That’s not to say it’s unnatural for our bodies to make a kicking motion.
In fact, you could say the contrary. Because the muscles that help connect your thigh to your pelvic bone (known as your psoas and iliacus muscles) are literally made to stretch and contract, allowing you to swing your leg forward and backward from your hip joint. This is how you walk, run, and kick.
But, if you play soccer, football, or any other sport that repeatedly requires this motion – especially when combined with fast, extreme, or one sided movements and/or fatigue – you may be overusing and tightening those muscles
How does the iliopsoas muscle work?
Your psoas muscle and iliacus muscle are two large muscles that sit side by side on both legs. They connect to the inner side of your pelvic bone and spine, then to the inner groin, and finally to the upper side of your knee or thigh.
Together, these two muscles are called the iliopsoas muscle when referred to together and are referred to as “hip flexors”, and they are at the core of most of the movements we do throughout the day.
.png)
Usually, you don’t think much about your iliopsoas muscles. You unknowingly contract them to sit upright in your seat and lift yourself out of bed in the morning. Even when you are setting yourself up for a game-winning kick, you might be thinking more about tightening your core and watching your steps than contracting your iliopsoas muscles.
But, if you kick a ball around day in and day out, and are starting to feel some pain or tightness in your hips, it’s time to start understanding what triggers might be irritating your iliopsoas muscles.
Before I get into some of the potential causes of your hip flexor pain, I’ll say that it’s not all bad news.
Many of these issues can be corrected by being more aware of your body, your mobility, your training habits, and your recovery routine. And I truly believe all of these causes of hip pain in sports with kicking motions can be corrected without the use of medications or drastic interventions.
What causes hip pain when kicking?
While it is easy to recognize when your hip is in pain, it can be more difficult to pinpoint the root cause.
If you’re a soccer player, kickboxer, martial arts practitioner, or member of any other sport that involves routine and repetitive kicking movements, then these are the most common culprits that could be causing you hip pain.
1. Poor flexibility
Sometimes, your hip pain is a result of going right into a workout when your muscles are cold. But other times, there’s a bigger flexibility issue. And it’s not always in your control.
There are some people who have more natural stores of collagen in the soft tissues which, explained in simple terms, is like the sticky glue that holds our ligaments, tendons, joints and bones together. And there are some people who have more elastin in their bodies, which is the stretchy counterpart to collagen.
All of our bodies have both, but the ratio of collagen to elastin varies from person to person. And it is possible to improve your flexibility, but if you are naturally not very flexible, your iliopsoas muscles will need more slow, gentle stretches and require a bit more time to do all the movements you want to.
In both situations – having cold muscles and having limited flexibility – you may not have access to a full range of motion in your hips. So, when you go to kick, it’s like trying to snap a very tight rubber band. It could snap very quickly, or other parts of your body may start to overcompensate for the lack of mobility. You could also injure yourself by kicking too aggressively and overreaching your body’s current limitations.
If you took some time off from training, and are just getting back into it, you might struggle with your range of motion more than usual. It can take time to loosen up your muscles again, but it’s very important to give your body that extra time it needs to get back to the level of flexibility you had – gradually and in a healthy way.
Use active hip flexor stretches and gradual movements to encourage your iliopsoas muscles to release, staying happy and relaxed. It’s not uncommon for even the most flexible of athletes to experience tight hip muscles, especially tight hip flexors. But, if that’s you, your problem may actually be…
2. Too much stretching
It seems weird to think you could be stretching too much or be too flexible – especially when you’re thinking about trying to achieve a big kick with a full range of motion. But what you think of as a “full range of motion” could very well be over-extending or an excessive range of motion when it comes to your iliopsoas muscles.
In fact, I see just as many cases of hyper-mobility causing tight and painful hip flexors in my office as I do sedentary lifestyles.
Here’s why: it’s fairly common for athletes to strive for more flexibility or push past pain or tension they may have, thinking it’s a part of the training process and getting into shape. However, if you’re feeling tightness in your hip flexors after a game or workout, it’s more likely that those muscles are working hard to stabilize and hold together a too mobile part of the body. This is especially true the higher a kick is and the more one leg is going forward with the other one reaching behind you.
3. Lack of physical conditioning
In direct correlation to range of motion, an overall lack of physical conditioning can affect how your hips feel after exercise. If you haven’t been able to get to the gym, or were on the bench due to an injury, it is best to take it slow and ease back into things.
It can be frustrating to not be at the same level as you were before, especially if you previously had a strong side-kick. But, going too hard too quickly is one of the easiest ways to injure yourself – and keep you on the bench even longer.
Lack of physical conditioning can also cause hip pain when you learn a new movement or skill. For instance, when you are practicing martial arts, you may learn new kicking styles or techniques as you progress that cause you hip pain when kicking.
In most teaching settings, you will have a strict breakdown of form and technique before getting to the full kicking motion. However, if you ever practice alone, you may be tempted to kick with no resistance or may forget about that perfect form as you get tired further along in your workout.
This can easily overexert your iliopsoas muscles.
What’s worse, because this is a new movement, your hip is not physically conditioned to move in that way. You may not have built up enough strength to support the momentum.
This same issue can occur with soccer, football, and any other sport where kicking is the main component. The goal should be to build enough strength to have a controlled kick, not to use speed or sheer force to propel your leg forward.
4. Skipping warm-up/cooldown activities
As with any physical activity, prepping your muscles before and cooling them down after exercise may help reduce tightness and even injury. When you participate in activities with motions as explosive and powerful as kicking, priming your hip muscles could not only provide more ease of motion, but give you more control and strength as well.
Although many people think the main reason for warming up and cooling down is to ease your heart in and out of high-level activities, it also helps regulate blood flow in your muscles and joints. When you warm-up before physical activities, the extra blood flow to your joints and muscles prepares them for strenuous movements like kicking, and staves off overuse injuries.
Throughout the warm-up, you may complete a combination of cardio, stretching, and strength exercises that slowly increase in intensity. You should make sure you are including a series of gentle but active stretches that help open your hip flexors and prepare them for more demanding activities. Moving those muscles slowly and progressing to fast motions prepare the hip for the explosive activity you are asking of it.
Specifically stretching and releasing the tension of the iliacus and psoas before any kicking activity is ideal. This is exactly what I designed the Hip Hook to do. Following that release with the realignment exercise if your pelvis is out of alignment gets the body ready to play and the hip flexor muscles ready for action.
Tight muscles act weak, even when they have the muscle fibers to be strong. Getting them to relax prior to using them is giving that hip the best chance for success.
Cooldowns are equally as important as warm-ups. A gradual cooldown eases your body into recovery, and should always include stretching at the very end. Just remember to listen to your body! Your muscles and body temperature are warmer, so you will probably be able to stretch deeper. But, just because you can doesn’t always mean you should.
If you tend to have a tight hip flexor, the end of the activity is a perfect time to release the tension there with a stretch or prolonged pressure technique like the Hip Hook. Doing the realignment exercise after activity if you pelvis is rotated will help set an aligned you for the rest of your day. I talk about this in detail in my book as well.
5. Skimping on recovery time
When we have some good, hard workouts, a big game, or are training for one, it can be hard to slow down that momentum. But, whether you’re a professional athlete, or just someone that loves the sport, your body needs time to rest and recover.
This is especially true if you are performing high-intensity, explosive, or repetitive movements like kicking. This is a perfect time to make sure your hip flexors are relaxed, soft, and supple with prolonged pressure with the Hip Hook. Happy muscles are relaxed and don’t hurt.
Recovery time is excellent for your cognitive functions as well as your muscles. If you are going into practices or training sessions with a clear and focused mind, you are better equipped to stay mindful of your form, know your limits, and perform high-risk movements with a lower risk of injury.
6. Poor form or incorrect technique
I’ve mentioned this one a few times throughout this post. But it’s worth having its own call-out.
Anytime you are exercising, your form and technique should be a primary focus. If you’ve had poor form in the past and are attempting to correct it, you may notice that you can’t kick as well or lift as much weight, but that’s an indicator you were not activating the right muscles.
In addition, if you are performing with a twisted core and pelvis, your body is out of alignment. Your muscles will be uncoordinated and weak and your joints are set up for unnatural wear and tear. Part of good technique is being aligned and balanced in your body to start. A tight hip twists the core and this twist sets us up for poor technique no matter what you do.
So, slow down if you have to. Decrease the weight and intensity of your workout.
Because putting a focus on correct form and technique will prevent you from forming more bad habits and help you to avoid unnecessary injuries in the future.
It may take time for a lousy kicking technique to manifest into an injury. And it may never become a full injury. But, it’s always a good idea to have a coach, peer, or mentor critique your kick and help set you – and your iliopsoas muscles – up for success.
What injuries cause hip pain after football, martial arts, or kickboxing practice?
Most athletes who come to me with hip pain from kicking have a mix of the above issues occurring. It’s seldom just one thing – or one game – that causes your iliopsoas muscles to make themselves known.
But, when they do, here are some of the most common injuries in athletes that participate in kicking activities:
- Muscle strain: If your muscles are not prepared for the extent of a muscle contraction, it can cause strains, tears, and pulling. This is the most common type of hip injury in athletes, especially with sudden and unexpected motions.
- Hip Bursitis: When the bursa on the outside of the hip joint gets inflamed, it causes pressure and pain within the hip, groin, and thigh areas. It’s important to catch this early, as it can become a chronic issue.
- Hip labral tears: Your labrum helps support your hip joint and hold the ball in the socket as it is a thick layer of tissue surrounding the hip socket. While injury to the labrum often occurs due to trauma in contact sports like football or rugby, the act of kicking can accentuate the problem. Chronic excessive pressure to the labrum will wear away at the labrum until one day it ends up tearing.
- Osteitis pubis: A common injury in soccer/football players, osteitis pubis occurs with the repetitive pulling of muscles in the front of your hip joint. This causes irritation to the pubic joint where they attach.
So, now you know what might be causing your hip pain when kicking – but how do you treat it?
Treat unresolved hip pain the right way
Most of us have used a foam roller or gone to a massage to loosen our muscles after a hard workout. But, getting deep into our hip muscles can be difficult.
One of the most innovative tools to address this is the Hip Hook, a tool I designed to mimic the trained hands of a physical therapist and effectively release your iliacus muscle where it connects to the pelvic bone and the psoas muscle’s tightness. The Hip Hook is the world’s first at-home psoas AND iliacus release tool and it uses your own body weight to apply the right angle and pressure needed to release your hip muscles.
As a “kicker,” most of your hip pain is likely being caused by an iliacus or psoas muscle that won’t relax its grip on your body. The good news is, releasing that muscle may provide almost instant relief. It could not only potentially address pain in your hip flexors, but also could increase your range of motion when it comes to kicking.
In addition to developing the Hip Hook, I’ve also written the book Tight Hip, Twisted Core, which gives specific and targeted ways to help you treat your hip pain without medication. Whether you are experiencing hip pain kicking a soccer ball, or when practicing martial arts, it’s key to find a remedy that doesn’t take away your joy for the sport.
Frequently asked questions about hip pain when kicking
Why does my hip hurt when I kick a soccer ball?
A common injury that develops in soccer players is a hip flexor strain. This is because the hip flexor muscles, like your psoas and iliacus, are used consistently as you run, sprint, cut, and kick when playing soccer. This can create pain at the front of the hip and even in the groin region.
What does a strained hip flexor feel like?
Many people who are dealing with a hip flexor strain may feel a sharp pain when performing sudden or explosive movements, such as kicking or sprinting. This may occur when lifting the leg into hip flexion or when moving the leg behind you into hip extension. Additional feelings of soreness, stiffness, or weakness may be present even when at rest.

Ask the Experts: Best Mattress for Side Sleepers
Christine Koth was recently featured on Mindbodygreen health noting what wide sleepers should look for in a mattress!
Christine notes that as we get older and develop muscle tension and various aches and pains, we’ll need to find a sleep solution that’s more customized to our unique needs.
Check out the full article here!

A Side-Sleeper’s Guide to Reducing Hip Pain at Night
Having hip pain at night or while sleeping can cause major disruptions in your life. This is especially true if you are a side sleeper. Hip pain when sleeping on your side, either whether it is one side or both sides, often puts additional strain or pressure on your hips – exacerbating preexisting pain.
For many side sleepers, having hip pain when sleeping on either side is especially annoying because it becomes more difficult to find a comfortable position to fall asleep. As hip pain progresses, it can even develop into a general pain at night no matter what sleeping position you are in!
The best way to approach hip and leg pain when sleeping on your side is to first understand the root cause of that pain.
While you may be able to do some research and narrow down the possible causes of your hip pain when sleeping on your side, it is recommended that you consult a medical professional to ensure you are treating your pain most effectively.
We will cover some of the most common causes of hip pain when sleeping, but that will not be the main focus. The bulk of this article will cover ways that you can reduce your pain and manage symptoms so that you can get a better night’s sleep and wake up feeling rested.
What causes hip pain when sleeping on your side?
There are several causes of hip pain when sleeping on your side.
No one person is exactly the same and neither is their hip anatomy. The shape of the hip sockets is different from person to person, some people may experience hypermobility issues, and it is also possible that your hip pain is residual from a past or current injury.
Chronic hip pain is something that is often associated with arthritis, bursitis, and osteoarthritis as well. That being said, one of the most common, yet easiest to overlook, causes of hip pain at night is having tight hip flexor muscles.
Your hip flexor muscles are also known as your iliopsoas. The iliopsoas consists of two muscles that overlap each other: the iliacus and the psoas muscles.
Because the iliopsoas muscles are used so extensively throughout the day, even when you are sitting, they can easily become tight enough to cause discomfort and can pull your hips out of alignment.
The stress on your hips does not stop when you lay down to sleep either. Especially for side sleepers.
You see, when you are lying on your side, your legs are usually stacked on top of each other – sometimes connecting at the knees and ankles. Depending on your mattress, the bottom hip may not experience much strain, but the top hip does.
Since the top hip and the rest of your leg are not on the same level, your knee pulls the hip slightly down and the hip feels a strain. If you sleep on your side, you may not notice any discomfort or irritation at first. It may take some time – even years – for your muscles to become affected by that pull from your knees.
If your hip flexor muscles are already tight, this additional nightly stress can cause hip pain when sleeping on your side.
Most side sleepers also tend to curl their knees slightly towards their chest, compounding the tight iliopsoas issue. Despite being in a resting position, your iliopsoas muscles are fully engaged when you’re drawing your thighs and knees slightly up.
All this just goes to say that, although there are many other possible reasons for hip pain when sleeping on your side, don’t overlook something as seemingly simple as tight muscles.
5 ways to manage hip pain when sleeping on your side
While the best way to address hip pain of any kind is to get a diagnosis and understand the cause of the pain, it can also be beneficial to address some of the symptoms.
Even if you are receiving treatment for the underlying condition, hip pain when sleeping on your side can still occur. And sometimes, hip pain is worse at night.
So in order to get a good night’s sleep, having a few ways to minimize your hip pain is a must, especially for side sleepers.
1. Invest in a quality mattress
Likely the most expensive way (and arguably most worthwhile) to reduce hip pain at night is to invest in a quality mattress. Most of us do not realize how much our mattresses really impact our lives until we get an upgrade.
One basic thing to avoid in a mattress if you experience any kind of hip pain when sleeping on your side is the mattress being too firm.
While spring mattresses tend to be an affordable option, they do not have much “give” and don’t conform to your body well enough. When sleeping on a spring mattress, there is more pressure applied to the hips and shoulders when you are sleeping on your side.
The main factors you want to look for in a quality mattress are support, firmness that suits your body and sleep style, and the ability to conform to the contours of your body. The idea is to maintain a straight line with your spine – whether you sleep on your back, stomach, or either side.
Many people that have hip pain when sleeping on their side should consider medium-firm mattresses that almost creep into the soft side. These offer enough give to gently cradle your shoulder and hip, but won’t let you sink completely into the mattress and cause your back to be out of alignment for the entire night.
Now I know, finding a good mattress can become tricky if you sleep in the bed with your significant other. Especially if you each have different sleep styles and needs. But there are beds that address that concern of differing mattress preferences – such as a sleep number mattress. Beds like this allow each person to set their preferred firmness to reach optimal comfort.
2. Get into a morning hip stretching habit
When you have tight hip flexor muscles, it can help to stretch them at least a little bit. Be aware that it is possible to overstretch your hip flexors. People with hypermobility, or people who sit a lot (such as with a desk job) should be careful of overdoing it with the stretches.
That being said, getting into the habit of doing a short yoga or hip flexor stretch session right when you get up is a good way to wake up your muscles and get them ready for the day. You don’t need to be a yogi and/or go to a fancy studio to effectively stretch your body (though, if you want to, yoga can be a wonderful practice!)
These stretches can be hip specific, but they can also be general to get more blood flow to your muscles. And you often don’t need to stretch as deep as you think you should. Everyone’s natural range of motion is a bit different and can even change day to day. So listen to your body, and never continue a stretch if it hurts.
Especially for those of you that sit for extended periods of time, stretching in the morning and getting up and moving throughout the day is important for hip health.
The longer you stay seated, the more your hip flexor muscles begin to shorten. These tight, shortened muscles could be the culprit for your hip pain when sleeping on your side. When you stretch, you are counteracting the compressed position your muscles were in and lengthening them again. This often provides a bit of instant relief but is also a practice you should continue doing each day.
3. Have a nightly muscle tension release routine
If muscle tension is the root cause of your hip pain at night, then you need a way to release that muscle tension. If you want to address your hip pain when sleeping on your side, muscle release is one of the most important steps.
Much like getting into the habit of stretching, muscle tension release works best when it is done on a regular basis. This could be every night or every other night.
Your hip flexors, or iliopsoas muscles, are extremely hard to reach with traditional pressure release tools like massage balls or foam rollers. These can work great to release the back of your hip and your glute muscles (which is also an important part of releasing tension in your hip muscles), but they will not reach the iliacus or psoas.
The best way to effectively achieve a muscle pressure release in this area is to use the Hip Hook. The Hip Hook is a muscle release tool specifically designed to replicate the skilled touch of a physical therapist, effectively targeting iliacus muscle tension in the comfort of your own home.
Since the iliacus is only accessible if you reach slightly behind or inside the pelvic bone, the Hip Hook somewhat simulates someone else applying pressure with their hands. The only difference is that you can do it yourself and you are in control of the amount of pressure applied.
It is possible that only one hip is causing you pain, but that doesn’t mean that you should neglect the other hip. It’s important to keep your body as balanced as possible so that nothing else gets pulled out of alignment.
Practice this muscle tension release nightly or every other night on both hips.
Don’t forget to also release the back side of your hip as well using a massage ball or foam roller. If you are experiencing sciatica pain along with hip pain and tightness, you may want to incorporate a gentle self-massage on your sciatica trigger points.
Releasing your hip flexor muscles is a targeted approach that can save you from sleepless nights and the domino effect of an overly tight iliacus muscle. By avoiding the issue and letting your tight muscles carry on, you may start to develop other pain points and problems like sacroiliac joint pain.
4. Sleep with a pillow between your legs
Using a pillow is one of the easiest ways to reduce and even eliminate hip pain at night and while sleeping on your side.
Many side sleepers find that using an extra pillow between their legs is more comfortable, even if they don’t have any existing hip pain or tightness. The pillow can be placed between your thighs and knees but you can also use a longer pillow that extends down to your ankles as well.
The main reason that using a pillow to prop up the top leg relieves the hip pain at night lying on your side is that it helps keep your pelvic bone level, your spine straight, and your knees evenly stacked on top of one another.
Side sleeping is not always the best sleep position for those with hip pain, but this gets you much closer to proper alignment.
When you are sleeping on your side without a pillow between your legs, the gravity, and the weight of your leg, pulls on your hip muscles and irritates the joint area. By allowing your leg to be more in line with your hip, you relieve that strain on the hip joint and muscles.
5. Mix up your sleeping positions
We all have a favorite sleeping position, and if you’re reading this, I’d guess it is on your side. You may switch sides from time to time, but even with the help of a pillow between your legs, your sleep position could be causing more hip pain than you would like.
As I mentioned, it might be time to try some new cuddling and sleeping positions if you have hip pain.
One of the best sleeping positions for hip pain is to sleep on your back. This position allows your body to have your weight evenly distributed across a larger surface area, which means less pressure is being concentrated on your hip joints.
The key with sleeping on your back is, again, to keep your spine in alignment. A good neck pillow will get you far. Try to find one that only slightly raises your head off the mattress. It shouldn’t cause your chin to dip toward your chest, but rather have it be perpendicular to the ceiling.
If your hips are particularly tight, you could also put a pillow under your knees to slightly elevate them and decrease any intensity you are feeling in your hips.
In any case, simply changing up your sleep positions from time to time can be really beneficial for hip pain when you normally find yourself sleeping on your side.
Invest in your hip health for better sleep
Your health is all you have! And chronic hip pain at night can easily become a burden in your life. It’s important to get to the root of your pain and begin treatment to enhance your overall well-being.
Remember, if you have hip pain when sleeping on your side, there are a variety of reasons why that pain started, but how you are sleeping, your daily routine, and even the mattress you have can impact your pain levels.
If you don’t want to invest in a new mattress just yet, investing in a Hip Hook and Hip Release Ball and experimenting with pillows/sleep positions are a great first step to reducing any pain you feel when you’re sleeping on your side. With the proper tools and dedication, you CAN be back to a sound sleep in no time.

Frequently asked questions about side sleeping and hip pain
Why does my hip hurt when I sleep on my side?
When sleeping on your side, a lot of pressure is being placed directly on your hip. If your hips are already feeling a bit unhappy from tight hip muscles or other injuries, sleeping with too much pressure on your hip can exacerbate the discomfort. Consider trying to sleep while on your back and with the support of pillows underneath your legs.
How do I stop my hip from hurting when sleeping on my side?
Taking a look at your sleeping posture may have a lot to do with having hip pain when sleeping on your side. If your hips are not in a good alignment, this can lead to more irritation and pain. To help improve the alignment of your hips, try adding a pillow between your legs. This creates more space within the hip joint to rest and recover as you sleep.
Signs and Symptoms of Labral Tear Hip Pain at Night
Could you be living with labral tear hip pain at night? If you have hip pain at night, it can really interfere with your quality of sleep. And, if you want to address your hip pain symptoms, the best way to do so is to first determine the root cause.
Your hips are essential and complex parts of your body, and there are many reasons why you could be experiencing hip pain, from minor to more severe.
The type and severity of your hip pain at night can help you narrow down the possible causes. For instance, if you have labral tear hip pain at night you likely have pain manifesting in the groin area – and may even have mistook it for arthritis.
In this article, I am going to break down what a labrum tear is, how to tell if you might have one, and how to adjust your sleep habits to minimize your labral tear hip pain at night.
What is a hip labral tear?
Your hip labrum is specialized cartilage in your hip joint, more specifically inside your hip socket. It helps hold the ball joint in your hip socket.
A healthy hip labrum creates a suction that decreases the force going through the joint and keeps it well protected. However, this suction and protection only occur if you have a labrum that’s fully intact – and there are a number of things that could cause damage to the area.
What causes a labral tear?
Some causes of hip labral tears include:
- Hip trauma or hip injury (like dislocation)
- Repetitive hip motions, especially in sports or physically intensive jobs
- Structural abnormality of the hip (like a shallow hip socket)
- Tight hip flexor muscles causing unnatural movement of the hip joint
If you have a torn or strained hip labrum, you may also have a tight iliacus muscle. The iliacus is one of the muscles (along with your psoas) that make up your body’s main hip flexors and is located on the inside of your pelvic bone, running very close to the hip joint itself.

Irritation to your hip joint in any form, and certainly from a labral tear, can cause your iliopsoas muscles to tighten in an attempt to protect the hip joint. What’s interesting is that some of the symptoms you have with labral tear hip pain at night overlap with symptoms you’d have if you had tight iliopsoas muscles.
In fact, your torn labrum may also be a byproduct of tight iliopsoas muscles. If your hip socket alignment is off because of tight muscles, your labrum will not only be irritated, but far more susceptible to tearing. This is because tight hip flexor muscles pull the hip joint enough to make the socket rub the labrum the wrong way during common day-to-day activities.
Unfortunately, a hip labral tear will never fully heal without surgical treatment. The good news is that you can treat the symptoms and minimize the amount of labral tear hip pain at night.
Releasing the muscle tension creates a healthy environment for the labrum and can help you realign your hip, which in turn reduces labral tear hip pain at night. But how do you know if you are experiencing labral tear hip pain at night? Here are some ways to properly identify it.
Identifying labral tear hip pain at night
Knowing torn hip labrum symptoms, in general, can help you to identify labral tear hip pain at night. Keep in mind that the way torn hip labrum symptoms present can vary if the tear is an anterior or posterior one.
An anterior tear is located on the front of your hip, which is easier to injure due to the lack of blood vessels in that area. Posterior labral tears are located on the back of your hip. Since there is less motion in the back of your hip joint, the labrum cartilage does not experience as much contact as it does in the front.
So, although I did state that most labral hip tears will cause pain in the groin area, that is more specific to anterior labral tears. If you have a posterior labral tear, you are likely to have more pain in the back of your hip when performing a motion like squatting or sitting.
Pain is not the only symptom of a labrum tear though. Other symptoms of a labrum tear may include:
- A clicking, locking, or catching sensation when moving the hip joint
- Limitations when it comes to hip mobility and general range of motion
So, how do you know if you are experiencing labral tear hip pain at night?
First, identify if you have any of the symptoms above throughout your day. Do you only have hip pain when you are in one position for an extended period of time? That could be a sign of a labral tear, and part of the reason why you have labral tear hip pain at night.
Identifying and addressing a labral hip tear is very important because if left untreated, it can lead to osteoarthritis.
Sleeping with labral tear hip pain at night
Diagnosing hip labral pain with a medical professional is one of the best ways to address and treat your labral tear hip pain at night. Most of the time, hip labral tear diagnosis is done with an imaging scan of the hip joint.
Working with a physical therapist, or even deciding to have surgery, can help you as you manage your labral tear hip pain at night.
Hip pain when sleeping is a fairly common issue to have, but how you address that pain and get a good night’s sleep will vary on a case-by-case basis. In general though, you can adjust some sleep habits, environments, and sleep positions to minimize your labral tear hip pain at night.
How your sleep position affects labral tear hip pain at night
We all have a favorite sleeping position, but what if the way that you are sleeping is causing you more hip pain at night?
The reason why labral tear hip pain at night is so common is because when we have a labral tear, and our hip is in the same position for an extended period of time, our labrum has time to react from the trauma of the day. We also have more time to focus on how our hip is feeling because we are not distracted by other activities.
And, if you prefer to sleep on your side, you may be agitating your injury even more. If you have hip pain when sleeping on your side, even if it isn’t due to a hip labral tear, it is likely because of some kind of hip trauma, trigger points or stressors, or improper alignment while sleeping (yes, there’s proper sleep alignment!).
Many of the sleeping positions for hip labral pain will overlap with general sleep positions that help alleviate hip pain. These are adaptable to if you are sleeping alone or if you enjoy falling asleep cuddling your partner.
Just remember that when you are lying on your side, your hip is sitting higher than the rest of your leg, and the pressure applied to your hip by the pull of your knee and leg adds more pressure to an already injured area.
To combat this and raise the rest of your leg to be level with your hip, all you need to do is put a pillow between your legs. It is best to do this lengthwise so the pillow is resting between both your knees and ankles, but you can play with the position that works well for you.
If possible, you should also avoid sleeping with your injured hip on the bottom. Have that hip on top to minimize the pressure put on the hip while you sleep.
Sleeping on your back is not as likely to irritate your labral tear hip pain at night, but it can. One of the best ways to adjust your sleep position is to try and help your iliopsoas muscles relax and keep your hips aligned.
If you are lying on your back, you can take some tension off your hip flexor muscles by putting a pillow or two under your knees. This raises your legs slightly to help the iliopsoas disengage, creating a healthier environment for your labrum.
Other ways to minimize labral tear hip pain at night
Your sleep position can only do so much to help with your labral hip pain at night. If anything, your sleep position will simply minimize your pain to help you fall asleep.
If you are diagnosed with a labrum tear in your hip, then it is best to work closely with your physical therapist or health care provider on a treatment plan that works best for your life and the activities you enjoy.
Although there are various causes of a labral hip tear, the treatment for a labral tear is usually the same across the board. Surgery is the only way to truly fix a hip labral tear, but there are nonsurgical treatments that can help you minimize pain and reduce symptoms as well.
Physical therapy
One of the best long-term treatments for a labral hip tear (that is not surgery) is to go to physical therapy. A physical therapist will come up with an individualized treatment plan that focuses on strength training around the hip and the iliopsoas (what you commonly think of as your hip flexors) to improve pelvic and core stability. They may also recommend stretches and other hip alignment exercises to help you get the best results for your situation.
Injections
Depending on the severity of your hip pain at night, a doctor may recommend that you get a local anesthetic fluid injection into your hip joint. These are called intra-articular injections. Most often this method will only be used if no other method works to alleviate your hip pain. A corticosteroid is sometimes added to the injection if the hip pain is extremely severe or if you have other hip problems causing additional pain.
NSAIDs
Often before resorting to an injection to reduce pain, non-steroidal anti-inflammatory drugs are recommended. This can be something like aspirin or ibuprofen to reduce inflammation and pain. Keep in mind that this should only be seen as a temporary relief, not as a long-term treatment for hip pain, so you do not become too reliant on NSAIDs for general functioning.
Muscle tension release
As we discussed earlier, tight hip flexor muscles can contribute to your labral hip pain at night. The good news is that you can create a nighttime routine that includes a pressure release for your psoas and iliacus muscles. You can also do this with your physical therapist, but it would not enable you to do it every night, which is what you should aim for eventually for the best results.
How do you do a successful muscle release for your hip flexors on your own?
The location of the psoas and iliacus muscles makes it a bit difficult to release by yourself, and that is why I invented the Hip Hook. The Hip Hook is designed to apply prolonged pressure to both your psoas and iliacus muscles to release tightness.
This is important because anytime you have a hip injury, like a labral tear, your iliopsoas muscle tightens in an attempt to protect the hip joint. This may seem good in theory, but in reality, this can cause more damage as your tight muscles pull your hip further out of alignment.
Performing a muscle release on both sides of your hip before bed is one effective way to reduce your labral tear hip pain at night – and it can be done in less than 10 minutes. Strengthening the other surrounding muscles, such as the glutes, hamstrings, and core muscles can be an effective supplement to help support your hips and pelvis in a better alignment.
Get a good night’s sleep again
Hopefully by now, you have a good idea if you are truly suffering from labral tear hip pain at night (or if you think it might be something else). And, if you are, you now have some great tools to combat that nighttime pain and discomfort.
Whether it’s adjusting your sleeping position, booking a physical therapy appointment, buying a Hip Hook for at-home muscle release, contacting your doctor to see if surgery is your best option, or all of the above, you have many avenues to try to reduce your discomfort at night and wake up feeling well-rested.
Frequently asked questions about sleeping with a labral tear
How do you sleep with a torn hip labrum?
To minimize the pain and discomfort of a torn hip labrum when sleeping, avoid sleeping with the affected hip on the bottom if you are a side-sleeper. Even with the affected hip on the top, you may further alleviate some pressure by sleeping with a pillow between your legs.
You may also try sleeping on your back, which helps to avoid placing any pressure directly on your painful hip. For added comfort and relief, back sleepers with a torn hip labrum can try placing a pillow under their knees to help their hip flexor muscles relax, which also reduces compression in the hip.
How do you fix a torn hip labrum?
A torn hip labrum can be 100% fixed only through a surgical procedure. However, not all cases truly require surgery and there are many ways to manage this kind of injury to minimize pain and discomfort. Non-surgical options include working with a physical therapist to improve the way your surrounding muscles support your hips and pelvis.
This may include the use of different corrective stretches and exercises. Applying pressure to help release tight muscles that are affecting your hip (such as your hip flexor muscles) can also decrease the compression of the hip joint, supporting an increased range of motion and reduction of pain.
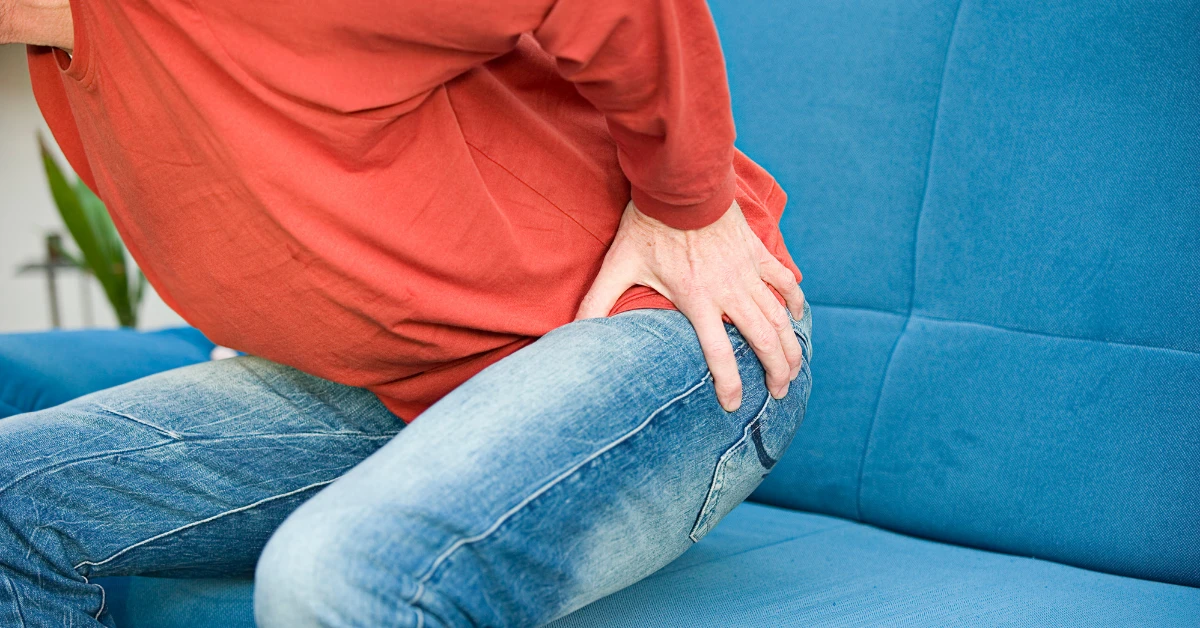
Experiencing Hip Pain at Night? This Could be Why
Sometimes, even after a seemingly average day, you begin to experience hip pain as you wind down at night to rest. Having hip pain at night only or hip pain worse at night than throughout your day has a lot of potential causes, but is often from stress on your hips during the day.
Your iliacus and psoas muscles, also known as your hip flexor muscles, are responsible for an extensive amount of movement, support, and stabilization throughout your day. Even if you’re working a desk job, your hip flexors are engaged all day long.
In fact, extended periods of sitting can cause hip pain just as often as too much strain while exercising can.
Once you’ve had a chance to unwind, sit and relax, or even crawl into bed, your body will be slowing down to heal and recover from whatever activities you participated in that day. As you start to rest, it may also be the first time you have had time to even notice your hip pain.
Whatever the cause of your nightly hip pain, finding actual solutions can help you get a better night’s sleep and avoid further discomfort and sleep disturbances caused by your chronic hip pain.
In this article, we will outline some of the primary causes of hip pain at night, as well as how to address your hip pain and build routines for healthy hips.
Reasons why you might have hip pain at night
Experiencing hip pain at night can cause sleep disruptions and general discomfort – even when lounging on the couch. And that’s the opposite of relaxing.
That’s why you may be eager to get to the healing nighttime routines later in this article, but first you need to know some of the possible causes of your hip pain at night so you can understand how to address and prevent it in the future.
Causes of hip pain at night
While hip pain may come and go in your life from exercise and general muscle soreness, we will focus on chronic hip pain at night in this article. Pain that resolves itself within a day or two may not fall into one of these categories.
Chronic hip pain at night is often associated with osteoarthritis, but that is not the only condition that causes joint or hip pain when sleeping.
Some other common causes of hip pain at night include tight iliopsoas or hip flexor muscles, bursitis, and rheumatoid arthritis. In some cases, sacroiliac joint pain can influence and worsen hip pain at night as well.
For all of these conditions, one of the overlapping factors is that inflammation may be causing the hip pain – and that inflammation can worsen while you’re resting and recovering.
If you have tight muscles causing hip pain, inflammation may not be the root cause, but it can absolutely be a symptom.
It’s important to remember that hip pain at night comes in many forms. Some people that experience hip pain worse at night report that it feels more like an ache or burning sensation, while others experience sharp or twisting pain.
For some people, they may only have hip pain at night lying on one side or another while trying to fall asleep.
Each person is different and although there are commonalities in the causes of hip pain at night, the severity of the hip pain may vary.
Why hip pain is worse at night
If you have hip pain at night, why is it suddenly worse? Why are you not having as severe of (or any) hip pain during the day?
That is a very common question for many of my patients who experience hip pain at night or hip pain while sleeping.
The primary reason is because once you give your body a chance to take a break and truly begin to relax, your body also begins to heal and repair itself.
Essentially, as you strain and stress your hips during the day – whether it is while you are sitting, walking, exercising, etc. – you are using your hip muscles and hip joints. Once you slow down and stop engaging your hips as actively, they have a chance to rest.
As your hip works to heal itself, that can also mean that the area around your hip joint will experience some inflammation.
Inflammation is a natural way your body protects itself and it is one of the stages of healing. Despite that fact, it does put pressure on other areas around the inflammation and can cause pain.
Not only that, but your brain is likely now resting a bit more as well. Sometimes you may have some hip pain during the day, but you don’t even realize it because you are too preoccupied with the task at hand.
Once you lay down to get some sleep though, you have nothing to distract you from how your body is feeling at that moment, putting a laser focus on your hip pain.
Are tight hip flexor muscles causing your hip pain at night?
Although there are a lot of possible reasons you may be experiencing hip pain at night, one of the most overlooked ones is tight iliopsoas muscles. Your iliopsoas muscles are more commonly known as your hip flexor muscles and are made up of the iliacus and the psoas muscles.
These muscles are responsible for a wide range of movements and stabilizations. From walking, to turning your torso, to bending over, your iliopsoas muscles are seemingly always engaged.
What’s more, if you are in the same position for extended periods of time, like sitting at a desk, driving, walking, etc., then your hip flexor muscles experience more strain than if you were engaging in a variety of movements throughout your day.
Since your hip flexors are constantly engaged and experiencing a lot of stress, it is easy to see why they may get tight over time.
But why would tight muscles cause hip pain?
Because of their proximity to your hip joint, when your iliopsoas muscles are tight they begin to pull things out of place. In fact, overly tight hip flexors can cause your hips to move out of alignment.
You can think of this muscle tightness as causing somewhat of a domino effect with neighboring muscles and joints.
Once your iliacus or psoas muscle tightens, it will begin to impact other movements and alignment enough that your hip joint can rub together wrong or cause an injury that further exacerbates your hip pain.
So what can you do about that hip pain? Here are my top tips.
Create a healing nighttime routine with the Hip Hook
There are several treatments for conditions like arthritis and bursitis, and many of them involve managing symptoms. When it comes to hip health though, your iliopsoas muscles play a huge role.
One of the more effective ways that I’ve found to help patients experiencing hip pain at night is to get them into a healthy nighttime routine that focuses on the root of their hip pain.
For many, this is tight hip flexor muscles. Or rather, releasing them.
Releasing tight hip flexor muscles can be quite the battle because of their location. The safest and most accessible locations to release the iliacus and psoas are inside the structure of the pelvis and somewhat deep within our core. This makes them hard to reach with other types of muscle release equipment like foam rollers and massage balls.
That’s why I invented the Hip Hook. This is a muscle release tool specifically designed to target tight psoas and iliacus muscles and apply prolonged pressure to release trigger points.
With just a few extra minutes each night, you can be well on your way to releasing built-up muscle tension, realigning your hips, and preventing hip pain at night.
The psoas & iliacus muscles are located within the soft spot inside the surface of your pelvic bone. That is why you need to line the tip of the Hip Hook up with that part of your hip. The tip needs to be pointing upward initially so it doesn’t slip underneath you.
Feel free to move the Hip Hook around and adjust it slightly to find the right spots along each of the muscles. There will be different tight spots that you find in your psoas and iliacus, and these may also differ whether you’re on the right or left side of your pelvis.
This can cause some discomfort at first, and the intensity will vary from person to person depending on their level of tightness, but try to breathe deeply and let your body melt into the Hip Hook.
After 30 seconds or so, the intensity will lessen and you will feel your muscles begin to release. Continue to hold that pressure and focus on taking relaxed breaths. The tightness and pressure applied by the Hip Hook into your muscles should begin to reduce.
Use the Hip Hook once on each side for 90 seconds or until the soreness lessens. Do this once a day or every other day. If you’re just starting out, it may be best to do it every other day as it can cause some soreness similar to bruising at first.
Wake up with gentle morning stretches
Your morning routine can be just as influential in lessening your hip pain at night.
After a night of rest, your hip muscles and other muscles are usually quite stiff. Take a few minutes each morning to wake up your muscles and your mind with a few hip flexor stretches.
Some examples of hip flexor stretches to try include:
- Figure 4 stretch
- Crossover stretch
- Half kneeling hip flexor stretch
- Couch stretch
No matter the stretches you employ during a morning stretch routine, be aware of how your hip feels during these stretches.
But be aware that there is such a thing as overstretching your muscles. And this can end up causing more muscle tightness and other hip issues throughout the day.
Just like with overstretching, stretching the wrong way can cause more harm than good. So, learn how to stretch your hip muscles correctly to avoid doing unnecessary damage.
If you are new to stretching, especially with your hips, it can help to get some advice from your physical therapist. Ask them which stretches would be right for your needs, and have them help you practice the stretches using the proper form.
Don’t settle for hip pain at night
Having chronic hip pain at night can impact your sleep habits – and eventually the rest of your daily life – because you aren’t able to get a good night’s sleep.
There are several possible causes of hip pain at night but, no matter the cause, it is important to seek proper diagnosis so you can treat the issue before it impacts your life further.
If you think tight hip flexors could be the root of your hip pain at night, reach out to a physical therapist for some targeted stretches and exercises, and consider investing in your health with the Hip Hook so you can relieve your hip pain from the comfort of home.
Frequently asked questions about hip pain at night
Why is my hip so painful at night?
There can be several reasons why you are experiencing hip pain at night. Perhaps the most common is that the muscles around the hip or even the hip joint itself are inflamed from a long day of being used (sitting, walking, working out, etc.) and you are lying directly on them, adding more pressure and increasing the pain.
How do I get rid of hip pain at night?
To improve your hip pain at night, you may need to adjust your sleeping position. Reducing the amount of pressure placed on your hip by using pillows for added support and to improve the alignment of your hips can help prevent hip pain when sleeping.
Other ideas include performing hip stretches before bed or even releasing tight hip muscles by applying pressure directly to the muscles to help them relax.
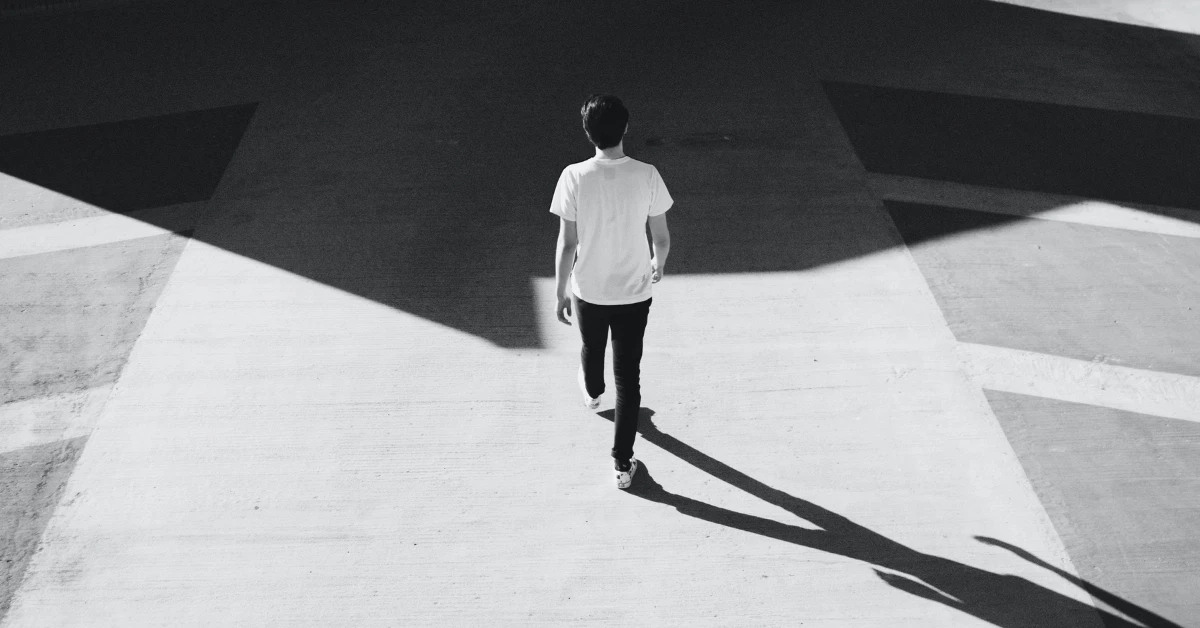
Why Do I Feel Lower Back Pain When Walking?
Do you experience lower back pain when walking? If so, you aren’t alone. Back pain is a prevalent complaint amongst adults in the United States. For most, back pain may occur when lifting things or during exercise, but for others, their back pain extends to average daily activities.
Once you begin to experience lower back pain when walking or standing, the pain may start to interfere with everyday life and happiness.
Whether your pain comes and goes, you have severe lower back pain when walking or standing, or your lower back pain is combined with hip or knee pain, the root cause may be the same.
And to prevent it from interfering with your daily quality of life and work duties, it’s always helpful for you to know and understand the cause of that pain. Then, you and your doctor or physical therapist can address both the surface level symptoms and the root cause with various treatment options.
In this article, I will outline some of the most common reasons people experience lower back pain when walking, and detail one that is often overlooked. From there, I’ll explain some anatomical aspects of your body that you need to know for treating and preventing your lower back pain.
Why do I feel pain in my lower back when walking?
As you may know, there are a multitude of reasons why you may have lower back pain when walking.
Maybe you’re reading this article because you’ve gone to the doctor and they’re having a hard time treating your pain. Or maybe you want to understand what issue you’re experiencing before you go to your first physical therapy appointment.
Whatever brought you here, my goal is not to clinically diagnose your issue, but to help give you some possible causes of your lower back pain so you can move forward to treat it with a medical professional.
So, here are some common causes of lower back pain when walking:
1. Stress on your back
For some, back pain comes on somewhat suddenly, while for others, it is a slow build-up that begins as a subtle ache and turns into severe back pain and even hip pain when sitting, walking or standing. In either case, stress on your back may be the culprit.
Stress, especially on your lower back, comes in many different forms.
For instance, if you are overweight, your body is continuously under additional stress because your joint structures and muscles are put under the extra weight. Being overweight can also impact the pressure placed on your vertebrae, leading to lower back pain.
Other common examples of stress on your back include lifting weights, poor posture when sitting for long periods, general muscle fatigue, pregnancy or a labor-intensive job that requires difficult movements or repetitive motions.
Your back can experience different stressors, but identifying if there was one particular activity or moment when you feel pain in your lower back can help narrow down the cause of your pain.
2. A sedentary lifestyle
Just as overuse can contribute to lower back pain when walking or standing, so can underuse.
Many of us work at a desk all day, looking down at a computer. Although you may adjust your posture from time to time, if you work a desk job, you most likely are not sitting in a way that supports your back.
Additionally, when you sit for long periods and don’t engage your muscles in movement, you contribute to the weakening and tightening of your musculoskeletal system.
Even if you are not sedentary to the point of developing a disuse syndrome, sitting for too long can lead to lower back pain when walking. The build-up to this pain has a lot to do with your muscles, which we will explain in more detail later in the article.
When you sit while driving in the morning, at work during the day, and even when you’re relaxing on the couch at home to unwind after a long day, you put two of your most essential muscles into a shortened position.
These two muscles include the psoas and iliacus, and they make up a part of your hip flexor muscles. Together, they are known as the iliopsoas.
When the iliopsoas is continuously in a shortened position, it begins to develop knots and trigger points, creating a bit of a domino effect with the surrounding muscles and joints, leading to lower back pain when walking.
It doesn’t help that gravity works against you when you are sitting and encourages you to slouch. Your body naturally goes into a slouching position when it thinks you are resting. This is an old instinctual habit to conserve energy, but you are most likely not using as much energy as your ancestors did, so having poor posture and slouching is doing more harm to your back and muscles than good.
3. Spinal stenosis
A more specific medical condition that can cause lower back pain when walking or standing is spinal stenosis. Spinal stenosis causes your spinal column to narrow and compress the spinal cord. It often happens quite gradually and will take a while for severe symptoms to occur. In some cases, no symptoms will occur because the compression is so minimal.
However, in more severe cases, spinal stenosis can put additional pressure on nerves within the spine, causing pain. Spinal stenosis is a condition that can occur anywhere along your spine, which means that the pain may not be isolated to your lower back.
When spinal stenosis is isolated to your lower back, it is known as lumbar spinal stenosis.
4. Muscle tightness
Muscle tightness and muscle fatigue can sometimes be correlated, and both can lead to lower back pain when walking or standing. As I mentioned before, sitting for too long can cause muscle shortening and eventually muscle tightness.
The main reason the iliopsoas impacts your body so intensely is that it is engaged in almost every movement. The iliopsoas is used when sitting, standing, walking, running, stepping up, squatting, hinging, etc. It is rarely at rest, which means that it is easily overused and easily tightened.
Since the hip flexors are a central part of movement and in a central part of your body, they interact with many neighboring muscles, joints, bones, nerves, and other connective tissues. The interaction with these neighbors can lead to lower back pain when walking or standing, especially since the iliopsoas are being engaged during both.
How tight muscles can cause lower back pain when walking
Understanding how tight hip flexor muscles can contribute to lower back pain when walking requires a section of its own.
You see, your primary hip flexor muscles, as mentioned before, are also known as the iliopsoas. The iliopsoas is made up of two connecting muscles: the iliacus, and the psoas.
The iliacus connects to your pelvic bone and the top of your femur bone (your bone in your thigh). The psoas connects to your mid and lower spine, joins to the iliacus, and also attaches to your upper thigh bone.
Since both of these muscles are so heavily used throughout your day, especially during ordinary activities like sitting and walking, they can easily become too tight and overused.
The iliopsoas gets its more common name “hip flexors” because it describes the hip flexion motion. The hip flexion motion is what moves your leg forward at your hip when you are walking. Although these hip flexion movements engage your iliacus and the psoas when walking, they also stabilize the pelvis continually through the day and help keep you upright while sitting. These muscles are constantly engaged. Since they rarely have an “off” time, you can easily see how they can form knots, tighten, and become irritated.
Why do tight iliopsoas muscles cause lower back pain when walking, though?
Tight hip muscles are associated with lower back pain due to their interactions with surrounding muscles, joints, and other functional body parts. You see, once your iliacus or your psoas muscle starts to tighten, one begins pulling on the other, sort of like a game of tug-of-war.
This pull between the muscles then begins to strain the bones and joint areas they attach to, most predominantly your hip and your lower spine.
The pull of tight hip flexor muscles on your bone structures can lead to alignment problems, specifically in your hips themselves. Over time, misaligned hips cause your joints to rub and your posture to change.
The iliopsoas pulls on rear hip muscles like the piriformis and hamstrings as well. As other muscles around your hips and low back are pulled on, those muscles too will tighten. A common example of this would be tightness in your quadratus lumborum muscles (or QL).
It’s easy to see how one muscle’s tightness can lead to many other issues, including back pain when walking. If this one vital part of your body, used in nearly every movement from walking to turning your trunk, is too tight, it can lead to several other issues down the line.

How to prevent lower back pain when walking
One of the first steps in mitigating lower back pain when walking is identifying the root cause of the issue. Since there are a variety of reasons why you could be experiencing lower back pain, I want to encourage you to seek medical advice on the issue.
If your doctor refers you to a physical therapist, then begin to open up a discussion with them about the possibility of tight iliopsoas muscles contributing to your lower back pain when walking.
After you’ve consulted a medical professional, they can direct you in deciding the right course of treatments to help alleviate symptoms and perhaps get rid of the pain altogether.
Some things a physical therapist may recommend will be simple lifestyle changes and habits like improving your posture, integrating more stretching or yoga into your routine, muscle strengthening, and performing muscle release techniques.
Improving your posture
If you have to sit a lot during the day for work or while driving, then ensuring that you have better posture can help reduce your lower back pain.
For many people, improving posture can be as simple as setting up a more ergonomic desk setup, so their feet are touching the ground, their knees put their legs near 90 degrees, their back is straight, and they don’t need to look down to see their computer screen.
You may also try to change the type of chair you use or choose a standing desk.
Stretching and strength training
Moving more can help reduce back pain when walking, especially if you are sedentary for work. Adding in more stretching throughout your day doesn’t have to be anything intense, and it can be as simple as a 5-10 minute yoga or stretching sequence you do in the morning or before you go to bed.
Beyond stretching, muscle balance is something that should be discussed with your physical therapist as well. If one muscle is stronger than another, it can cause an imbalance and add additional stress to opposing areas.
So, you may want to integrate some lower back and hip-strengthening exercises into your routine as well.
Muscle release
One of the most effective ways to address tight hip flexor muscles is to release them. Releasing the iliacus, in particular, can be difficult because of its location on the inside of the pelvic bone (or ilium). Most of the time, people can only get a proper iliacus or psoas release when they are at the physical therapist because another person applies the pressure at the best angle.
Still, if you only go to your physical therapist once a week or less, then your muscles are not being released often enough to make much of a difference in your pain levels. That’s why I invented the Hip Hook.
The Hip Hook allows many of my clients to perform psoas and iliacus muscle release at home as often as they need. For some, this is every day, and for others 2-3 times a week will suffice. Either way, the benefit is that it allows for prolonged pressure on the hard-to-reach psoas and iliacus muscles, achieving a better release of tightness.
Over time, as you continue to release the iliopsoas muscle, the tension created on other parts of your body, like your lower spine, also decreases. That’s why continued care of the hip flexor muscles is an integral part of addressing lower back pain when walking or standing.

Frequently asked questions about lower back pain when walking
How do I stop my lower back from hurting when I walk?
Making sure that you are holding yourself in good posture as you walk is one way to help reduce your lower back pain. This helps to properly engage your core and use the stronger muscles in your legs and hips to propel you forward with each step.
Some other ideas include doing various exercises to stretch and strengthen your muscles, as well as other corrective exercises that address potential muscle imbalances causing misalignment of the lower back and pelvis. This could include using muscle release techniques for muscles in the hip flexors and also the lower back.
Is it okay to walk with lower back pain?
Walking can be a great low-impact form of exercise for people with lower back pain. Walking can help get more movement into the hips and pelvis and increase circulation to the surrounding muscles, allowing them to loosen up a bit and even reduce the pulling on your lower back.
Why does my back hurt after walking for a longer period of time?
Walking for longer periods of time can cause the muscles supporting your lower back and pelvis to become fatigued, potentially leading to them feeling sore and overused. Slowly increasing the length of your walks over time along with the proper stretches and releases can help the muscles to recover and grow stronger, allowing you to walk longer distances.