Your cart is currently empty!
Category: Pain
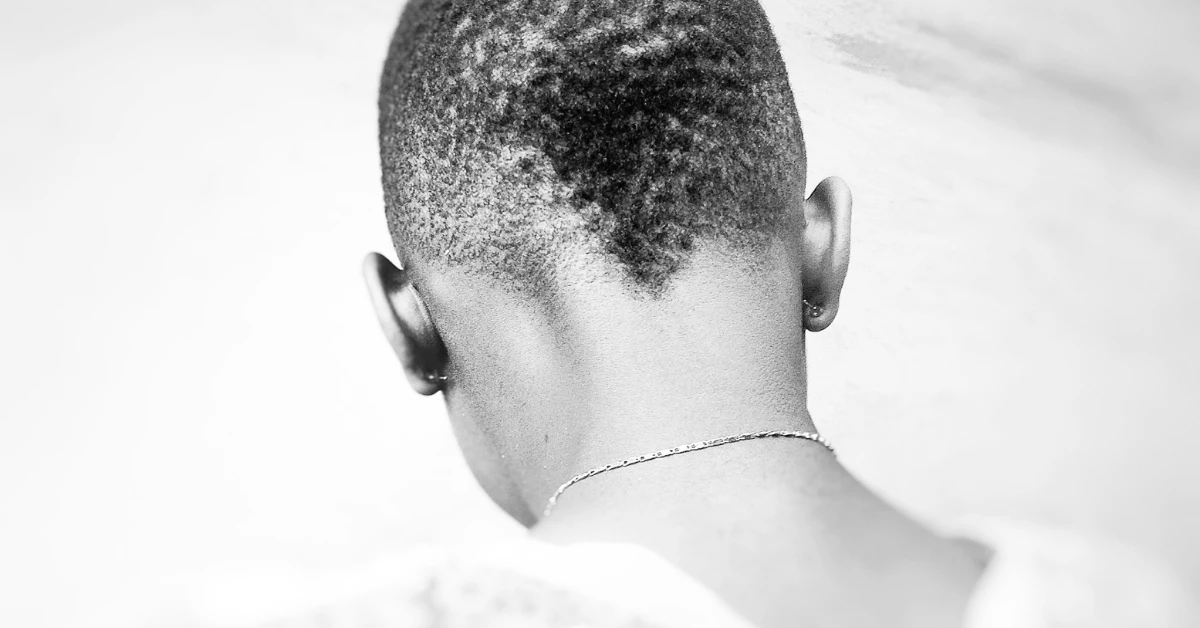
Tightness at the base of the skull? Massage these muscles
You’re likely to be sitting at your desk when it strikes: a slow, throbbing neck pain that feels like a kink at the base of your skull. Sometimes, the pain might feel like a sharp electric shock. At this point, you’re likely to perform a couple of neck stretches for pain relief.
The pain is likely to radiate up your head, making your temples tender. It may spread to your shoulders and travel down your back, causing tingling and numbness in your arms.
The pain is caused by tension headaches which result from trigger points, and muscle tension builds up in the muscles surrounding the head and the neck. Simply put: you have tight shoulders and a stiff neck.

Why are my back of the neck muscles so tight?
Technology is neck pain’s primary culprit. Our reliance on technology puts enormous strain on our necks. We usually tend to move our heads out of alignment when using a cellphone or a laptop by rounding forward.
Keeping your arms in front of you contracts the muscles in your chest – the pec minor muscles, which round your shoulders forward. Tightening pec pulls your shoulders forward, and the body compensates for this development by pulling your head forward.
As your head leans forward, your bones are no longer doing the work of keeping you upright: it’s all on your neck muscles. Your new forward head posture throws off your head and spine alignment. Your neck muscles now carry the bulk of the weight of your head. The additional load places undue stress on the suboccipital muscles at the back of neck, resulting in pain and tightness.
How to relieve pain at the base of the skull
There’s a group of muscles, the suboccipital muscles at the base of your skull, and muscle knots in these muscles can be responsible for tension headaches. These are four pairs of muscles that facilitate the subtle movements between your head and the neck.
They provide postural support and allow the neck’s rotational and extension movements. The muscles are innervated by occipital nerves, a series of nerves running from the spinal cord to your scalp.
Poor posturing such as slouching and forward head posture builds tension in the suboccipital muscles. Sore and tender suboccipital muscles irritate and inflame the occipital nerves, leading to a condition known as occipital neuralgia. The condition manifests as pain at the base of the skull or in the back of the neck. Most people turn to neck stretches for pain relief, with only temporary results.
Direct, prolonged pressure on the suboccipital muscles is the best way to relieve pain at the base of the skull. Press into the muscles and hold for 30 to 90 seconds.
Deep pressure massage for the neck
Sore suboccipital muscles feel like wearing a painful crown or band wrapping around your head. When tense, these muscles may compress the nerve that exits at the base of your skull, triggering tensional headaches. Prolonged deep pressure, specifically on these spots, helps to relieve muscle tension and the resultant headache.
Relieving sore and tense suboccipital muscle requires consistent pressure. Rubbing on trigger points in the neck can actually activate them, creating increased pain in the long run.
Applying mild to moderate pressure on the muscles produces a “hurts so good” sensation. The intensity of this sensation decreases as the muscles soften and relax, taking away your headache and your pain.
Trigger points in the neck and traps can cause tension headaches
Working on your laptop for a lengthy period may be the norm. But an hour of typing on the computer may cause a tensional headache. Hunching over the computer creates trigger points in the neck and upper traps, leading to tension headaches.
Trigger points are knotted muscles that trigger pain in another part of the body. If you have muscle knots in your neck or upper trap muscles from hunching or poor posture, they might refer pain to your head, giving you a headache. Pain medication might help relieve the headache (symptom) but does little to solve the actual problem.

Tight chest muscles and rounded shoulders can cause neck pain
The pectoralis minor (pec minor) is a tiny muscle that connects your shoulder to the rib cage. It helps to stabilize, rotate, and support all your shoulder movements. Poor posture causes the pec muscles to become tight and shortened.
Tight and short pec muscles pull your shoulders in towards your chest. Besides rounding your shoulders, shortened pec muscles lead to the upper crossed syndrome, a condition characterized by deformed neck, shoulder, and chest muscles.
When the pecs are tight and short, they pull the shoulders in toward the chest and can also contribute to forward head posture. This turns on the upper trap resulting in the creation of tension knots and trigger points in the upper trap muscles. Naturally, most people opt for a shoulder rub to soften and relax the tight muscles. However, pressing and massaging the knots in the shoulder muscle amounts to treating the symptoms.
Your real problem is the tension in the pec minor and the suboccipital muscles. Remember, the suboccipital muscles are close to the spine and buried underneath the upper traps. Releasing the pec minor (with pressure and not just chest stretches) and the muscles at the base of your skulls is critical to eliminating muscle knots in your traps. If the upper traps still need attention after addressing the neck and chest, then release them third in the sequence.
Massage or chest stretches?
Stretching is a popular way to relieve muscle tension, but it may not help tension tightness. Stretches help to lengthen the muscle, which improves blood circulation, muscle repair, and increases the range of motion.
However, stretching doesn’t work well on knotted muscles. The muscles might elongate just a tiny bit but retain the tension as soon as you stop. Typically, your brain holds muscle tension to protect you from pain and injuries.
Likewise, rubbing or massaging a muscle produces short-lived effects. Rubbing improves the muscle’s pliability and circulation to ease some of the tension.
After a while, the effects will wear off, and the fibers retract to their original state. It might feel good to rub or stretch a muscle holding tension, but it won’t help to release and relax tension longterm.
Neck massage or neck stretches for pain
While stretching may feel good, pressing on muscle is the most effective way to release muscle knots. Applying prolonged pressure, about 30 to 90 seconds, with your fingers or a tool produces the best result.
Initially, pressing on a muscle elicits some pain, but after 30 seconds, the pain dissipates as the muscles relax. Your brain instructs the muscle fibers to stop contracting and relax, producing long-term results. The effects can last for hours, days, or even months to allow you to lead a pain-free existence.
After you’ve released tension using pressure, you may find that your neck feels less tight and can stretch into a greater range of motion more easily. These effects will last longer compared to stretching alone.
A rotated pelvis may be causing neck and shoulder pain
Anterior pelvis rotation refers to a pelvis pulled forward due to tension at the front of the hips. Tight hip flexors pull the pelvic bone forward and throw the tailbone and pelvic bone joint out of alignment. As a result, the joint creates tension, gets irritated, and becomes painful.
Anterior hip rotation changes the way the ball fits in the hip joint socket to alter the entire trajectory of your leg. More importantly, a twisted hip limits the rotation of the spinal column and affects alignment higher up the spine. It leads to lower back pain and nerve irritation that affects your entire back and shoulders.
Our bodies have a primary core (hips/abdomen) and a secondary cores (neck/shoulders). Tension in either of these cores can create pain in other areas of the body. Therefore, it’s critical to keep our cores strong, properly aligned, and relaxed to ensure our spines, limbs, and nervous systems work properly.
Hip flexors are a crucial part of our primary core. The primary core comprises the abdominal muscles, back muscles, and hip flexors. If your body is under stress or traumatized, it holds tension in the primary core around your pelvis. Unfortunately, tension and pulling in the primary core irritate the nervous system.
Your neck and shoulders form the secondary core to support the upper part of the body. If you’re stressed, you’re likely to have tension in the pec minor, the tiny muscle connecting your shoulders to your chest.
Tight pec minor pulls you forward, resulting in rounded shoulders. Rounding shoulders pull your head forward and misalign your spine, which twists and irritates your nervous system. The nervous system irritation is more pronounced if you have more tension on one side than the other.
Misalignment in the head and neck junction creates tension at the base of the skull. Carrying tension at the bottom of the head and in pec minor severely irritates the brain, brain stem, spinal cord.
As a result, your nervous system is in a constant state of fight or flight mode. Any efforts to release muscle tension won’t work when your nervous system is in this state constantly.
Releasing and aligning the primary core is an important first step before issues in the upper body, neck, and shoulders can be resolved for good.

Stress and neck pain
There’s a direct connection between stress and neck pain. When you’re stressed, you’re likely to curl up into a fetal position with your head jutted forward, shoulders rounded, and knees tucked into your chest. This position activates the muscles at the base of your skull, your chest (pec minor), and your hip flexors.
Even if you don’t actually go into the fetal position, these are the most common areas where people develop muscle tension as a result of stress.
Unfortunately, all these positions produce muscle tension and irritate the nervous system. Stress creates muscle tension at the back of the neck leading to neck pain. Absolutely use additional relaxation efforts such as warm baths, meditation, or a walk in nature to affect your stress level. But don’t forget about also releasing the patterns that have formed in your muscles!
How to relax tight neck and shoulder muscles
Addressing muscle tension in the primary and secondary core is the most effective way to relax tight neck and shoulder muscles. In the primary core, you need to release the iliacus and psoas muscles at the front of the hips with a specialized tool like the the Mark (formerly the Hip Hook). At the back of the hip, you should release the piriformis and deep hip rotators with a massage ball, such as the Orbit.
In the secondary core, you release tension in the base of the skull and pec minor. Some people try to do this with tennis balls, but this is ineffective because it is too soft and not shaped properly to deliver precise pressure where you need it. We highly recommend using a specific tool, such as the Range, that is anatomically-shaped to access these small but mighty muscles.
Applying direct, prolonged pressure is the most effective way to release muscle tension. Prolonged pressure on a muscle knot causes the muscle to soften and relax, which signals the brain it’s safe to release tension in those muscles. You can apply direct, prolonged pressure with your fingers or a dedicated tool.
Eliminate tension headaches today
Tools designed to apply pressure like hands and fingers work best when releasing muscle tension. It provides the specific angular pressure you need to reach and release the sore spots. The best tension release tools allow you to apply prolonged pressure without sliding or rolling, and are angled to provide precise, targeted pressure. They can handle the pressure, adapt to your body, and isolate the small yet critical muscles.
We recommend a product called the Range (formerly the Nuckle): it’s designed by a physical therapist to release, relax, and realign these specific muscles that become tight and affect your head, neck, and shoulders (these are the suboccipitals, pec minor, and upper traps). With three widths and six angles, it can adjust to every body and apply clinically effective specific pressure to relax tight muscles and reduce pain.

Commonly asked questions about how to fix forward head posture and tech neck
Why is the back of the neck tight?
The back of the neck is often tight because of over-activation of those muscles caused from forward head posture, looking down, and tension due to stress. Rounded shoulders due to shortened and tight pec minor muscles can place additional strain on these muscles at the base of the skull.
How do I fix nerd neck?
You can fix nerd neck by releasing muscle tension at the base of your skull and in the pec minor. Applying direct, prolonged pressure with your fingers or a specialized tool to these areas helps to relieve muscle tension and improve posture.
How to correct forward head posture?
You can correct forward head posture by first releasing muscle tension in your pec minor and the suboccipital muscles at the base of the skull. This gives you a better opportunity to get into a good posture and, over time, strengthen your postural muscles to maintain proper spinal alignment. Without releasing these key areas first, you’ll always feel like you’re fighting against tension and forcing your posture.
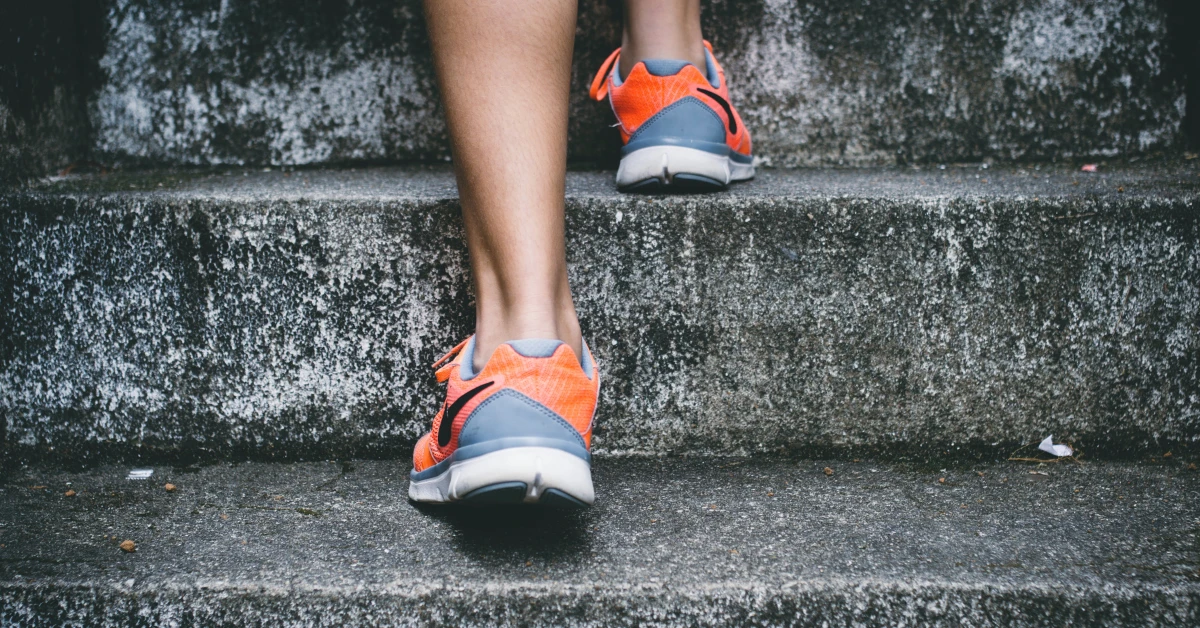
It’s in the Hips: A Runner’s Guide to Hip Pain & Running
Do you experience hip pain running? If so, you’re not alone.
While knee pain may be reported more commonly by runners, the answer to that pain may lie in the hips.
Hip pain can get in the way of a lot of your daily activities from going up and down the stairs, sitting at your desk while you work, and doing activities that you love – like running.
So what are you supposed to do? Just stop running?
Depending on the specific issue, you may need to take some time off doing high impact activities like running. But, more often than not, the cause of your hip pain while running boils down to one simple culprit: tight muscles.
Specifically, tight iliopsoas or hip flexor muscles.
Now, this isn’t the only reason for hip pain running, but your hips influence a lot of other areas of your body, so getting to the bottom of your hip pain should be a top priority.
Before we get into the causes of hip pain when running, it’s important to understand how exactly your body moves when you run.
Anatomy of running
When you run, your body primarily uses sagittal movements as your arms and legs propel you forward. Sagittal movements are joint movements that occur on the longitudinal plane that divides your body into left or right parts. These movements are a flexion or extension.
While running primarily utilizes sagittal movements, there will also be rotation of your leg joints to support your body weight as you move. An additional counter pelvic rotation will occur as your chest moves forward on the opposite side from your leg.
That’s all good to know, but what exactly does that mean? To break it down, let’s look a bit deeper at your running gait cycle.
The running gait cycle is characterized by having both of your feet off of the ground, versus walking where both of your feet are on the ground.
In this instance, we are defining a cycle as the period of time between one foot making contact with the ground until the same foot reconnects with the ground.
There are two phases in a runner’s gait cycle: the stance phase (sometimes called support) and the swing phase.
When you are in the stance phase, and your foot makes its initial contact with the ground, you have a foot strike. This will occur mid-stance through your toe-off and takeoff.
Your swing phase starts with a float that moves forward into a swing or swing reversal, and then finishes with a foot landing. Once your foot has moved through these motions, the cycle begins again.
Your running stride length, form, and a few other physiological factors can impact the length of your running gait cycle.
Through all of these movements, several parts of your body are engaged. They are the:
- Plantar fascia
- Subtalar joint
- Achilles tendon
- Soleus
- Gastrocnemius
- Hamstring
- Glutes
- Rectus femoris
- Pelvis
- Abdominals
How much strain is on a particular area of your body while you run has a lot to do with your running form and the distribution of stress. If you have improper form, or something in your body is off balance, you are much more likely to develop hip pain running.
Why do I have hip pain from running?
While you engage several areas of your lower body while running, one of the primary motions is happening in your pelvis with your iliopsoas. The iliopsoas is made up of your iliacus and psoas muscles which are responsible for hip flexion, and are therefore also referred to as “hip flexors.”
Running utilizes the iliopsoas to swing the leg forward in the running pattern described above while simultaneously stabilizing your spine and your hips.
Your leg strides forward by using your iliopsoas. Then, when your leg extends behind you, the muscle stretches out. You are repeatedly contracting and stretching while your muscles work to stabilize your hip and spine which can quickly lead to overuse and muscle fatigue.
Because of this constant engagement of the iliopsoas as you move through the cyclical running gait cycle, there is a good chance one or both of your iliopsoas muscles will develop tightness.
When you have tight hip flexors, you may experience hip pain running, but many runners also experience pain in their knees, glutes, ankles, and lower back because of this muscle tension.
Some of these additional pain points along with hip pain while running can be signs of a tight iliacus.
What is really surprising to most runners is that your hip flexors never really get a break, even when you’re done running. When you are doing other things like sitting at your desk, laying on your couch, or simply doing household chores, your iliopsoas is still engaged.
That means these muscles could be why you continue to have hip pain after running or when you haven’t been running for a few days.
Since these are stabilizer muscles that control the flexion of your leg and any hip extension when running, they have a lot of pull in the surrounding muscles, joint structures, and bone alignment.
Tightness in the iliacus and psoas is so important to take note of as a runner because it can create a domino effect in your body.
Other common running pain points
If left untreated, overly tight hip flexor muscles can lead to a rotated pelvis, general body misalignment, poor posture, nerve pinching, hip joint pain, knee pain, ankle pain, SI joint pain, and lower back pain.
Not to mention, tight hip flexor muscles can impact your running gait and form – which can lead to further overuse injuries.
Not all running related pain points are directly associated with tight iliopsoas muscles, but many of them are. Here are some of the most commonly reported pain points for runners other than hip pain while running:
Knee pain after running
Have you ever heard of runner’s knee? Plantar tinnitus? IT band syndrome? All of these are common injuries that cause knee pain after running. Their causes vary but often knee pain and tight hip flexors go hand in hand.
Other causes of knee pain while running include overuse, improper form, or a muscular imbalance.
Ankle pain after running
If your ankles hurt during or after your run, it could be a matter of biomechanics or running form impacting the joint. Other causes of ankle pain associated with running include ankle tendonitis, arthritis, stress fractures, ankle instability, or sprains and strains.
Getting running shoes for overpronation can also help eliminate some ankle pain while running.
Hamstring strain
Much like your iliopsoas, your hamstrings are under a lot of stress and being continuously contracted as you run. When they are used for such repetitive movements, they may become strained.
If you’ve started to feel a sudden, sharp pain in the back of your thigh, swelling, bruising, or a popping sensation during or after your run, then you may have a hamstring strain. These symptoms may occur within 24 hours after the activity and may inhibit your ability to walk.
A hamstring strain can also cause hip pain while running.
Plantar fasciitis
Sometimes referred to as runner’s foot or running feet, plantar fasciitis is when the thick band of tissue that connects your heel bone to your toes becomes inflamed. This is a commonly reported pain point for many runners, especially long distance runners.
The most common symptom of plantar fasciitis when running or walking is a stabbing pain near your hee. This pain may be worse in the morning or during activity.
Piriformis syndrome
Your piriformis muscle is a small, stabilizing muscle in your hip joint under your glute. It is used to externally rotate your hips and stabilize your pelvis. The repetitive action of running can cause irritation of the piriformis muscle, especially if you have tight hip flexors.
When the piriformis is inflamed, it can irritate your sciatic nerve – causing symptoms in your thigh like weakness, numbness, or pain. Symptoms of piriformis syndrome often increase in severity when engaging in activities like running, squatting, lunging, or going up stairs.
Piriformis syndrome can also cause hip pain while running. Piriformis stretches can help.
Root causes of common running injuries
As we’ve mentioned, hip pain from running isn’t always due to tight muscles, and you can often narrow down the cause by identifying the area of the hip pain and visiting a medical professional.
For instance, if you have lateral hip pain, you may only have pain on your left hip. This hip pain may be associated with tight hip muscles and a rotated pelvis.
However, lateral hip pain can also be due to bone damage like a stress fracture which is why it is important to seek guidance from a medical professional.
Since tight muscles isn’t always the root cause of running injuries, we want you to be aware of three other common causes of hip pain while running:
Strength imbalance
Strength training is often recommended to runners as a cross training exercise. This is primarily to avoid strength imbalances that cause injury. If you have hip pain running, it could be due to a strength imbalance in your hips.
Muscle imbalances can also contribute to muscle tightness as stronger muscles overcompensate for weaker ones.
Having proper running form, performing regular counter muscle exercises, and engaging in cross training like yoga and swimming can help prevent muscular imbalance. You can also get regular muscle massages and practice muscle tension release.
Overuse
As the avid runners reading this know, running can be fun, amazing, and somewhat addictive.
What you also know is that it can be really hard on your body. That’s probably why you’re reading this article!
Overuse of your joints like your hips or your knees can lead to issues in muscle tightness, muscle strain, or even long-lasting disorders like bursitis. Overuse can also lead to more serious issues like stress fractures or cartilage tears if you continue to run on an already injured joint.
Most overuse injuries are noticeable while you are running and will cause inflammation after you’ve completed the run. If you feel hip pain running, running fewer miles and taking a few days off may help with mild overuse injuries.
Fractures or tears
Stress fractures and cartilage tears are also common causes of hip pain while running.
If you have a sharp pain on the inside of your hip when running, then it could be a stress fracture. This is especially true for road runners or long distance runners.
A cartilage or labral tear is often noticed by the clicking or catching feeling in your hip when you run, especially if it causes pain. If you’ve recently fallen or twisted your hip, a labral tear is even more likely.
Both fractures and cartilage tears will get worse if you keep running on them. So, if you suspect you have either of these, visit a doctor as soon as possible for treatment.
Running recovery
If you have hip pain running, one of the best treatment options is to visit a physical therapist. A physical therapist can help you determine the root cause of your pain, give you direction on treatment, and provide advice on running recovery to prevent future pain.
Physical therapy can easily answer some of your common questions like:
“Why do my ankles hurt when I run?”
“How can I learn how to run longer without causing hip pain?”
And “are there ways I can heal my hip pain at home?”
Delving into the causes of hip pain while running is just the start. From there, you can start to address the issue head on and hopefully get rid of your hip pain for good.
One of the most amazing discoveries I’ve made with my patients is how to release the iliacus muscle to prevent hip pain while running. To do this, you need to have a tool like the Hip Hook that can reach the iliacus muscle properly to perform a muscle tension release.
Muscle tension release appies prolonged pressure to release the tension. When tension is released, the muscle can finally relax and quit pulling on the surrounding area.
While stretching is a necessary and often recommended practice for runners, when it comes to releasing muscle tension, you do not want to stretch muscle knots.
Other trigger points to release that can help relieve running pain points include:
Doing a muscle tension release just once won’t solve your problem. Like most PT exercises and treatments, they take time and need to be performed daily. The same goes for the Hip Hook.
Investing in your running recovery is one of the most effective ways to curb some of the most common causes of hip pain from running. Use the Hip Hook daily along with strength training exercises, hip alignment exercises, and limited stretching for best results.
FAQs about hip pain and running
Is it okay to run when I have hip pain?
Anytime you feel pain when you run (in your hips, knees, ankles, feet) you should take a break from the activity. Find the root of your hip pain: releasing your the hip flexors with a specialized tool like the Hip Hook is a good start. You can gradually reintroduce running once you start to feel better, but it is in your best interest to address the hip pain to treat the root cause and avoid pain or injury in the future.
How do I strengthen my hips for running?
Working with a physical therapist can help you target weak muscle groups and balance out muscle strength. Tight muscles are weak muscles, so make sure you don’t have tension in key core muscles, like the psoas and iliacus.
There are several exercises you can do to strengthen your hips for running, including:
- Body weight squats
- Clam shells
- Side leg lifts
- Donkey kicks
- Single bodyweight leg squats
- Hip bridges
How do I know my hip pain is serious?
Once you notice swelling that doesn’t go away with rest, redness in the joint area, joint pain that persists even without activity, or intense enough pain that it makes it difficult to move your hip joint, you should see a doctor.

How Hip Extension Impacts your Running Form (and Comfort Level)
Does hip extension impact your running efficiency? What about running injuries and pain points?
Yes, yes, and yes! Hip extension matters in all of those cases.
Hip extension in running begins as your leg passes behind your center of gravity in your running stride. It is essential to producing the power phase that propels you forward.
It can make or break your running stride.
This article will help you better understand how your hip extends while running – so you can improve your efficiency and prevent unnecessary running injuries.
Hip biomechanics when running
As discussed in the guide to handling hip pain from running, the anatomy of running has a lot to do with hip positioning.
There are a lot of variables at play in the biomechanics of running, but the easiest way to understand them is to look at the running gait cycle and why hip extension is so important throughout.
Running involves a lot of propulsion. These actions create extension throughout your body, including your hips.
When you are in the mid stance of your running gait, your foot passes beneath your hips. Here you need to create a strong and stable propulsive drive to move into the next stride. You do this by pushing the ground away and moving your body forward.
This propulsive extension is essential to effective running and involves continuous and repetitive hip extension. Running athletes with a powerful stride and large extension range are likely to store extra energy in their hip flexors and tendons due to an efficient recovery or elastic recoil.
Hip extension opens up your stride for the elastic recoil of your hip tendons. If you stretch your tendons quickly, they should spring back to their original length. This motion pushes your knee forward again so you can start your next stride.
Your hip is not the only part of your body going through extension while you run though. Many runners may be familiar with the term “triple extension.” This term applies to your running gait and the extension of your hip, knee, and ankle since they happen concurrently.
Understanding the hip flexor motion during extension is necessary because triple extension is driven top-down, meaning it starts at your hip. This extension involves your iliopsoas muscles, glutes, and hamstrings as they drive your leg back, stabilize your pelvis, and flex forward once more.
While each of these muscles has a role to play, the iliopsoas is the major player.
Hip extension for efficient and pain-free running
Since your running stride moves in a top-down motion, your hip positioning and extension dramatically influence your running efficiency.
During hip extension, your push-off leg moves behind your body and your gluteus maximus and hamstrings perform the brunt of the work. In order to reach an efficient triple extension, you need to be able to reach far back enough in your stride to engage your glutes fully.
What would prevent full glute or hamstring engagement during hip extension?
Tight and imbalanced muscles are largely to blame.
You could also be dealing with a rotated pelvis, IT band syndrome, foot pronation, piriformis syndrome, lateral hip pain, or a multitude of other pain points. But did you know that all these issues could be related to tight muscles?
Specifically, tight iliopsoas muscles.
Tight muscles in your pelvic region, especially the hip flexor muscles, can cause a domino effect that impacts other major muscle groups and joint structures.
The extension of your hips can also be impacted.
Your iliopsoas is responsible for hip flexion, or moving your legs forward and up. When your leg goes into extension, you are no longer engaging the iliopsoas, you are stretching it.
If these muscles are too tight, they are “frozen” in a shortened position, limiting your backward movement during extension.
Limited extension of your hip while running means your body is less likely to achieve the most efficient mode of triple extension. You may notice your body begin to compensate, such as by arching your lower back to “achieve” a similar motion. It also means you are exposing your body to higher impact.
A combined muscle strength in the glute and hamstrings and flexibility in the iliopsoas is necessary to reach triple extension or efficient hip extension. Improving both can create harmonious balance in your running stride and improve your range of motion and speed.
Poor hip extension and running injuries
Limitations in your body can impact the extension of your hips and increase the potential forrunning injuries. The three main limitations include:
- Tight hip flexor muscles
- Poor glute activation and strength
- Weak hamstring muscles
Any one of these things can cause the other, meaning once you experience limitations in your hip extension, be on the lookout for weak glutes and hamstrings as well.
If poor extension is allowed to continue as you push more running miles, it is also possible you’ll begin to experience hip pain after running.
Tight hip flexor muscles
Muscle tension in the hips and even weak hip muscles may be associated with an imbalance in running biomechanics that disrupt your running gait and hip extension.
Nearly all runners I’ve seen have tight hip flexor muscles, not just because they engage these muscles as they run, but because they live a sedentary lifestyle outside of running.
When you sit, your hip flexors are engaged and pushed into a shortened position for extended periods. Over time, your muscles can become frozen in this shortened position. This is bad, especially for runners, because when you run, you not only need hip flexion, but extension too.
Your hip flexor muscles need to be flexible and strong enough to fully stretch, propel, and lengthen as you move through your gait cycle.
As your running form gets out of whack from an inability to perform a proper gait and extension, other parts of your body may start to suffer. If these muscles are allowed to stay shortened and tight, they can even cause a rotated pelvis – leading to running posture and form issues.
Do you have knee pain after running? Well, that might be from tight hip flexors!
Have you ever asked yourself: why do my ankles hurt when I run? Well, you guessed it, it could be from tight hip flexors.
Once the kinetic chain is disrupted in your pelvic region, you can guarantee a domino effect will move down your body until you fix the imbalance, muscle tightness, and alignment.
Muscular imbalance and weakness
Poor muscle activation, weak muscles, or muscular imbalances can all impact your hip extension effectiveness – and even cause some running injuries.
If you are a runner that doesn’t do enough cross training or strength training, it is easy to develop muscular imbalances that lead to poor muscle activation or strain.
When one muscle is not strong enough to keep up with the rest, the surrounding muscles end up putting in the hard work, increasing muscle fatigue and the likelihood of injury.
Running recovery exercises for injury prevention
In order to have full mobility and efficient extension in your hips while running, you need a solid foundation of optimal joint and muscular biomechanics. Then, you can start focusing on things like your overall strength, power, coordination, and synchronization while you run.
In order to achieve balanced biomechanics while running, you need to build healthy habits and running recovery routines that include practices like:
- Strength training
- Cross training
- Mild stretching
- Muscle activation activities
- Joint mobility exercises
- Muscle tension release
You might not know how to implement all of these things on your own, and that’s okay. It is best to seek professional help from a physical therapist to make certain you use proper form and the appropriate exercises for your needs.
As you perfect your biomechanics, you can move into coordination that focuses more on running form and achieving triple extension.
In order to get there, you need happy, aligned joints and relaxed muscles. While you may be able to tackle your glutes and hamstrings with a foam roller or massage ball, the iliacus and psoas muscles that make up your hip flexors are much harder to reach.
That’s why I invented the Hip Hook and the Hip Release Ball.
The Hip Hook is specially designed to reach behind your pelvic bone and apply prolonged pressure to the hard to reach iliacus muscle.
The Hip Release Ball can then be used to reach the psoas muscle. The size and firmness of the ball make it possible to target the psoas without the ball getting lost in your abdomen. Plus, this ball can be used to release the back of your hip and your glute muscles.
Forming healthy habits that include muscle tension release and the above practices can help you achieve a healthy hip extension while you run. This will not only shield you from running injuries, it can even improve your performance.
FAQs about hip extension and running
How much hip extension does a runner need?
An average runner extends their hip around 10-15 degrees from toe off. Hip extension can be limited by factors such as a tight iliacus and psoas muscle.
How can I improve my hip extension for running?
Improving your hip extension involves improving your hip mobility, hip flexor release, and a consistent running recovery routine. Make sure you focus on both the psoas and iliacus muscles, the primary hip flexors.
How do tight hips impact my running?
Tight hip flexors can pull your body out of alignment, imparting your running gait and many other parts of your body. All of these factors influence your running form, hip extension, hip flexion, and how your foot hits the ground when you run

Your 3 Running Recovery Commandments
It doesn’t matter how seasoned of a runner you are, you need a healthy running recovery routine at any level.
For many runners, hip, knee, and ankle pain can make an activity they once loved turn into a painful endeavor. But it doesn’t have to be that way.
You can make recovery a part of your healthy routine, which could lead to running longer and/or faster with little to no discomfort.
While things like diet and sleep certainly play a huge role in running recovery, the main focus needs to be on relieving muscle tension, soothing muscle knots, and encouraging muscle recovery. Building a personalized program is a great way to reverse some of these painful byproducts of running – and even prevent them in the first place.
Why you need a running recovery routine
Running is an excellent way to stay healthy in body and mind, but it can also be hard on your body!
If you’re looking into how to run longer or more frequently, knowing how to run with proper form, doing plenty of cross-training, and implementing a running recovery routine are all measures needed to prevent running injuries.
Many running injuries are due to overuse. These overuse injuries can also come from muscular imbalances and tightness, which can be avoided with the right post-running routine and by implementing intentional rest days between hard runs.
Now, if you’re someone that has hip pain after running, then these types of recovery practices become even more essential. Hip pain or knee pain from running usually means one thing: your hip flexors are tight.
Your hips are a vital part of your running stride. They provide your hip flexion and allow proper hip extension when running as well. Unfortunately, they’re also prone to fatigue from running, which causes muscle tightness and knots.
Runners that also have an office job and live a relatively sedentary lifestyle outside of their daily run are even more likely to have tight iliopsoas muscles.
How can you hurt your muscles by sitting, though? Aren’t you resting them?
Well, not exactly. In fact, excessive sitting is one of the easiest ways to get tight hip flexors. You see, when you are in the seated position, your iliacus is continually in a shortened position. If you leave it here for too long, it can start to “freeze” and develop knots.
By the time you get to this “frozen” muscle stage, you start to lose flexibility that allows for proper flexion and extension while you are running.
As tightness builds, both your iliacus and psoas muscles begin to pull on all their nearby muscles and joints which creates a domino effect from your hip out.
If you’ve ever asked yourself, “why do my ankles hurt when I run?” it might not have to do with your ankles at all. Having tight iliopsoas can effectively cause lower back pain, knee pain, and even ankle pain.
The domino effect from tight hip flexors is so dramatic because of its location and ability to pull your pelvis out of alignment. Anatomically, if your pelvis is out of alignment, then it becomes difficult for you to properly perform certain movements like running.
The best way to address issues like tight muscles is to employ preventive measures in your running recovery routine.
Your 3 running recovery commandments
There are three practices I recommend for every runner in their running recovery routine. How often you do these running recovery commandments will depend on your running regiment and knowing your body and personal needs.
There are several other things you can do before and during running that will help as well. For example, there are running shoes for over-pronation and many warm up routines to try before your run.
Working with a medical professional like a physical therapist is a great way to build an effective running recovery program that helps you reach your individual health goals. For everyone, however, these are the three running recovery commandments I recommend.
1. Implement a proper cool down
Doing a proper warm up is important, but it may be even more important to do an effective cool down. When you think of a cool down for running, most people think of walking for a few minutes and stretching.
Both of these can be effective cool down tools, but should be done so with caution and with the right timing.
While the cooldown is arguably the best time to stretch your muscles because they are warm and pliable, if you have muscle knots, are hyper mobile, or have tight hip flexors, be careful how much and how deeply you stretch.
First, don’t stretch muscle knots.
Stretching is great for muscle to brain communication, blood flow, and helping the muscles repair after exercise, but it does have its limitations.
One major limitation occurs if you have a muscle that is holding muscle tension, meaning it is contracted and in a shortened position (much like when sitting). When you stretch with muscle tension, the muscle may elongate some, but the muscle tension will still exist.
You’ll likely notice this muscle tension in the form of muscle knots. So, if you notice you have muscle knots in certain areas after running, you can stretch them but do so very carefully.
If you go on a really long run (more than 90 minutes), acute muscle damage is actually possible if you jump right into stretching from the run. So, before you stretch it out, walk for a while to let the muscles begin to relax and engage in a new way.
Part of your cool down period (20 minutes post run) should also focus on things like refueling through nutrition and hydrating.
During the cool down activities, like stretching and walking, start hydrating right away. Having proper hydration can help your muscles stretch more effectively and prevent injury caused by overstretching.
2. Use foam rolling and massage
When your muscles are holding tension, stretching, massage, and foam rolling will all feel good.
Massage and foam rolling help you stimulate more blood flow throughout your muscles and can encourage faster muscle recovery.
However, these activities may not get rid of the muscle tension, nor allow you to reach all of the muscles you want to massage.
This is especially true when it comes to IT band tightness. If anyone has ever told you to foam roll your IT band, I’m sorry to break the news to you – your IT band isn’t a muscle and foam rolling is a waste of time (not to mention really painful).
Using a foam roller or other massage tools can be effective with the right applications. Foam rollers are also great additions to certain stretches and have the potential to help stave off delayed onset muscle soreness.
3. Practice muscle pressure release
When you have muscle tension in your body, it can cause issues like hip pain from running, lateral hip pain, or even ankle pain from running.
You can hold muscle tension anywhere in your body, and muscle pressure release is the most effective way to release that tension. Since we are focusing on running, we are also going to focus on ankle, hip, and knee pain and tight hip flexors.
Not only are your hip flexors required for flexion and extension, they are also primary stabilizing muscles and are used to move your trunk from side to side. The constant engagement of these muscles make it easy to see how running can fatigue them and cause muscle knots.
The issue with getting muscle knots out of these two specific muscles is that they are very hard to reach and stretching has its limitations. Most runners will integrate hip flexor stretching into their cool down but, to prevent overstretching, muscle tension also needs to be removed.
You cannot reach the iliacus or the psoas with a standard foam roller, and most massage balls are too small or too hard to reach the psoas. So, how can you put prolonged pressure on those muscles on your own?
First, you can have someone help you, like a running partner or physical therapist. Unfortunately, those options aren’t always available when you need them, and if you’re an avid runner, you may need muscle release every day!
That’s why I invented the Hip Hook.
The Hip Hook is specially designed for tight iliacus muscle release and allows you to perform prolonged muscle release on your own. The manual gives you a map of how to locate your psoas and iliacus muscles.
Once you’ve found the right location, roll onto your stomach and use your body weight to apply pressure for 30-90 seconds. The first few times you use it, depending on how tight your muscles are, it may be a “hurts so good” sensation.
It’s likely you’ve had this muscle tension for a long time, so it will take patience and practice to train it to relax once again.
If you know your hip flexors are extremely tight, or you’re not accustomed to pressure in this area, you may choose to start with the Hip Release Ball. The size and firmness of the ball are perfect for warming up this area for more direct pressure with the Hip Hook. While the ball won’t be able to access your iliacus, it provides broad pressure to the psoas muscle: the size and density ensures that it doesn’t get lost in your abdomen and will be able to help release this muscle. It can also be used to release the back of your hip and the piriformis muscle.
With the proper tools, and a regular running recovery routine, you’ll be able to focus on your running goals instead of your aches and pains.
FAQs about running recovery
Is it bad to run every day?
Yes and no– running every day can increase your risk of overuse injuries, but if you build up to running daily gradually, your risk can go down. If you follow proper running recovery steps (including releasing your hip flexors), cross train, and listen to your body when it needs a break, running daily is feasible with little to no issue.
What does a running recovery day look like?
When you are taking a total rest day from running, you should also avoid doing other activities that stress the same parts of your body. However, you can participate in recovery exercises like recovery yoga or a walk around your neighborhood. Running recovery days will look a little different for everyone, but the main theme should be rest.
How many recovery days should I take after a long run?
Many physical therapists will recommend at least 2-3 recovery days per week for runners pending their level of fitness and physical health. However, after a long run, it can be beneficial to have one full recovery day with no activity and then 1-2 other recovery days with light activity unrelated to running (i.e., swimming, yoga, etc.).
After a really long run, younger runners can usually benefit from 2 full days off of activity, and older runners can benefit from 3 full days off.

Why Neck Stretches Aren’t Enough: The 2 Muscles That Matter Most
There are various types of pain, but neck pain is the most common in Americans. It can be a stiff neck, pain in your shoulders and upper back when waking up, or simply a limited range of motion. Whether the discomfort arises from chronic stiffness or the residual effects from an accident, neck pain has a way of interfering with various aspects of your life.
If you’ve been experiencing neck pain for a significant portion of your life, you’ve probably learned how to manage it using neck stretches occasionally, especially in the morning. You may think that neck stretches for pain are effective, but you’ll be surprised to learn it may actually not be the best plan of action.
You probably have several questions regarding this, considering the routine has been working thus far for you. So how could it be that we are telling you neck stretches aren’t enough? For the record, this isn’t meant to encourage you to get rid of your stretching routine completely. Instead, it’s intended to inform you that stretching alone won’t help you get rid of the chronic pain you feel.
Anytime people feel some neck tightness, the first impulse is to try stretching. Sometimes it may work, but other times you experience zero results. Here is everything you need to know about why neck stretches aren’t enough and the two muscles that matter when dealing with neck tightness.
Causes of neck tension
The neck has several flexible muscles that work to hold the weight of your head. If overused, these muscles can get irritated or injured. Neck tension, therefore, refers to pain in the neck that develops when the neck muscles are unable to relax, leading to muscle spasms, soreness, and even headaches.
Studies state that more than 70% of adults experience neck tension during their lifetime. Depending on the cause, people experience varying types of neck tension which have different symptoms. The brain relays electrical signals to trigger some muscle movement. In response, the muscles will either relax or contract depending on the message the brain relayed.
Neck tension occurs when a muscle in the neck remains contracted despite the brain telling it to relax. If the muscle remains contracted for an extended period, it leads to pain. People develop neck tension for several reasons, including:
Postural problems
Poor posture is a huge contributor to neck tension. People who slouch in their chair or hunch over their computer all day may notice some tension in the neck after some time. A 2016 study found a direct correlation between a forward head posture and neck pain.
Poor posture causes the weight of the head to shift away from the center of the body and forward. This then forces the neck muscles to work harder to hold the head, instead of being naturally supported by the spine. Slouching causes the head to move forward, forcing the neck to bend, thus overextending the muscles in the back of the neck. With time, this results in inflammation or pain.
Teeth grinding
Teeth grinding, also called bruxism, is when a person clenches or bites their teeth while sleeping. This then puts pressure on the neck and the jaw muscles, thus causing neck tension and pain. In other cases, it causes headaches.
Repetitive neck movements
People who engage in activities that require repetitive motion throughout the day may acquire Repetitive Motion Disorders (RMD). The National Institute of Neurological Disorders and Stroke defines repetitive motion disorders as a group of muscular conditions that arise from repetitive motions done in the course of daily activities or everyday work.
They are caused by unnatural motions such as incorrect posture or twisting of the arm or wrist. RMDs usually affect people who work in the assembly line, such as meatpacking, computer work, or sewing. Although they typically happen in the hands, shoulders, and wrists, they may also affect the neck. If not treated immediately, RMDs can result in inflammation, swelling, or tissue damage in severe cases.
Injuries
Injuries may occur in the neck muscles if a person lifts heavy weights or experiences whiplash due to an accident. Such injuries can result in mild to severe muscle strains and, if left untreated, may lead to persistent neck pain.
Stress
Whenever the brain picks up on stress, it signals the body to release several hormones that increase heart rate and tighten muscles. For someone who experiences frequent anxiety, the muscles tend to remain contracted for a long time, thus resulting in neck tension.
Tension in pec minor
The pec minor or pectoralis minor starts from the ribs and attaches itself to the front of the shoulder blade. It has a significant effect on how the shoulder blade positions itself. The pec minor is very vulnerable and gets tight with a slumped posture. A tight pec minor leads to a forward tipped shoulder blade resulting in a rounded shoulder position.
If you catch sight of yourself from the side, and your shoulders are rounded forward, creating a rounded upper back and outstretched neck, the culprit is your pec minor muscles. Relaxing these muscles will help bring your body back into upright alignment.
If the shoulder blades are pulled forward, the spine will curve, forcing the neck to extend so that the head can continue pointing forward. This leads to a strain on the neck and leads to tightening of the neck muscles.
The difference between stretching and pressing a muscle
Stretching and pressing a muscle are two different techniques that people use whenever they feel some muscle tightness. They are both ways of addressing muscle tightness. When stretching a muscle, you’re elongating it by undertaking a particular movement with your body. If, for example, you do an upper back stretch, your brain signals the body to release some tension. With continuous stretching, the brain reprograms the signals so that you can stretch a bit further every time by warming the muscle-up.
When you put prolonged pressure on a muscle, it will increase circulation and inhibit the contraction of muscle fibers. Holding the muscle in one place for a long time without any motion results in the brain signaling the particular muscle to relax. Prolonged pressure is vital for releasing muscle tension in areas where you’re experiencing muscle knots.
Tight muscles require pressure
Although stretching your neck feels like a great way of releasing muscle tension, it’s not always the best approach. Stretching is an excellent way of increasing motion, circulation and informing the muscle how it can repair itself after a workout. However, stretching might only do the bare minimum if your muscle has tension (is contracted). Your muscles will elongate, but when you rest, the muscle tightness returns. If you’re looking for a good way of getting your muscles to relax, apply prolonged pressure.
If you introduce pressure on the area with a finger or tool, the brain will respond by releasing pain signals at first. After some time of prolonged pressure (preferably 90 seconds), the muscle will start to relax in a long-term way without worrying about the muscle knot returning. This technique is way more effective in releasing muscle tension and muscle knots compared to massaging and stretching.
Tools for tight necks
You’ll need a tool to provide specific angular pressure to reach and release these spots to relax the neck. Because you need to apply prolonged pressure, you want something anatomically-shaped to access these muscles (not something round!) that isn’t going to slide or roll, that can handle pressure, and is able to adapt to your body and isolate these small yet mighty muscles.
We recommend the Nuckle: It’s designed by a PT to release, relax, and realign the neck and shoulders. With three widths and six angles, it can adjust to everybody and apply clinically effective specific pressure to relax tight muscles and reduce pain.

Frequently asked questions about neck pain and neck tightness
What causes a stiff neck?
Oftentimes, a stiff neck is caused by contracted muscles (usually the suboccipitals) that won’t relax. Overtime, these muscles pull the adjacent structures out of alignment. The root cause can be poor posture, created by tension in the pec minor muscles.
How do I get rid of a stiff neck?
Releasing two key muscle groups can help with neck stiffness: the suboccipitals at the base of the skull and pec minor muscles in the chest. The best way to relax these muscles is to apply direct, prolonged pressure to the muscles with a tool that can access these hard-to-reach muscles.
How do I treat a stiff neck in 60 seconds?
Focus on these two muscles: pec minor in the chest and the suboccipitals at the base of the skull. Apply precise, prolonged pressure to these muscles for at least 30-90 seconds to allow the muscles to release. Rubbing back and forth can aggravate these muscles, and stretching only provides temporary relief.

Why Do My Ankles and Feet Hurt When I Run?
Why do my ankles hurt when I run?
To be honest, this is not a simple, cut and dry question to answer. There are a bunch of reasons why someone’s ankles hurt when they run, including:
- Sprains
- Strains
- Stress fractures
- Tendinitis
- Incorrect running form
- Foot pronation or supination
- Plantar fasciitis
- Muscle weakness
- Muscle tension
While this list doesn’t encompass everything under the sun, these may all have a common culprit. If you’re experiencing more than one from this list, it may be because they’re more interconnected than you thought!
For instance, muscle weakness can lead to muscle tension in other muscles, due to overcompensation. Then, that muscle tension can lead to misalignment and incorrect running form, and eventually tendinitis.
And that could lead to an ankle strain or sprain, or even a stress fracture.
From personal experience of over 20 years as a physical therapist working with runners, one of the most common reasons people have ankle pain while they run is because of muscle tension in the hip flexors. Yup, tight hips when running are trouble.
Most people don’t even think to consider that part of the body but – like I said – it’s all interconnected. Let’s take a closer look at how…
Your hip flexors: powering each stride
When we are addressing pain, we often start by addressing the initial symptom. If you’ve been here for a while, you know I’m all about finding the cause – and creating habits that prevent the pain in the future. Often, it means looking to other parts of the body that could be triggering your ankle pain when running.
Even though you are worrying about why your ankles hurt when you run, your ankles might not be the main issue at all. In fact, they’re probably not.
It’s probably coming from higher in your legs, knees, or hips. And I’d be willing to bet on the latter.
It can be hard to imagine how an issue in your hips can make its way all the way to your ankles, but it is all by a network of muscles that start in your hip flexors. Your hip flexors, or iliopsoas muscles, are actually two muscles: the iliacus and the psoas, and it’s important to understand how they work.
The iliacus sits on the inside of your pelvis bone, comes down the front of your hip, and connects to the front of your thigh bone. The location of your iliacus is very close to the hip joint, which is why it’s common to feel hip pain or tension if this muscle has become overworked.
The psoas starts its upper attachment on the diaphragm and has a tight grip on your entire lower spine. Moving down, it crosses the iliacus and attaches to the same spot on the front of your thigh bone.
Your hip flexors earned their name because they flex your hips. These muscles are quite literally the reason you can create the forward and backward movements of your legs while running.
Hip flexion is when you move your leg forward, like when you step forward or up when you are running. And hip extension is when you bring your leg behind you. Your leg isn’t bearing any weight in this position, but it’s still indirectly engaging the iliopsoas muscle.
So, for every running stride length you take, you are engaging the iliopsoas. For proper hip alignment and the best running form, the iliopsoas needs to be flexible enough to stretch into a full leg extension while running, but taut enough to pull your leg back into position.
But that’s not all.
These muscles also work round the clock to stabilize your spine, keeping it in the correct position and alignment relative to your pelvis. And this doesn’t just impact your ability to run.
What happens when your hip flexors stay tight?
Start to think of your hip flexor muscles like a new rubber band or hair tie, quickly and easily moving back to its original shape. Just like a rubber band, prolonged activity, improper or overstretching, infrequent stretching, and more makes it very easy for these to become stressed and/or worn out.
When they are stressed, they may not release their hold on your bones and joints – creating tight muscles and joint issues. But the same happens when they are fatigued. Your hip muscles actually work harder when they are tired, and that causes them to apply more force than is needed to our joints.
Both options lead to the same issue: tight hip flexor muscles.
And this is the beginning of the dominos. The first piece to fall. Because when your iliopsoas is tight, the other muscles in your hip and pelvic area won’t align properly. The tightened muscles will also shorten, pulling unnaturally on your thigh bone and knee joints.
This causes everything else down the line to topple out of place.
As these dominos fall, it can cause your thigh bone to rotate inward, stretching and straining the inside of the knee.
Eventually, nearby structures like your MCL (medial collateral ligament) and your thigh adductor muscles become more strained and inflamed. The continuous stretch on the inside of your knee puts more pressure on the outside of the knee as well.
The twist of your knee now can strain your meniscus and make it harder for your knee to absorb shock and keep the knee stabilized. (This is why you may be having knee pain after running too.)
Pronation in runners
The internal rotation of your leg can also turn into a twisted ankle or a flattened foot. As the ankle turns inward, your foot naturally becomes flatter. When your foot and ankle are in this position, you are at higher risk of injury and strain to your knees, hips, ankles, and feet.
If the bones in your foot aren’t lining up properly, this will cause wear on the ankle over time and the Achilles tendon can also become strained.
When the foot is twisted into a flattened position, it causes something many runners may already be aware of called foot pronation, which brings your weight more towards the inside of your foot every time you step. When this happens, the bottom of your foot is easily irritated and can quickly develop into running feet, plantar fasciitis, or even bunions.
Now you can see how the answer to the question: “why do my ankles hurt when I run” could actually be your tight hip flexors – even if your hips are showing no sign of tightness or pain. The issues may be manifesting in other parts of your lower body, but it can usually be traced up the leg and into your core.

How to prevent ankle pain after running
If your hip flexors are causing you to ask “why do my ankles hurt when I run?” then it’s time to solve the real problem – not just the symptom. And it starts with establishing proper hip alignment.
Realigning your hips can be broken into three parts:
- First, address the muscle tension from all angles.
- Second, implement gentle daily realignment exercises.
- Third, be consistent with your running recovery routine.
Depending on the severity of your hip flexor tightness or how long your body has gotten used to operating out of alignment, each of these steps will take a different amount of time.
It doesn’t mean your ankle pain from running will go away overnight, but you might be surprised at how quickly symptoms begin to subside. I have seen iliopsoas releases that bring some instant relief!
The important thing to keep in mind is to be patient and understand this is a process.
Treating tight hips for runners
Have you ever had hip pain after running? Did that pain appear before or after your ankle pain appeared?
If you did, targeting your iliopsoas muscle tension will help you address several pain points.
The best way to address muscle tension is by applying prolonged pressure. When you apply pressure for at least 30-90 seconds, it gives the mechanoreceptors in your muscle tissue enough time to send signals to your brain and tell it to stop holding tension in the area.
That’s why if you skip the muscle pressure release and go right to stretching, you get fewer results. The muscles will still retain tension and it will be a bit like trying to stretch an impossibly tight rubber band.
To reach these muscles for a full pressure release, one way is to work with a manual therapist to help you. Or you can release these muscles at home, using a precision tool designed to reach these pressure points. The Hip Hook is currently the only muscle release tool that targets your psoas and your iliacus muscle to release tension. It does this by using specific angular pressure in hard-to-reach locations.

To use the Hip Hook, first locate the soft spot just inside of your pelvic bone. This where your psoas and iliacus muscles live. Once you’ve found this spot, lay on the Hip Hook, letting it sink into the psoas for about 90 seconds. Once the psoas has had time to relax, you can push the lever on the Hip Hook to push into the iliacus muscle and pin it against your ilium. Continue to apply this prolonged pressure for another 90 seconds.
Listen to your body and pay attention to the sensitivity you may have in this area. Staring out with less time at first and working your way up to longer sessions is perfectly okay, and even encouraged!
If you know your hip flexors are extremely tight, or you’re not accustomed to pressure in this area, you may choose to start with the Hip Release Ball. The size and firmness of the ball are perfect for warming up this area for more direct pressure with the Hip Hook. While the ball won’t be able to access your iliacus, it provides broad pressure to the psoas muscle: the size and density ensures that it doesn’t get lost in your abdomen and will be able to help release this muscle. It can also be used to release the back of your hip and the piriformis muscle.
Realignment exercises to add to your routine
Once the tension has been released, you still need to start working your pelvis back into alignment so the rest of your leg can track straight again. To do this, perform realignment exercises after you use the Hip Hook.
Unlike the muscle tension release tools, you should only perform the realignment exercise on the side of your hip that is being pulled out of alignment. Here is how to perform the realignment in 10 simple steps:
- Lay on an even flat surface on your back.
- Bring your knees up towards your chest. Your feet should be off the ground.
- Place one hand behind the knee on the side of your hip you are realigning. This is the side that has more tension and is being pulled forward (also likely the side of your body that has ankle pain).
- Squeeze your hand behind your calf muscle by bending your knee towards your butt and the floor.
- While you do this, moderately push against your hand without moving. It should feel as if you are attempting to push your foot towards the ground.
- As you push, the hand holding your leg will resist the pressure. Do not press too hard, just enough to feel some force.
- Your opposing leg should stay off the ground but in a neutral position.
- Hold the pressure and pushing motion for two seconds.
- Relax for a few moments.
- Repeat the cycle of pressure and relaxing 10 times.
Consistency is key
As a runner, you know that you won’t go from your couch to running marathons after one training session. Well, the same can be said for running recovery and alleviating that ankle pain.
Once you’ve answered the question, “why do my ankles hurt when I run?” and you’ve narrowed down the root cause, then you can start to take on a consistent, daily running recovery routine.
When I say daily, I mean daily! When it comes to ankle pain that is caused by muscle tension, it will take time for your muscles to learn to relax.
Using tools like the Hip Hook and Hip Release Ball are very effective in training your muscles to release tension, but only if you practice the steps provided above daily.
The good news is that these running recovery tips can fit right in with your running routine and only take 10 minutes. They won’t be adding an exorbitant amount of time to your workout schedule – and they are likely to make running more pain-free and enjoyable with time.
FAQs about ankle and foot pain while running
Should I stop running when my ankles hurt?
First, rest and treat the immediate pain. Then, address the root cause of the pain which may include tight hip flexors which are changing the overall alignment and stress on your ankles.
How do runners strengthen their ankles?
There are exercises you can do to strengthen your ankles, including calf raises.
How to do a calf raise:
- Stand with your feet hip-width apart at the edge of a step with something to hold onto for balance (i.e., a railing). If you don’t have access to stairs, you can do this on a flat surface.
- Raise your heels up so you are standing on your toes.
- Lower your heels down.
- Repeat 10 times.
- Do it once per day.
Working with a physical therapist will help give you targeted exercises to strengthen your ankles.
How can I fix runner’s foot?
Runner’s foot is the degeneration of the fascia (thick layer of tissue) on the bottom of your foot. If there is increased pressure on the inside or outside of your foot, this can be creating the problem. Look up the chain to tension in your hip flexors as a possible culprit.
What causes hip pain when standing up after sitting?
Having hip pain when standing up after sitting can be difficult to deal with. You’re sitting every day (for more hours than you want to admit!) and you may feel 100 years older than your actual age.
Let’s move past the “I’m just getting old” excuse, and look at what’s actually happening in your body. In this article, you’ll get a better understanding of what happens while you’re sitting for long periods, how to get short-term relief, and address the root cause for long-term solutions.
What causes hip pain after sitting?
Your posture ultimately reflects the way that you train your muscles to hold your bones and joints together in good alignment. This combination of muscle strength and muscle length on both sides of a joint affects whether or not it is in an “optimal” position.
Sitting places the hips into a flexed position, which changes the length of the hip flexors and the other surrounding hip muscles relative to when you’re standing upright. This seated position affects all sides of the hip joint.
The hip flexors at the front of the hip become shorter, creating an anterior pelvic tilt, resulting in an over-arch in the low back. The glutes and hamstrings, which connect to the back of the hip and pelvis, become stretched out and longer (and not in a good way!).
In this anterior pelvic tilt, your hips move differently in their ball-and-socket joint, leading to an internal rotation of the femur (thigh bone). The adductor and groin muscles, which connect to the inside of the femur and groin, become shorter and tighter. The abductor muscles on the outside of the hip then become longer.
With the amount of sitting that the average human being does on a daily basis, the hip muscles become accustomed to being in this position. As this pattern is repeated over the course of days, weeks, months, and years…your hip muscles will eventually tighten up.
The hip flexors and adductors become short and tight, while the glutes, hamstrings, and abductors become long and tight. When standing up after sitting, the shorter muscles may have difficulty lengthening and the longer muscles may have difficulty in activating.
Essentially, there are 2 simultaneous games of tug of war being played between the front and back sides of the hip and also the inner and outer sides of the hip.
This results in the muscles pulling on the hip joint in an imbalanced fashion, potentially contributing to hip pain when standing up after sitting. This hip pain may be felt in multiple locations, including pain in the front or back of the hip, pain in the groin or on the outside of the hip, and combinations resulting in hip pain felt on several sides of the joint.

Pain in the front of the hip when standing
Pain in the front of the hip when standing after sitting is most likely coming from tightness in the iliopsoas, your body’s main hip flexor that consists of the psoas and iliacus muscles. Both muscles come together where they cross the front of the hip joint and insert at the lesser trochanter of the femur.
Remember, these hip flexor muscles often become tight when sitting and may struggle to fully lengthen when standing if they are still holding tension. This may result in pain in the front of the hip when standing after sitting for an extended period of time due to the vertical pull and compression that a tight iliopsoas places on the hip joint.
Because the psoas muscle originates at and connects to the L1 through L5 vertebrae of the lumbar spine, pain may also be felt in the lower back when going from sitting to standing.

Pain in the back of the hip when standing
Pain in the back of the hip when standing after sitting may be coming from several different muscles: the glutes, hamstrings, and other deep hip rotators. When the hip flexor muscles on the front side of the hip become short and tighten up, it creates an anterior tilt of the pelvis. The glute and hamstring muscles, which attach to the back of the hip and pelvis, become longer than they want to be. While we often think of long muscles as optimal, these muscles have not lengthened in a healthy, active way. They’ve been yanked into a game of tug-of-war, where the posterior chain muscles (along the back of your body) may also tighten up to prevent further imbalance.

Tight hamstrings after sitting
Ever get the feeling that your hamstrings are tight after sitting? There’s a good chance they’re involved in the same game of tug-of-war with the tight hip flexors that makes it feel like the hamstrings are short and tight, when they truly are not (they are long and feel tight). The same idea can apply when feeling tightness in your gluteus maximus, especially down closer to your sitting bones.
Similarly, the game of tug-of-war can impact the deeper hip rotators such as the piriformis muscle. This is because the much larger glute muscles, which have been lengthened beyond what is optimal, now have a harder time contracting and have developed weakness due to being overstretched by sitting for long periods.
Because the much smaller piriformis muscle is now required to perform more of the work that the glutes aren’t doing, it can lead to the muscle being overworked, fatigued, and tight. As the sciatic nerve runs beneath this muscle, a tight piriformis may compress the nerve and cause sciatica pain when standing up after sitting.

Pain in the groin when standing
Groin pain when standing after sitting may be caused by tightness in the hip flexors. Remember that the psoas and iliacus muscles insert at the top and inside of the femur (thigh bone) near the groin area. Having tightness here impacts the alignment and function of the hip joint as it moves and may refer pain into the groin region when the hip joint isn’t aligned or moving smoothly.
Pain in the groin when standing can also be coming from tightness in the adductor muscle group, which consists of 5 muscles: the adductor magnus, adductor longus, adductor brevis, pectineus, and gracilis. Because the adductors originate along the pubis of the pelvis, they can pull on this area and cause pain and discomfort in the groin region.
It is quite possible that your pain is coming from issues with both hip flexors and adductors, as each of these muscles groups tends to become short and tight together, affecting the hip joint from multiple angles.

Pain in the outer hip when standing
Lateral hip pain in the outer hip when standing after sitting may be caused by tightness in the abductor muscle group, which consists of 3 muscles: the gluteus medius, gluteus minimus, and the tensor fascia latae (or TFL). Each of these muscles connects along the outer surface of the ilium (your pelvic bone) and inserts at or near the greater trochanter (top of your femur/thigh bone).
When chronically tight, these lateral hip muscles create compression on the greater trochanter (top of your thigh bone) and can cause inflammation of the bursae in this area (called trochanteric bursitis or hip bursitis), leading to pain that is felt at the outer hip. Tightness at the outer hip, specifically the TFL muscles, can also cause pain in the IT band, a piece of connective tissue that runs along the outer thigh and down to the knee.

Tips for hip pain relief when standing up after sitting
Here are 3 simple tips to help relieve some pain in your hips (and even your lower back) when going from sitting to standing.
Take more breaks and move around
Being inactive by sitting for longer periods of time makes your muscles “fall asleep” where they end up weakening and tightening as you repeat this day after day over time. Getting up from your couch or chair to move around a little bit helps to get some blood flow and activation into the muscles, keeping them “awake” and feeling better throughout the day.
Stretch your hip muscles regularly
If your hips tend to feel tight all the time and cause you pain when sitting, consider adding in some stretches for your hip muscles into your daily routine. Stretching can help to increase blood flow and circulation to these areas, helping the muscle to lengthen back out and provide some relief for your hips. The lunge stretch is one the best hip flexor stretches we know of and the figure 4 stretch is great for targeting the piriformis.

Use the best posture for sitting at a desk
First things first, make sure you are sitting in an upright posture. This properly activates your core and hip muscles to strengthen them and also support you in this position. From there, adjust the height of your seat by moving it up (you can also sit on a cushion). This opens your hips up a tiny bit to help lengthen your iliopsoas, reducing how much it wants to pull on your hips and spine both while you are seated and also when standing up from sitting. (Sitting with your knees at a 90-degree angle to your body is a myth!) If neither of these options are available to you, another alternative would be to tuck your feet underneath your chair.

Steps to improving your hip pain when standing up after sitting
Step 1 – Discover the root cause of your hip pain
Why choose temporary relief when you can fix the problem!? Muscle tightness and imbalance are at the root of pain. When these kinds of issues exist around the hips, it can cause misalignment of the pelvis as well as restricted movement and range of motion in the hips. If left unresolved over a longer period of time, this can lead to the development of hip pain.
Imbalances and tightness in the muscles can be caused by old injuries, overuse in sports or other activities, repetitive patterns (e.g. sitting), and more. It is likely from a combination of several of these things, but the long-term solution remains the same.
Step 2 – Address the muscle imbalances
Your muscles are what holds your joints together in the proper alignment and helps to create motion of the body. Tightness and imbalances in the muscles around your hips can contribute to aches and pains developing on all sides of the hip joint.
By releasing the tension being held in tight muscles – alongside the proper corrective strengthening and stretching exercises – you can begin to restore better strength-length balance around your hips, improve your alignment, and move with fewer restrictions.
Once tight and contracted, these tight hip flexor muscles rarely release by stretching alone. These muscles release best by applying direct, prolonged (at least 90 seconds) pressure. Some of the muscles along the back of the hip and glutes are easily accessible with the Hip Release Ball or other tool, and you can create a routine to provide pressure to the back of hip.
The iliopsoas muscles (the psoas and the iliacus) require a more specific tool to apply direct pressure. The Hip Hook is the only tool designed for both psoas release and iliacus release, due to the unique angled pressure. It’s like having a physical therapist at home with you, offering manual release therapy to these tight muscles.
Step 3 – Establish a consistent routine
Creating a routine that you can follow consistently is very important. The muscle tension and imbalances that you are working to correct in your body have likely been building up for some time now…likely over the course of YEARS. Therefore, it may take some time to sufficiently retrain the “muscle memory” in the muscles surrounding your hips to have them support you in better alignment.
Working with a personal trainer, physical therapist, or other skilled practitioners to address these issues can help you along the way and support you on your healing journey. You can (and probably should) also put in some work by yourself to accelerate this process — I cannot recommend this enough. Ultimately, you are the one in control of your body each day and must take ownership of what you need to do to improve your hip pain.
Set yourself up for success by having the necessary tools and equipment to make this happen. Using things like a hip flexor release tool, foam rollers, massage therapy balls, exercise bands, and other training equipment may be helpful to have available at home, making it easier (and more convenient) for you to help yourself stay accountable, put in the work consistently, and start making progress that turns into long-lasting results.

Learn more about what is causing hip pain
If this article describes what you may be currently feeling with your body, consider learning more about this topic by reading my book “Tight Hip, Twisted Core – The Key to Unresolved Pain”.
As a hip expert and holistic physical therapist of more than 20 years, I share my knowledge and expertise about how tightness and imbalances in your core and hip muscles affect the alignment, movement, and function of the entire body, leading to hip pain, back pain, knee pain, and more.
Frequently asked questions about hip pain when standing
How do I get rid of hip pain from sitting?
Hip pain from sitting is typically the result of tight and imbalanced muscles that are pulling on different sides of the hip joints or referring pain into the hip area. You may find relief and improvement with this pain through a combination of muscle release alongside corrective strengthening and stretching exercises to ease the pressure felt in the hips.
Why does my hip hurt when I get up from sitting?
Your hip may hurt when getting up from sitting because your hip flexors and other surrounding hip muscles are too tight. Going from a seated position to standing requires those muscles to lengthen out. If they are holding tension and not functioning properly, the hip flexors may pull on the hip joint because they remain short and do not fully lengthen as you stand up.
Why does my hip pain after sitting go away after walking?
If you are experiencing hip pain after sitting, you may find that the pain reduces after you get up and walk around for a couple of minutes. This is likely due to the increased blood flow and activation felt in the muscles surrounding your hips that helps create more movement in the joint. Take this as a sign that you should get up and move more frequently.
Ditch the Tech Neck: How to Fix Forward Head Posture
Your upper half has been slowly descending towards your screen. Have you eaten? Have you moved? By the time you remember you have a body and decide to take a break, you’re rubbing the back of your neck or your shoulders and complaining, “my muscles are so tight!” Or perhaps you’ve noticed that you’re having headaches more often and a nagging pain at the base of your skull.
Unfortunately, this experience is quite common. You may have heard of the terms ‘tech neck’ or ‘nerd neck.’ These are conditions where the body has been inclined towards a forward head posture due to the many activities of modern-day living, such as computer and cell phone use. This unhealthy posture curls the body forward, contributing to rounded shoulders, back of the neck pain, shoulder pain, stiff neck, jaw pain, tension headaches, and migraines.
This article will explain how muscle tension in a few key muscles contributes to your pain and show how direct, prolonged pressure to specific areas is the best way to get relief.
Why are my back of the neck muscles so tight?
That’s a great question! But, before we get into what is causing your tight muscles, let’s get an understanding of what ‘tight’ actually means. Having an accurate understanding of what it means when a muscle is tight will ensure that everyone is on the same page and help you correctly identify the root of your problem and the proper solution.
What is ‘tight’ anyway?
Sometimes, when a person refers to a muscle as tight, they mean that it is ‘sore’ or that they feel a normal stretching sensation when the muscle is being used. Or a person might feel pain or pinching in some muscle and refer to the muscle as tight. Although sometimes a tight muscle can cause pain, in these situations mentioned, ‘tight’ is most likely not an accurate definition of what’s occurring.
There are two situations that more accurately describe a muscle being tight:
- Lack of Motion – When there is a lack of motion in a muscle, the tissue will not fully extend. Say you bend down to touch your toes, and your hands can’t make contact with the floor because the muscle in the back of your legs doesn’t fully extend; that muscle can be correctly called ‘tight.’
- Tension – Also, if a muscle is holding tension, you might feel a knot when you touch it because the muscle is contracted. When a muscle is not in use, it should feel soft, not hard. In this case, it can also be correctly referred to as ‘tight.’
It is important to know which type of tight muscle you have, because the solution is different for each. If you want more motion, you do stretches to elongate the muscle to increase the range of motion. If you have tension, you need pressure. However, your muscle might be motion tight because a muscle knot is impeding its ability. You can use tools such as a massage ball, Hip Hook, or the Nuckle to release tension and train your brain to break the pattern of holding tension in the muscle (more on that a little later).
Knot my problem
Actually, muscle knots are a problem for many people. And if you have pain in the back of your neck, a muscle knot may be the culprit. Let’s discuss what a muscle knot is, what causes it, and the impact it can have on your body.
What is a muscle knot?
You will know if you have a knot in your muscle because, at rest, the spot will feel hard and dense, unlike a healthy relaxed muscle that is soft and supple. This knotted area of tissue can be created due to several factors. But, for the most part, it is made when the muscle becomes contracted (or stays in an active state) for some reason.
As a part of the body’s (brain’s) protective mechanism, muscles sometimes remain engaged, resulting in a knot. It’s as though a switch was turned on, and then the operator went out to lunch. You’re not actively using the muscle, but it’s still in a contracted state. These muscles need a reminder of how to “turn off”.
What causes muscle knots?
There are three main reasons why muscle knots happen: (1) the muscle is being overused and gets stuck in active mode, (2) the muscle is shortened for an extended period, (3) stress/trauma.
Overuse
In today’s society, we perform many actions that have our muscles in static positions for prolonged periods – think using the computer with arms outstretched forward, looking down at a cellphone, driving, or simply sitting in a chair all day. These activities can cause our necks to be stretched forward or down and our shoulders to be rounded.
Shortened Muscles
Muscles do not like to be in a shortened or lengthened state for extended periods. So when a muscle is in a shortened position for a long time, and you try to get it to work hard, it might cramp or form a knot. Ever have pain when you stand up after sitting?
Stress/Trauma
Also, suppose you are dealing with stress or emotional or physical trauma. In these cases, the brain will attempt to preserve your vital organs, including the brain, by forming ‘protective’ knots in the areas closest to the brain (neck/shoulders) and the abdominal cavity (back/hips/chest). This principle also applies to trauma from an accident or surgery, where muscle knots can form to protect the traumatized area.
Effects of muscle knots
When a muscle is compressed, it cuts off the nutrients delivered to the muscle because it constricts the blood flow. This action is detrimental to the health of the overall muscle function as it reduces its ability to repair itself and interferes with the processes that remove toxins. This, in turn, creates a negative cycle that encourages the muscle to remain in a contracted state.
The core issues
Now that we have the basics covered, let’s get down to the mechanics of why you may be experiencing tight muscles in the back of your neck and what you can do about it.
Your primary and secondary core
As mentioned previously, our daily lives have us hunched over computers and other electronic devices that interfere with our bodies’ alignment. Many are aware of the body’s core, or primary core, which encompasses the abdominal cavity, lower back, and hip area, including the importance of keeping the core strong. Having a healthy primary core ensures you have robust nervous system function and proper alignment of the spine and hips.
But did you also know there is a secondary core that is vital to overall health? This secondary core comprises the brain, head, neck, pecs, and shoulders. Sometimes when you are dealing with stress, tension is created in the pec minor muscle. This tension can pull your entire body forward, including your neck and shoulders, misaligning your core, causing pain at the base of the skull. When you have tension in the secondary core, it blocks tension from being released in other parts of the body.
Rooting out tension
So, what can you do to get relief from your pain? You must release the tension in the pec minor and the base of the skull. Releasing the tension in the pec minor will allow your shoulder to relax back. Releasing the tension at the base of the skull will allow your head to be aligned with your spine. This takes the stress from the muscles and lets your bones do the work. When everything is aligned, your muscles can relax, your shoulder blades can relax, and you can experience free range of motion in the shoulder and neck. And when the nerves and the brain stem are not being pulled on, and the muscles are relaxed, your body is in a position that does not result in nerves being pinched in the spine. This restorative state allows the muscle pain that could be contributing to your neck pain to resolve.
How to relieve pain at the base of the skull
The technique you use to relieve your pain makes all the difference in whether you will get lasting results or a temporary fix. There are three main methods that people try on the muscle when seeking to get rid of pain at the base of the skull: stretching, rubbing, or applying pressure.
Stretching, rubbing, or pressure…and the winner is?
We all have muscle tension from time to time for various reasons. Suppose your muscle is at rest and is holding tension. In that case, there is one method that has proven to be superior in providing relief.
- Stretching – When you stretch a muscle, you take it from its resting place and allow it to get longer. The brain enables the muscle to stretch longer if it feels it is safe to do so. Stretching is good for training the brain to allow you to use your full range of motion, increasing circulation, and telling the muscle how to repair itself after exercise. However, if a muscle is holding tension (contracted), stretching might release it somewhat, but when you revert to a resting state, the tightness is still there.
- Rubbing – If you rub a muscle that is holding tension, it may relax a bit because you’re increasing the muscle’s flexibility. You’re also increasing circulation, but after some time, it will revert to being tight again. Rubbing or massage may feel good, especially if the muscle is tight/sore, and it does have some benefit, but it doesn’t teach the muscle to relax.
- Pressure – The BEST way to get muscles to relax is by applying prolonged pressure. Initially, using pressure will cause pain as the muscle is sore. However, after a brief period of applied pressure, the muscle will start to relax and lead to long-term relief. When seeking to relieve tension at the base of the skull, focus pressure on the suboccipitals (a group of muscles in front of the occipital bone) for a prolonged period of at least 90 seconds.
Tight chest muscles and rounded shoulders can cause neck pain
Another cause of neck pain could be a muscle knot in your upper trap. But before you go pressing or rubbing the area, you must address the root cause, which is the pec minor and muscles at the base of the skull. These muscles, which are connected to the spine, underneath the upper traps, must be released first.
So, you may be thinking, “but I have neck pain, why do I need to fix the muscles in my chest or at the base of my skull?” Remember what we learned about the secondary core and how tension can be created in this area by pulling on the brain stem and causing pinched nerves? To relieve the pain in your neck, you must align your body by releasing these muscles first.
Easy on the trigger
It may seem strange that you have a pain in your neck that warrants releasing tension in the chest. But some muscle knots are triggers. This means that you can press a specific spot and feel pain somewhere else. For example, you might press in your shoulder area and feel pain in your neck. In this case, the issue is not really with your neck; it’s with the muscles in the shoulder.
Chest stretches
In general, stretching is useful for muscle health. It helps to increase circulation and make the muscles more pliable. However, when it comes to muscle knots, it does not provide sustained relief. You will still need to apply prolonged pressure to the muscle to alleviate your pain and teach the brain to break the pattern of holding tension in the muscle. Read more about why chest stretches aren’t enough.
Neck stretches for pain
Similarly, doing stretches to soothe pain in your neck is not effective either. Again, this method may provide temporary relief, but the muscle will revert to its contracted state, causing pain. Check out this article to learn more about why neck stretches aren’t enough.
A rotated pelvis may be causing neck and shoulder pain
As you can see, there can be multiple factors that contribute to your neck and shoulder pain, even misalignment of your pelvis! If you’ve heard that little tune – “the hip bone’s connected to the thigh bone, the thigh bone’s connected to the knee bone…” it is not only true that the bones are connected, but because they are connected, the muscles that support them all affect one another.
A rotated pelvis may be caused by tight hip flexors (primary core). This rotated pelvis shifts the position of the hip, changing the way the ball fits into the hip socket. This, in turn, changes the trajectory of the leg and the position of the spine. Once this occurs, the nerves can become irritated, and pain can work its way up the spine to the neck and shoulders (secondary core).
How to relax tight neck and shoulder muscles
As previously mentioned, massaging and stretching are helpful techniques, especially for improving blood flow to the muscle. But the best method for releasing tension in your tight neck and shoulder muscles is through direct, prolonged pressure. Specifically, this approach involves applying sustained pressure without movement.
The essential takeaway is that prolonged pressure is the best way to relieve muscle tension. However, to fully leverage this method on your own, you need a tool to provide specific angular pressure to reach and release these spots. And because you need to apply prolonged pressure, you want something that isn’t going to slide or roll, that can handle pressure, adapt to your body, and isolate these small yet mighty muscles. We recommend the Nuckle; a PT designed it to release, relax, and realign the neck and shoulders. With three widths and six angles, it can adjust to every body type and apply clinically effective, specific pressure to relax tight muscles and reduce pain.
FAQs about tech neck and forward head posture
Why is the back of the neck tight?
When the shoulders round or hunch forward, the whole body adjusts to try and stay upright. Your chin juts forward and head tilts up, shortening and tightening the muscles at the base of your skull.
How do I fix nerd neck?
Tension in the subocciptal muscles (base of the skull) and pec minor muscles (chest) are at the root of nerd neck. Applying prolonged pressure for at least 30 – 90 seconds to these muscles will help to train the brain to release the tension. As a result, the muscles will relax, the nerves will calm, and the body will realign.
How to correct forward head posture?
To fix forward head posture, releasing tension in the pec minor muscles and muscles at the base of the skull by using a tool (or a practitioner’s hands) to apply direct, prolonged pressure to these muscles.
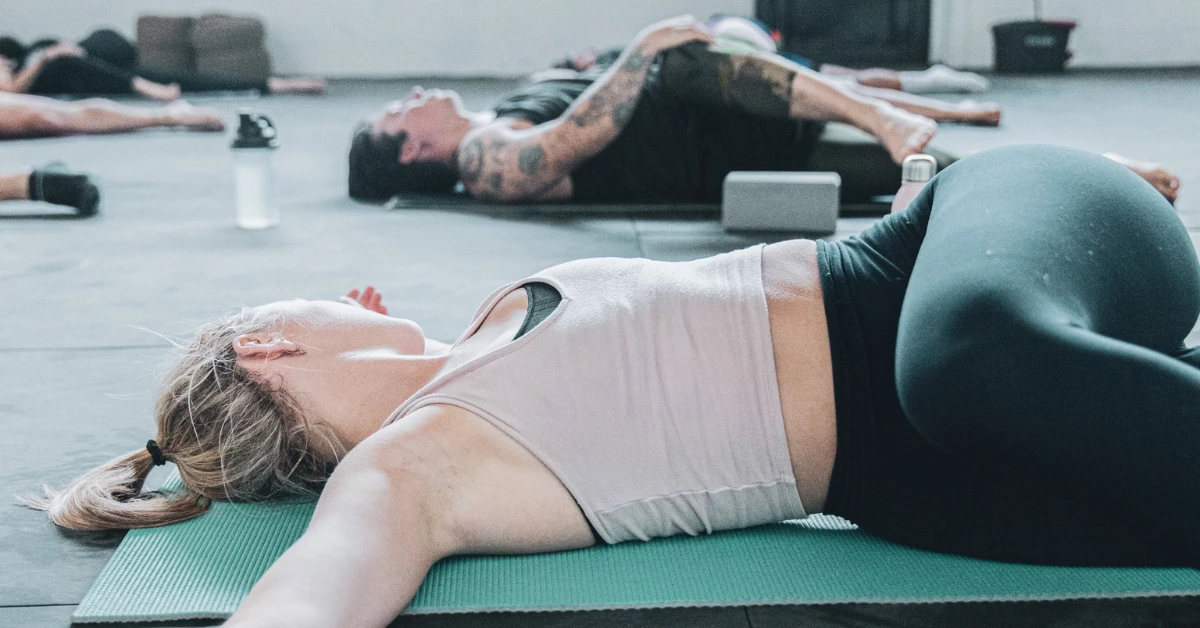
Best Piriformis Stretches to get rid of Sciatica, Lower Back Pain, and Hip Pain
According to the United States National Center for Biotechnology, National Library of Medicine Information, back pain affects nearly 70% of the population, and about 40% of people experience sciatic pain at some point during their life. Sciatica is a type of nerve pain typically caused by an injury or irritation of the sciatic nerve. The sciatic nerve originates in your buttocks and gluteal area and is the longest and thickest nerve in the human body.
Often, tension in a few key muscles is a significant cause or contributing factor of sciatica, lower back pain, and hip pain. Therapists have found that the best way to relieve muscle tension in these areas is by addressing the muscles with direct, prolonged pressure and stretching exercises.
The importance of piriformis muscle stretches
The piriformis muscle is often a significant contributor to hip, back and leg pain. The piriformis muscle is located in the deep muscular area near the buttocks and attached to the outer part of the hip, and the sacrum, a part of the spine found in the lower back region. Tightness in this muscle is common and can lead to piriformis syndrome, a medical condition that causes sciatica symptoms.
Like any muscle in the body, stretching is essential for optimum performance, and a tight piriformis muscle can cause pain in the sacrum, lower back, and legs. Properly stretching the piriformis muscle will provide several health benefits and often provides immediate relief for sciatica pain. In addition, when adequately stretched, the piriformis muscle will have a better range of motion and improve the functioning of the hip joint and lower back.
Doctors, therapists, and other experts may recommend piriformis muscle stretches for your condition as a way of stretching away your sciatic nerve pain. Athletes and workout enthusiasts also use piriformis muscle stretches to warm up before exercising to improve performance and reduce the chance of injury. There are several piriformis muscle stretches that can help relieve lower back pain and sciatica and help prevent injuries before exercise.

Figure four stretch
The figure four stretch can be done in two ways:
- Sitting on the edge of your chair, rest your ankle on the knee of your opposite leg. Then, place and hold gentle pressure on the elevated knee for 30 seconds, and switch legs.
- Lying on the ground with your knees bent and feet on the ground, place one ankle over the knee of the other leg, connect your hands behind the hamstring of that leg, and gently pull the figure four towards your belly, hold for 30 seconds, and repeat with the other side.
Crossover stretch
Lying flat on your back, place the affected leg’s foot on the floor outside your opposite knee. Then, using your hand or a towel, pull the knee of the bent leg across the body’s midline until you feel the stretch. Hold the position for 30 seconds before slowly returning to your starting position. After a short rest, repeat the exercise, trying to complete three sets.
Hip flexor stretch
Hip flexors are the muscle group near the top of your thighs, including the iliacus and psoas, that enable you to walk, bend, and swivel your hips. The kneeling hip flexor stretch is a simple and effective stretch for these muscles. First, place your left knee on the floor, your right foot flat on the floor in front of you, and with your back straight, place your hands on your right knee. Then, with your left knee pressed to the floor, lean forward into your right hip while squeezing the muscles in your left buttocks. Hold for about 30 seconds and repeat for the other side.
Windshield wiper stretch
Lie on your back with your knees bent and feet on the floor about two feet apart. Keeping your shoulder blades on the floor, gently let your knees fall slowly to the right, allowing your feet to flex. You will feel an internal hip stretch on the left leg and an external hip stretch on the right. Hold the stretch for 30 seconds and repeat on the other side.
Knee to chest stretch
The knee to chest stretch is passive, so keep your legs and hips as relaxed as possible. Lying on your back with your feet on the floor, raise one knee and hold your lower leg with your hands. Gently pull your knee towards your chest while relaxing your legs, pelvis, and lower back. Hold for a few seconds, return to the starting position and repeat with the other leg. Perform the stretch 10 to 15 times once or twice a day.
Hip flexor release, piriformis release, and deep hip rotator release
When the piriformis muscle, hip flexor muscle group, and other deep hip rotator muscles are injured, irritated, or tight, they can place pressure on the sciatic nerve and cause hip, back, and leg pain. While various factors can cause tightness of the flexor muscles, it is often due to muscle contraction. For instance, if you sit in the same position for hours every day or habitually cross your legs in the same way, the flexor muscles get tight and contract over time.
When your muscles contract, they typically won’t respond the way you would like them to. They will often want to return to the position they have become accustomed to, which can inhibit mobility and cause you pain. While stretching these muscles is typically involved in physical therapy for sciatica, it is often necessary to first relax or release the piriformis muscle, the hip flexors muscle group, and deep hip rotator muscles.
The most effective way to release tension in the area surrounding the piriformis, iliacus, and psoas muscles is by applying direct, prolonged pressure to the affected area.
Prolonged direct pressure with the Hip Release Ball can help relax the muscles and surrounding connective tissue. Not only does this method usually provide immediate relief for sciatica pain, but it also enables the muscles to relax so that you can begin to address the underlying issues through stretching and exercise.
It is also critical to address both the front and back of the hips, as the hip flexors must be free of tension for you to get relief. Because of their location, releasing tension in the psoas and iliacus muscles can be challenging. The Hip Hook is the first product designed to address this issue specifically.
The Hip Hook was created to eliminate tightness and tension at your core. By addressing your pain and discomfort at the root cause, the Hip Hook will quickly relieve pain caused by prolonged sitting, traveling, or overuse of the hip flexors. In addition, the Hip Hook will provide long-term relief and enable you to regain your mobility.
For the best results in keeping your body strong, healthy, and pain-free: combine stretching with deep muscle release.

Frequently asked questions about piriformis stretches
How do I relax my piriformis muscle?
Different ways to try to relax your piriformis muscle include performing piriformis stretches, massaging the piriformis, or by applying direct pressure to the muscle for a prolonged period of time (at least 30-90 seconds). It is important to remember to take deep and relaxing breaths when using any of these techniques for the best and most effective results.
What is the fastest way to fix piriformis syndrome?
If you have piriformis syndrome, fixing the issue may take some time. However, with a consistent approach of stretching, self-massage, muscle release, and corrective exercises you can make faster improvements. It may also be wise to address muscle tightness in other surrounding areas of your hips, such as the psoas, iliacus, and other deep hip rotator muscles.
What causes a tight piriformis muscle?
Perhaps the most common reason for the piriformis muscle to be tight is the excessive amount of sitting we do each day. Sitting places the hip flexor muscles on the front side of the hip into a shortened position, where they become tight and inhibit the ability for the glutes and other hip muscles to activate and function properly. This has a chain reaction effect where many of the hip rotator muscles, such as the piriformis, become tight as they are forced to work harder to help stabilize the back side of the hip.
How do I release a tight piriformis muscle?
Releasing muscle tension in the piriformis muscle requires the application of direct and prolonged pressure to the muscle (for at least 30-90 seconds). Find a tight spot in the muscle and hold it there, maintaining the pressure and making sure to take deep breaths throughout the course of the 30-90 seconds (or more) to help get the muscle to release and let go.
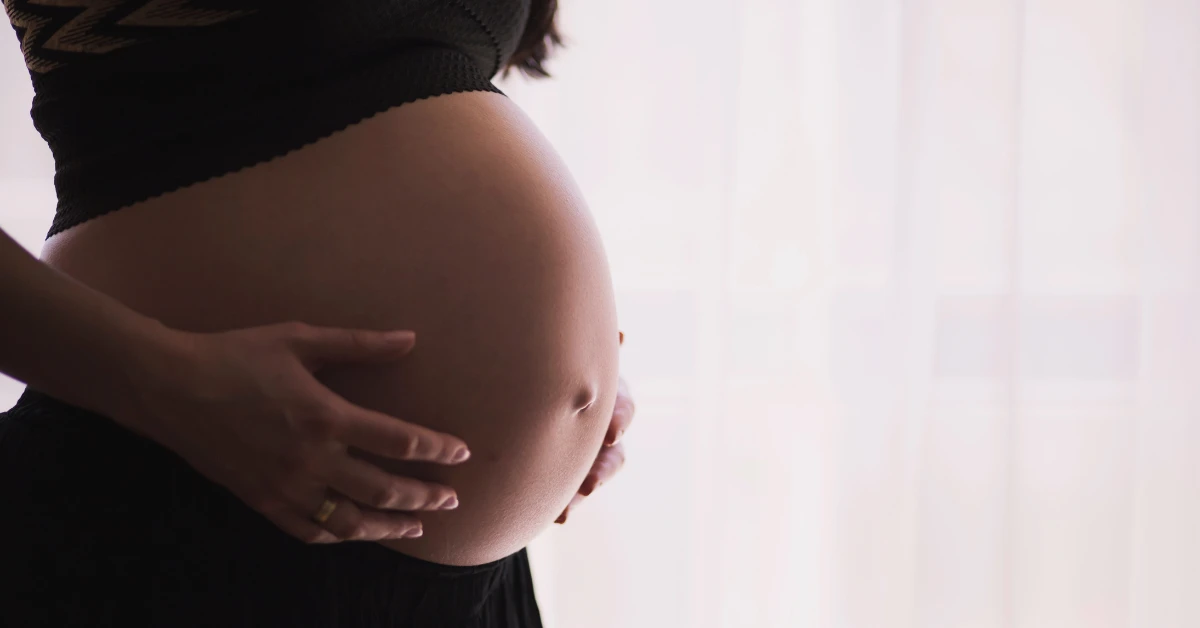
How to Relieve Sciatica Nerve Pain and Hip Pain from Pregnancy
Pregnancy is a beautiful time to get to know your body as you prepare to bring new life into the world. But, with that joy and happiness can come some challenges for many women, such as sciatica pain and hip pain from pregnancy.
Whether it is your first or third pregnancy, there’s no doubt that you will experience some new changes in your body. Some of these changes will be exciting, especially if it is your first baby. But other changes, like sciatica nerve pain or hip pain during pregnancy, can distract from the experience.
Hip pain and sciatic nerve pain during pregnancy are common symptoms during your third trimester. The symptoms are generally felt within a month or so of your due date. However, depending on your underlying health condition and body shape, low back and hip pain in pregnancy can occur earlier.
You may also feel hip pain from different movements during the day or from sleeping on your side during pregnancy. Each pregnancy is unique, so it’s important to work with a professional to identify the pain you’re feeling, understand its potential causes, and seek natural remedies.
In the moment, it might feel like there’s nothing you can do about these aches and pains – or that they’re just a part of becoming a mother. But they don’t have to be. There are ways that you can relieve and reduce your low back and hip pain during pregnancy. Seriously!
So, how do you ease hip pain from pregnancy? First, let’s examine what’s happening in your body to create back or hip pain in pregnancy – and then, I’ll give you some tools to relieve it.
Why is hip pain during pregnancy so common?
A woman’s body does some pretty amazing things during pregnancy to provide for their new baby’s arrival in the world. One of those things is the change in connective tissue to allow more flexibility in the pelvic region.
As you approach your due date, joints and ligaments in your abdomen and around your pelvis will begin to loosen. This is because your body starts to release hormones, including relaxin. These hormones help your body to become flexible enough to accommodate a growing baby – and for the birth itself.
If your body didn’t adapt like this, the baby’s movement through the birth canal would be much more difficult. But hormones aren’t the only thing that change.
As you know, with a baby in your belly, your weight changes too. The additional weight of the baby in an isolated area of your body adds excess pressure to your hips, muscles, and lower back. This change in weight distribution can also change your posture when pregnant.
Both your posture and the overall weight carried in your abdomen influence the strain on your hips while you’re performing even normal, day-to-day tasks. As a result, your muscles may try to overcompensate and become strained as well. This extra strain on your pelvis can cause hip pain during pregnancy, as well as other unwanted symptoms.
What causes sciatic nerve pain during pregnancy?
With all the changes happening in your pelvic region – and depending on where your baby sits inside of you – lower back pain is common during pregnancy. As your hips shift with hormone changes, and your baby’s weight increases, extra pressure is often applied to your sciatic nerve.
Your sciatic nerves run from your lower back to your feet. Sciatic nerve pain in pregnancy (sciatica) occurs due to the enlargement of your uterus as the baby grows. Sciatica puts pressure on the nerves, causing pain, numbness, or tingling sensations in the lower back, hips, buttocks, or thighs. People often report a tingling sensation or pain down one side of their body or down one leg.
Many pregnant women experience sciatica, but the severity and stages in which it presents will vary.
As your pregnancy progresses, and your belly and breasts grow, your center of gravity shifts forward. This can put extra weight on different areas of your pelvis and stretch your lordotic curve. As you get closer to your due date, you may notice that sciatica pain decreases or changes. This is usually because the baby is shifting position to prepare for birth.
Although sciatica and hip pain in pregnancy are common, you should still notify your doctor that it is occurring. Sciatica can be caused by things other than pregnancy and should be addressed. There are also some options that may help soothe the pain you are feeling and reduce sciatica symptoms.
How to reduce sciatica and hip pain during pregnancy
All of the bodily changes during pregnancy can add stress to your bones and nerves, but they can also cause many of your pelvic muscles to work overtime. Since your body is literally changing its anatomy to give birth, muscles, bones, and joints are enduring more stress.
Large muscles like your iliopsoas (also known as your hip flexors), which are in charge of basic leg movement and core stabilization, often take the brunt of the damage.
Your hip flexor muscles may begin to play tug of war with your piriformis muscle. This muscle is located in the buttock region. Irritation of the piriformis muscle is also directly related to sciatic nerve pain in pregnancy.
Some hip flexor stretches can loosen your hip area, but when your hip is already becoming loose, flexibility often isn’t the leading cause of your hip pain in pregnancy. While stretching the glutes and your piriformis muscle can still provide relief from sciatic pain during pregnancy, the relief is often short-term.
Stretching alone will only get you so far. And overstretching can be more damaging.
Plus, stretching can become increasingly difficult as your baby bump grows bigger. So, a combination of exercise, stretching, and targeted muscle release is ideal in treating hip pain from pregnancy.
Five stretches to relieve hip and back pain during pregnancy
Although you may be limited for movement as you approach your due date, there are still some stretches you can do to keep your sciatica and hip pain during pregnancy to a minimum.
A few tips before you start stretching include warming up your muscles a bit, being careful not to bounce, and taking it easy.
Listen to your body, and if it hurts, always stop.
Go for a short walk before you stretch to get your blood moving in your muscles first.
The hormone I mentioned earlier, relaxin, is already loosening your ligaments, so you may notice that you’re more flexible than you’ve been before. This does not mean that you should push it. Because of your pelvis’s added flexibility, it is easy to overdo a stretch and injure your body.
Many of the best stretches to do during pregnancy come from practicing yoga. If you can, consider attending some prenatal yoga classes in your area. This will give you a chance to learn from a professional, and ensure that the body positions are safe during pregnancy.
Here are my top five yoga poses to help relieve hip pain from pregnancy:
1. Modified child’s pose
You may be able to fully perform child’s pose early in the pregnancy, but as the third trimester rolls around, your belly may be too big. Having an exercise ball or a chair in front of you can help.
Kneel in front of the ball. Rest your hands on the ball in front of you, and roll it forward until you feel a stretch in your lower back. Be careful not to roll too fast or too far. You are seeking a gentle stretch that should feel immediately good. If it is uncomfortable, try rolling back a bit toward your body.
2. Modified camel pose
Camel pose can be a great chest opener, but it can also stretch your lower back. Because of the added weight in your belly, you may want a blanket, or a yoga mat folded up on the floor to kneel on as you do this stretch.
Kneel with your legs about hip-width distance apart, your feet flexed behind you, and your toes on the ground. With your hands on your lower back, begin to lean backward, opening your chest. To avoid overstretching, keep your head and neck supported (don’t let your head fall back, you should be looking slightly up or at the ceiling).
If that is comfortable, you can begin to move your hands to your buttocks and down to your back thighs. This is often enough of a stretch for most women. But if you were an avid yogi before pregnancy, you can also reach your hands back to rest on your heels while looking up at the ceiling.
3. Half pigeon
Half pigeon is an excellent stretch for your piriformis muscle, which irritates your sciatic nerve if too tight. However, it can also be a good way to injure your muscles.
So, take this one slow. If it is too much, consider doing a different version of this, but on your back.
From kneeling, bring one knee forward and slightly out from your hip. Extend your back leg behind you, keep it straight, and point your toes. Balance yourself by keeping your hands down on the floor by your side.
Try to keep the front leg’s shin parallel to your hips as you do this. Once you feel your hips are balanced, you can sit deeper into the stretch and even lean slightly forward. Keep your hips square to the ground and keep a slight arch in your back.
If you have to sacrifice your form to lean forward, keep your torso upright and use yoga blocks on either side of your body for extra support. You will feel this stretch in the front of your hips, where your iliopsoas muscles are.
4. Butterfly
A classic hip-opening stretch, the butterfly can help with hip pain from pregnancy, and is easy to do in every trimester.
Sit with your back straight and legs straight in front of you. Grab one leg by your foot (you may need to bend your knee) and bring it in towards your groin until it is comfortable.
Do the same for the other side, but now bring your feet to touch. Bring your feet in as close as you can to your groin before feeling any tightness or discomfort – and hold.
If you don’t feel a stretch, you can lean slightly forward or even apply slight pressure to your thighs.
5. Cat-cow
The final stretch for decreasing hip pain during pregnancy is the cat-cow stretch. To do this stretch, go to your hands and knees. Keep your knees hip-distance apart and your hands shoulder-distance apart.
Slowly drop your back to release your belly towards the floor while lifting your head up. Then reverse your motion to arch your back up, like a cat, and drop your head to the ground.
Perform this motion as many times as is comfortable, as often as you want.
Muscle release for sciatica pain during pregnancy
Stretching can be an effective and very beneficial practice during pregnancy. However, it often does not fully get rid of sciatica pain or hip pain from pregnancy.
Lower back stretches may relieve some pressure from the sciatica nerve, but as your iliopsoas and piriformis muscles play tug of war back and forth, pressure on the nerve will continue.
One of the best ways to relieve this pain is to use a muscle release ball. The Hip Release Ball is the right size and density to perform a full release of the piriformis muscle that is causing sciatica pain.
To do this, lay on your back and place the ball on the soft spot of your buttock next to your tailbone. This is the area the piriformis muscle is located. You can lay flat with your legs out, or you can pull one leg in and hold the knee for a deeper release.
Depending on your trimester, you may also be able to use this release ball on your iliopsoas muscles. However, to do this, you need to be able to lay on your stomach. It’s important to talk to your doctor before applying pressure to the front of your stomach. And it may not always be an option available to you.
The good news is that releasing the back of the hip will help the front of the hip. If one side is loosened, their tug of war with each other lightens up, and the iliopsoas will pull less as well.
With a combination of gentle stretching, exercise, and the use of muscle release tools such as a hip flexor release ball, you should be able to find relief from hip pain during pregnancy. After all, you want to enjoy this amazing time in your life!
If your hip pain from pregnancy persists, it could be worth contacting a medical professional or physical therapist for a more tailored hip pain relief treatment plan.
At the end of the day, hip pain during pregnancy isn’t something you just have to deal with. And, once you learn how to manage your pain, you can get back to focusing on the things that matter – like bringing your beautiful little one into the world.
Frequently asked questions about sciatic nerve and hip pain during pregnancy
What causes sciatic nerve pain and hip pain during pregnancy?
The combination of hormonal, postural, and weight changes can shift your center of gravity to create extra pressure on the sciatic nerve while your hip flexors strain to stabilize your pelvis.
How can I relieve hip pain during pregnancy?
Lower back stretches may relieve some pressure from the sciatic nerve, while targeted pressure on gluteal muscles (specifically the piriformis), can be extremely effective. A mix of exercise, stretching, and targeted muscle release with a muscle release ball is ideal in treating hip pain from pregnancy.
The simple truth: adopting a daily ten-minute routine of gentle stretching and targeted muscle release can relieve pain and gift you an opportunity to enjoy your pregnancy.