Your cart is currently empty!
Blog

The 4 Best Cuddling & Sleeping Positions for Hip Pain
Is there anything better than a cozy night cuddling with your sweetheart? Or anything worse than when you can’t find the right cuddling or sleeping positions for hip pain?
For many of us, cuddling is one of the ways we show affection to our partners and enjoy quality time together. So, what happens when your hip pain starts to interfere with that sacred time?
Whether your hip pain starts to act up just when you’re starting to snuggle in, or is interfering with your ability to sleep at night, you’ll need to know how to manage it.
No matter what the root cause of your hip pain is, knowing the best snuggling and sleeping positions for hip pain is a good starting point in your hip pain management.
That being said, implementing the best sleeping positions for hip pain is only the first step. Your body positioning is merely a reaction to a deeper issue. If you don’t find out what is causing your hip pain in the first place, then you are only putting a bandaid on the problem. And I’m a big fan of addressing the root cause of the problem.
That’s why I’ll help you understand some common reasons your hip may be hurting when cuddling or sleeping, a few of the best sleeping positions for hip pain, and how to prevent hip pain altogether.
What causes hip pain when cuddling?
Hip pain can persist throughout the day, but many people actually experience the worst of it when they’re resting or trying to sleep. So, it’s no wonder the pain can pop up when you are cuddling with your partner or relaxing at the end of the day.
There are a variety of reasons why you may have hip pain, but some of the most common causes of hip pain include:
- Arthritis and osteoarthritis
- Bursitis
- Tight iliopsoas muscles
- Tendonitis
This is certainly not an exhaustive list. There are other reasons you may be having hip pain, including a hip fracture or a labral tear.
Because hip pain is so different for many individuals, if you are experiencing discomfort or any sensation that is interfering with daily activities like sleeping, cuddling, walking, driving, etc., it is important to get an opinion from a medical professional.
This article isn’t meant to diagnose or treat hip pain. It is here merely to help you understand your hip pain better, learn a little bit about the anatomy of your hip flexors and find the best sleep positions for hip pain so you can rest easy.
Although there are quite a few relatively common reasons for hip pain, the one I want to focus on today is overly tight iliopsoas muscles (also known as your hip flexor muscles).
Tight iliopsoas muscles are a frequently overlooked factor when it comes to hip pain, but this tightness is also one of the most prevalent reasons so many people have persistent pain in their hip – sometimes spreading to their back, legs, knees and further downward.
How tight hip flexor muscles cause hip pain
Your hip flexor muscles are one of the most used muscles in your body. During the majority of your daily activities – including sitting, walking, stepping up, lunging, squatting, kicking, running, and anything else that involves leg or trunk movement – these muscles are engaged.
The over-engagement of the iliopsoas muscles can eventually lead them to tighten.
The two separate muscles that make up the hip flexors are the iliacus and the psoas muscles. The iliacus and psoas overlap and connect, the psoas starting at your low-mid spine, and the iliacus starting inside your pelvic bone, and both inserting at the top of your thigh bone. These muscles go diagonally through your core and have the very important job of connecting your upper and lower body.
If the iliacus and psoas muscles are allowed to get too tight, they begin to pull on the structures around them. The excessive tension in the iliopsoas can pull your hip out of alignment and eventually cause pain in your hip or lower back.
The iliopsoas muscles and other surrounding pelvic muscles have the ability to create a domino effect. If one of the muscles is too tight, or a bone is misaligned, it will impact the surrounding areas. Tight iliopsoas muscles can interfere with your other muscles, interfere with your posture (all the way down your feet!), and keep creating more and more issues if the tension continues.
That’s a pretty big effect from such small muscles!
So now that you have a better understanding of your hip structure, and know at least one possible source of your hip pain, it’s time to learn how to manage that pain in the evening so you can actually relax.
Here are the best sleeping positions for hip pain that I recommend to my patients.
The 4 best cuddling & sleeping positions for hip pain
Cuddling is a great way to relieve stress, enjoy time with your partner, enjoy a strong cocktail of your self-manufactured love chemical oxytocin, and even alleviate some chronic pain symptoms. Still, if you suffer from hip pain for any reason, you may struggle to cuddle comfortably or to get a good night’s sleep.
Most of these cuddling and sleeping positions for hip pain are going to be ones that you’re already familiar with, but they include some variations to help you get comfortable and ease hip pain while you cuddle or fall asleep.
1. Be the little spoon
Spooning is a very common cuddling position for many couples, especially when they’re falling asleep together. And, if you are one of the couples who enjoy spooning then you are in luck! Spooning is one of the best sleeping positions for hip pain.
If you have hip pain even while spooning with your partner, identify which hip you’re having pain in while you spoon. If your hip pain is isolated to one hip, be sure to flip over and lie down on the hip that is not causing you pain.
If you prefer being the little spoon, put a pillow between your legs (from knee to ankle) while lying on your side. Elevating your top knee and keeping your top leg parallel to your bottom leg with the pillow, helps to change your top thigh’s angle and prevents it from dropping and tugging on the muscles surrounding your hip.
If you don’t prop your leg up with a pillow and it drops, it can impact the soft tissues (such as your muscles) around your hip and pelvis. This can trigger pain. By separating the top and bottom leg, even just slightly, you can take away some of the stress on those muscles.
If you don’t have an extra pillow to use, or you find sleeping that way uncomfortable, you can instead try angling ever so slightly onto your stomach so that your top knee rests in front of your bottom leg and your hip angle is altered.
2. Be the big spoon
If you are the big spoon through and through, there are some helpful sleeping positions for hip pain for you too. In fact, as the big spoon, you won’t need a pillow at all – you can substitute your partner for one!
While being the big spoon, simply rest your upper leg on top of your partner’s leg. Make sure you are actually relaxing while doing this. This position will help to relieve some of the tension in your leg and will ease your hip pain as well.
3. Try half-spooning
The half spoon is another one of the best sleeping positions for hip pain. If you aren’t sure what I am referring to, don’t worry. I’m here to explain it!
One partner will be lying on their back to perform this cuddling position, and the other one will be on their side facing their partner, similar to a traditional spooning position.
The partner lying on their side will rest their head on the crook of the other partner’s arm, and can rest their own arm on their partner’s chest.
The partner lying on their back can wrap their arm around their partner and lie in whatever position is comfortable for them.
If lying on your side doesn’t work, even with modifications, then choose to be the partner lying on their back.
If you still have hip pain on your back, then try putting a pillow or two under the back of your knees to lift your legs slightly and release some tension on the hip flexor muscles.
If you are the partner that is lying on your side, then just make sure you are lying on the hip that does not cause you pain. Then, drape your top leg across your partner’s body. Just like in the examples above, this will elevate your upper leg enough to relieve some of the pull on the soft tissues in your hip.
4. Rest your head on your partner’s chest
Resting your head on your partner’s chest while they are lying on their back is one of the most comfortable cuddling or sleeping positions for hip pain. Much like in the half-spoon cuddling position, one partner will lie on their side and the other will lie on their back.
The partner on their back can choose a position that works well for them, and if you struggle with hip pain when lying on your side, it will work best for you to be in this position.
The partner lying with their head on their partner’s chest will essentially be in the half-spoon position, but will be slightly lower so that their head rests on their partner’s chest instead of their partner’s arm.
This position allows you to also elevate your top leg by laying your leg across the top of your partner’s legs.
So there you have it! You can be the big spoon, little spoon, or a combination of the two (a human spork?) – and still find a comfortable sleeping position for hip pain.
As I mentioned before, however, simply managing your hip pain at night or while cuddling will not correct the cause of your hip pain in the first place.
Don’t just react to hip pain – prevent it
Chronic hip pain doesn’t have to last forever. While finding the best cuddling and sleeping positions for hip pain can help relieve your pain (or at least make you comfortable enough to fall asleep and enjoy cuddling with your partner) it is only a temporary solution.
One of the most effective ways to address hip pain when cuddling or sleeping is to find the cause of that pain and manage it. Often, there is a common root cause to hip, back and knee pain: tight hip flexor muscles. Fortunately, if that’s the case, there are several easy things that you can do to address the issue.
First, you should get an evaluation from a medical professional, like a physical therapist, to help come up with a treatment plan that fits your needs. Within that treatment plan, they may recommend that you begin to implement some hip flexor stretches to target tight iliopsoas muscles as well as muscle release techniques.
Some stretching techniques can be beneficial to tight hip flexor muscles, but the best way to release your iliacus or psoas muscles is to use targeted muscle release, involving direct, prolonged pressure. Unfortunately, the iliacus and psoas are hard muscles to reach.
While your physical therapist can reach your iliacus and psoas muscles to apply pressure to them during a session, your muscles need more attention between appointments if you want to see results.
Most standard massage or muscle release tools can’t access the iliacus or psoas muscles. That’s why I invented the Hip Hook – a psoas release and iliacus release tool.
Paying careful attention to the tightness of your hip flexor muscles is one of the best preventative measures anyone can take to ensure that they can enjoy cuddling and sleeping without hip pain. Because relaxing with another human really is the good stuff.
Keeping your hip flexors muscles healthy and happy is a long-term journey, and it’s completely worth it. If you need some relief in the meantime, my list of the best sleeping positions for hip pain should help you find it.
FAQs about hip pain when sleeping
Can a body pillow help with hip pain?
It can, and a human body pillow works just as well! If you’re a side sleeper, spooning another human (or a body pillow) allows you to keep your top leg elevated, reducing muscle tension on your top hip joint and compression on your bottom hip joint. But at some point, you may want to address the root cause of that hip pain and look at what you’re with your body during waking, non-cuddling hours.
How do I stop my hip from hurting when I sleep on my side?
One way is by using pillows to adjust the positioning of your body, allowing for more natural alignment. However, addressing any underlying muscle tension during the day may address the root cause of hip pain at night and lead to longer-lasting results.
Chronically tight quads? It might be an iliacus trigger point
Those stubborn quads. You’ve rolled them, stretched them, and massaged them but they’re still tight and/or sensitive to pressure. It’s time for a new angle: let’s look up the chain to find out where that tension is coming from.
There’s no doubt that your quads are working hard, and it’s true they may be holding tension. But they’re also part of a much larger team of muscles that works synergistically while you’re running and even while you’re sitting.
Just because the pain is in your quads doesn’t mean the problem is in your quads
I’m going to bring your attention up the chain to your iliopsoas muscle, an important member of the hip flexor family.
The iliopsoas is actually two muscles: the iliacus and the psoas. Many runners mistakenly refer to these muscles interchangeably, or believe when they’re releasing the psoas they’re also releasing the iliacus. But these two muscles each have distinctive locations and roles, and they both need to be addressed.
One part of this muscle – the psoas– travels from your lower back, across the front of your pelvis, and attaches to the femur (thigh bone). This muscle crosses diagonally through your body in a direction we rarely think about.
The other part of this muscle – the iliacus – travels from the iliac fossa (the pelvic bone) and crosses over the hip joint and also attaches to the femur.
Functionally, these muscles attach your upper body to your lower body, and have the extremely important job of both stabilizing your pelvis and lifting your leg.
Nearly all runners have a tight iliopsoas. Running utilizes the iliopsoas to swing the leg forward in a running pattern while simultaneously stabilizing the spine and hips. The leg strides forward using the iliopsoas and when the leg extends behind the body, that muscle is stretching. Any time you have one leg forward and the other leg behind while using this muscle, there is a good chance for one of the iliopsoas muscles to develop tightness because they have to shorten and lengthen all while stabilizing your spine and hip area. And when this tightness is chronic, this muscle can form something called a trigger point.

What is a trigger point?
A trigger point is a muscle knot that refers pain to a completely different place than where it’s pressed (hence the name; it triggers pain elsewhere). For example, if you have a knot of the trigger point type in the top of your shoulder and you press on it, it might hurt right where you’re pressing, but it could also refer trigger point pain into your neck or head, resulting in a headache.
Trigger points are important to understand because often we have pain in certain areas of the body that are actually coming from a different location.
So back to those stubborn thighs…
An iliacus trigger point can refer pain to the thigh
If you have an iliacus trigger point, you may experience referred pain to the top of the thigh. This may feel achy or tight. If you have a psoas trigger point, you may also experience referred pain that specifically runs vertically along your lumbar spine: this is the trigger point pattern for the psoas and iliacus.
While trigger points often show up in iliospoas muscles on both sides, they are typically more active in one side over the other. But for you special cases out there, it is possible to have them equally active on both sides.
Because the nerves from the lumbar spine are lodged within the psoas muscle, trigger points in either the psoas or iliacus muscle can also entrap nerves, creating symptoms of weakness in the leg and/or sensations of numbness, tingling, or pain.
Tension in these muscles not only affects the nerves and the pain patterns, but they cause a twist in the core resulting in issues from the spine down to the mechanics of the toe. It’s a pretty big deal. I wrote a whole book about it: Tight Hip, Twisted Core: The Key to Unresolved Pain.
What causes trigger points
Iliopsoas trigger points can form from overexertion on an unconditioned muscle, a sudden overload (as in, falling and catching yourself), or regularly sleeping in a fetal position (with your knees drawn up to your chest).
Trigger points can also be aggravated when a muscle is in a contracted position for an extended amount of time (hello, desk chair and long drives), especially in positions where your knees and higher than your hips. Even more so if you are leaning forward at the same time.
Keep in mind that any posture or activity that activates a trigger point, if not corrected, can also perpetuate it.
Foam rolling is not the (only) answer
A trigger point can remain inactive, existing as a knot in the muscle tissue, but not causing any other issues. However, if you go to town rubbing on the trigger point or stretching it, it can become active. Once activated, this “active” trigger point can cause referred pain without being pressed. (Spoiler alert: you don’t want that.)
Foam rolling and stretching your quads can be part of the solution: increasing circulation, releasing tension and softening those muscles absolutely helps. However, when the rectus femoris muscle (that big one on the front of your thigh) is shortened, the iliopsoas muscle also becomes shortened, making it more susceptible to forming and perpetuating iliopsoas trigger points. So even if the origin of your quadriceps tension was actually in your thigh, it is now tugging on the entire chain.
In my experience, many runners with tight iliopsoas muscles have resolved their pain in other parts of the body such as the glute, knee, foot, and toe, by releasing the tension in the core, the iliacus muscle itself.
Trigger points release best with direct, prolonged (90 second) pressure
You need to access this muscle directly to release the trigger point. If the trigger point was in your shoulder, you could easily release it with a tennis ball, a partner, or a well-placed doorframe. The psoas and iliacus muscles are a bit trickier because they are located up against the pelvic bone and you need more angled tools to reach them.
Your first option is to see a physical therapist who can manually release these muscles with their hands. Your second option is to use a tool to release your iliopsoas at home. Some runners have been known to use a kettlebell handle or a massage ball. But there are a couple of tools on the market that address the psoas and only one that addresses both the psoas and the iliacus.
One psoas release tool is the Pso-Rite. It has two arches that curve upwards and you lay over them. For some runners, they are able to get the angle they need for psoas release using this tool, but be aware that it’s a one-size-fits-all tool. Your body needs to be a certain width for those spots to match up with your psoas muscles and the pressure point is non-specific.
Another other psoas release tool is the Hip Hook, which first releases the psoas, then angles inward to perform an iliacus release. For trigger point release specifically, you want hands or a tool that can access the specific nooks and crannies of that muscle and provides pinpoint pressure like only a therapist’s thumb could do otherwise.
Sometimes a trigger point may be right in the belly of the muscle, but sometimes it may be further towards the origin or insertion point. Engage your patience and curiosity: you may need to do some exploration to find the right spot: that’s where a skillful practitioner or specific tool comes in handy.
Iliopsoas trigger points pull on other places, too
Because the iliopsoas muscles are part of a larger functional unit, it is likely you also have trigger points or tightness on the back of your hips and legs due to trigger points in the iliopsoas. So don’t ignore your backside. The antagonists (muscles designed to work opposite the iliopsoas) are also likely to develop trigger points: especially the gluteus maximus (your largest butt muscle), hamstrings (backs of your legs), and adductor magnus (tippy-top of the inner thigh to your inner knee).
This best practice of direct, prolonged pressure applies to these muscles as well. For your gluteus maximus, lay on your back with your knees bent and place a lacrosse ball, tennis ball, hip flexor release ball, or solid dog toy under your hip to release these muscles. Trust me: you will know the spots when you reach them. Breathe and imagine your muscle melting over the ball for 30-90 seconds and you’ll feel that muscle releasing. You can also let your knee fall out to the side to achieve deeper pressure. Then roll the ball a couple inches in any direction and find the next spot. Use this same technique with a foam roller or ball for your hamstrings and adductors.
How to prevent iliopsoas trigger points
Sometimes the best way to take care of your runner’s body is to pay attention to what you’re doing in the other moments of your life. Avoid sitting in positions that keep your iliopsoas flexed for long periods of time, and learn to release your iliopsoas regularly as part of your stretching routine. (And if you haven’t already: develop a stretching routine). Your muscles form movement habits that affect everyday functioning. And like every habit, for better or for worse, regularity matters. Think of releasing your iliopsoas like flossing for your core: it doesn’t take long, you have to remember to do it, and your body will thank you for it in the long run.
The Best Hip Flexor Strengthening Exercises
Now that you’ve learned the top reasons to strengthen your hip flexors, you’re probably chomping at the bit to try some exercises. In this article, we’ll share with you the best hip flexor strengthening exercises you can do to gain those benefits.
Try these exercises to strengthen your hip flexors
For the most effective results with any of the following hip flexor exercises, we recommend that you work within a range of motion, resistance level, rep range, and speed at which you are sufficiently challenged yet can control with good technique. This is super important!
Hip Flexor March (Supine or Standing)
A hip flexor march strengthens the iliopsoas (formed by the iliacus and psoas muscles). So it is a psoas strengthening exercise and an iliacus strengthening exercise. Depending on your ability to balance on one leg, you may choose to perform this exercise while laying on your back (supine) or you can place your hand against the wall for some light assistance when standing.
Removing balance from the equation may make this exercise even more effective because you are able to place more focus and energy towards engaging and strengthening your hip flexors. We recommend that you try those variations first before challenging yourself by adding balance back into the mix.
Here’s how to do each exercise!
Supine Hip Flexor March

To perform a supine hip flexor march:
- Lay down on the ground on your back and have a resistance band (optional) around the middle of your feet. Keep your legs straight.
- Keep the core engaged around a neutral pelvic position, where you could really only slide one finger between your lower back and the floor if you tried.
- Bring one knee as close to your chest as possible, while squeezing the glute and quad on the other leg to keep it straight. Hold this position for 3-5 seconds and make sure the core stays engaged.
- Return to the starting position slowly and with control, repeating the same thing on the opposite side. Continue to alternate sides with each rep in the set.
To challenge the core and upper body during this psoas strengthening exercise, you can also add movement of the arms to perform a more advanced variation of this exercise that is commonly called a dead bug.
Standing Hip Flexor March

To perform a standing hip flexor march:
- Stand up tall and have a resistance band (optional) around the middle of your feet.
- Keep the core engaged around a neutral pelvic position (not too arched and not too rounded in the lower back).
- Raise one knee towards your chest, while keeping your pelvis as level as possible. Squeeze the glute and quad on the other leg to keep it straight. Hold this position for 3-5 seconds and make sure the core stays engaged.
- Return to the starting position slowly and with control, repeating the same thing on the opposite side. Continue to alternate sides with each rep in the set.
Taking a Different Angle
By changing the angle at which you orient your hip when holding the end position, you can begin to target the tensor fascia latae (TFL) and pectineus muscles — both of which are also hip flexors — and strengthen them too.
By placing your hip into internal rotation, you will activate the TFL muscle. As you do this, you can also move your leg further away from the center of your body (hip abduction) to challenge the TFL even more, while also recruiting the gluteus medius.
By placing your hip into external rotation, you will activate the pectineus muscle. As you do this, you can also move your leg closer to the center of your body (hip adduction) to challenge the pectineus even more, while also recruiting the other adductor muscles.
Note that you can also use these variations to change the angle of your hip flexor strengthening when performing the supine hip flexor marches shown earlier.
Mountain Climbers to strengthen hip flexors (using sliders)
Mountain climbers are a fantastic way to challenge your core and upper body while keeping the primary focus on strengthening the hip flexors. It is our preference to perform this exercise using sliders underneath the feet (wearing socks on a smooth surface also works great) to add some additional resistance due to friction and also to prevent “cheating” the purpose of the exercise by bouncing out of each rep.
Standard Mountain Climber

To perform a standard mountain climber:
- Start in a high plank position with your arms directly underneath your shoulders. Keep the core engaged around a neutral pelvic position and with the hips around shoulder height.
- Drive one knee forward towards the elbow while the other leg remains straight, keeping the core engaged and staying in contact with the slider or the floor.
- Straighten that leg out while you simultaneously drive the opposite leg forward towards the other elbow, again keeping the core engaged and staying in contact with the slider or the floor.
- Repeat this alternating pattern for the remainder of the reps or duration in the set.
For a very advanced version of mountain climbers, you can add a resistance band around the middle of your feet. Feel the burn!
Crossover Mountain Climber

To perform a crossover mountain climber:
- Start in a high plank position with your arms directly underneath your shoulders. Keep the core engaged around a neutral pelvic position and with the hips around shoulder height.
- Drive one knee forward towards the opposite elbow while the other leg remains straight, keeping the core engaged and staying in contact with the slider or the floor.
- Return that leg to its starting position while you simultaneously drive the other leg forward towards the opposite elbow, again keeping the core engaged and staying in contact with the slider or the floor.
- Repeat this alternating pattern for the remainder of the reps or duration in the set.
This version will be much more of a challenge for the hip flexors and there will likely be the tendency to want to round the lower back and twist the pelvis to help the knee get closer to the opposite elbow. Resist the urge to do so as best as you can to keep the focus on the hip muscle working.
Paused Squats to strengthen hip flexors (or Tempo Squats)
You might not think of these exercises as something that trains your hip flexors, but they sure do! The functions of the iliopsoas include flexing the hip and stabilizing the lower back, pelvis, and hip. When performing a paused squat or a tempo squat, you will find yourself engaging your hip flexors (as well as many other muscles that make up your core) as you control your body throughout the movement.
There are many different tempos and lengths of pauses that you can experiment with. When written out, you will often see the tempo as 3 numbers. For example, a 3:2:1 tempo means a 3-second eccentric component as you lower yourself down into the squat, a 2-second isometric hold (or pause) at the bottom of the squat, and a 1-second concentric component as you stand back up.
Here are some helpful cues!
To perform a pause squat (or tempo squat):
- Start by standing nice and tall in the squat variation you’ve chosen. Keep your core engaged around a neutral pelvic position.
- Send the hips back slightly as you also begin to bend your knees. Slowly lower yourself down into the bottom of your squat position in accordance with the tempo you selected.
- At the bottom of the squat, hold this position and continue to engage your core (which includes your hip flexors) to maintain a strong, stable position.
- Drive out of the bottom position of your squat and return to the starting position with a strong squeeze of the glutes and legs as you stand back up.
- Take a breath and rest in between reps, as needed.
There are many different squat positions that you can practice these exercises — bodyweight squat, goblet squat, front squat, back squat, overhead squat, and more. The ones listed here are in an order of relative difficulty. Choose a squat variation that is appropriate for you and, if you choose to add weight, select a resistance that you can control with good technique.
Want to deepen your knowledge of your hip flexors?
Learn more about the hip flexors and how they affect the functioning of your entire body in the book “Tight Hip, Twisted Core – The Key To Unresolved Pain” by Christine Koth, MPT.
Frequently asked questions about hip flexor exercises
What are the benefits of strong hip flexors?
Having strong hip flexors can help you maintain good posture and core stability, reverse the effects of sitting, improve the symptoms of weak hip flexors, decrease the likelihood of pain and injury, and increase athletic performance.
How do you strengthen your hip flexors?
Strengthening the hip flexors can be done using isolation or compound exercises that train these muscles through their full range of motion. Using added resistance and changing the tempo during the eccentric, isometric, and concentric portion of an exercise are all variables that can be changed to achieve the desired effect.
What causes weak hip flexors?
Your hip flexors spend a lot of time each day in a shortened position when sitting, where they can become easily fatigued. This contributes to the hip flexors becoming weaker and tighter, especially as you sit for longer periods of time day after day without letting the muscles recover.
How long does it take to strengthen your hip flexors?
If you are someone who does not do any direct hip flexor strength training work on a regular basis, then you may start to see some noticeable improvement in a relatively short period of time by incorporating these hip flexor strengthening exercises more consistently into your routine.
If you are a more experienced athlete or are someone who trains their hip flexors already, then it may take longer for you to make significant strength improvements. Working with a trainer or other exercise professional to determine a more appropriate routine that mixes in more exercises, different loads and resistance, varying rep ranges, and larger ranges of motion can help accelerate your hip flexor strength gains.
If my hip flexors are tight, should I still strengthen them?
A tight hip flexor is likely to be a weak hip flexor. To strengthen tight hip flexors, you may find it helpful to first get those muscles to relax. Using a hip flexor release tool in combination with other hip flexor stretches can help the muscles to recover before you perform hip flexor strengthening exercises.
5 Reasons You Should Strengthen Your Hip Flexors
That’s right — we said strengthen your hip flexors.
With tight hip flexors being such a common problem, people are always asking for the best hip flexor exercises to stretch these muscles. Perhaps they’ve never considered also adding hip flexor strengthening exercises into their routine.
Whether you’re an athlete or a NARP (non-athletic regular person), we’ll share from our perspective on why strengthening the hip flexors is important and lay out the best approach for doing so (since they’re probably tight to begin with).
Five reasons to strengthen your hip flexors
Strengthening your hip flexors can help you maintain good posture and core stability, reverse the effects of sitting, improve the symptoms of weak hip flexors, decrease the likelihood of pain and injury, and increase athletic performance.
1. Strong hip flexors help maintain good posture and core stability
The iliopsoas muscles, your main hip flexors, play an important role in helping you maintain good posture and core stability. They each connect to the lumbar spine, travel through the pelvis, and attach to the inside of the femur near the hip joint. As a result, the iliopsoas are the only muscles that connect your upper and lower halves of the body!
Whether you are sitting, standing, walking, running, or moving around some other way, the iliopsoas is responsible for providing stability for your lower back, pelvis, and hips — all of which make up the “core” of your body. It’s important for these areas to be strong and supported!
2. Reverse the effects of sitting
As you’ve likely heard before, sitting places the hip flexors into a shortened position where they are asked to perform a lot of work to help us sit up straight for hours and hours each day. Over time, these muscles fatigue, tighten up, and actually become weaker.
Adding some exercises for your hip flexors can help build the strength back up in these important muscles, increase blood flow to the area, and help the muscles lengthen out more effectively later on when you do some hip flexor stretches.
3. Improve the symptoms of weak hip flexors
If you know what it feels like to have tight hip flexors, then you know what it feels like to have weak hip flexors, as these often go hand-in-hand. Common symptoms of weak hip flexors include (but are not limited to):
- Tightness at the front of the hip and/or the lower back
- Reduced range of motion in the hips
- Stride length when walking or running feels “off”
- Clicking, popping, or clunking sensation felt in the hips when moving in certain ranges of motion
- Difficulty activating posterior chain muscles (e.g. glutes and hamstrings), which may also feel tight
- Experiencing lower back and/or hip pain and discomfort after standing, sitting, or walking for longer periods of time
4. Reduce the likelihood of pain and injury due to weak hip flexors
When the hip flexors are weak, muscle imbalances can begin to develop in the surrounding areas of the body. This affects the alignment of the pelvis, restricts movement of the hips, and reduces stability around the lumbar spine. Ultimately, there is a chain reaction seen throughout the entire body.
The mechanics of your body change and compensatory movement patterns develop. The pre-existing muscle imbalances become “stronger” and continue to hold your bones out of their natural alignment. Over time, this creates wear and tear on the structures of your body and leads to pain.
5. Strengthen hip flexors to improve athletic performance
Having strong muscles around your hips (like your hip flexors, glutes, etc.) allows the hip joints to work in each of their ranges of motion — flexion, extension, abduction, adduction, internal rotation, and external rotation — and do so efficiently.
Whether your sport involves running, jumping, squatting, throwing, hitting, skating, or changing directions, strong and mobile hips support the body’s ability to produce force, power, and speed to increase athletic performance across the board.
3 tips for strengthening your hip flexors
When strengthening your hip flexors — or any other muscle, really — it’s generally best to have a solid approach to achieve the goal in mind. Here are our best tips for you to consider as you create a routine that works best for your body.
1. Relax your hip flexors before strengthening them
Learning to relax your hip flexor muscles is an important first step before you strengthen them. With the amount of sitting that we do on a regular basis, these muscles are likely to be exhausted and may already be holding tension. Contracting the iliopsoas without letting the muscles recover won’t do you any good.
Think about it — what sitting does to the hip flexors is what squeezing your biceps for 10+ hours each day would do to your arms. As the hours pass by, the muscles get tired, the contraction of your biceps becomes weaker, and it gets harder to straighten your arms because the muscle is tight and holding tension.
Trying to squeeze the bicep even more after having it flexed for 10+ hours doesn’t let the muscle recover and it won’t actually get stronger. By first letting the bicep muscles relax, they will be able to produce a stronger contraction the next time you train them, leading to actual strength gains. This same concept applies to your hip flexors.
To relax the hip flexor muscles, consider adding in various hip flexor stretches to your routine. However, understand that stretching alone may not be enough to get the muscles to truly relax if they are holding tension. Using a hip flexor release tool that applies pressure to BOTH the psoas and the iliacus muscles (like the Hip Hook, pictured below) can help release that tension and improve the effectiveness of your stretches. This sets you up for better success with your hip flexor strengthening exercises because your psoas and iliacus will have recovered and be more relaxed. Hip flexor strengthening exercises are also psoas strengthening exercises because you are working the entire iliopsoas.

2. The best hip flexor exercises are adapted to your body’s needs
The hip flexors are just like any other muscle in your body — they need an appropriate amount of functional strength to perform the daily activities that you do each day. As such, you should be training your hip flexor muscles in accordance with these demands.
We’ll use 3 different kinds of people — a weightlifter, a marathoner, and a desk jockey — as an example to help illustrate this concept of functional strength in the hip flexors. Each of them need strong hip flexors in a slightly different way.
Strengthening hip flexors for weightlifters
A weightlifter needs to have very strong hip flexors to help support and stabilize their lumbar spine, pelvis, and hips in a strong position when performing exercises (such as squats or deadlifts) with very heavy loads. A way in which they may train for this could involve using paused reps or a slow tempo during the descent of the movement (like a squat) to exhibit strength and control throughout their entire range of motion.
Strengthening hip flexors for marathon runners
A marathoner needs to have the strength and endurance in the psoas and iliacus muscles to be able to lift the weight of their leg (which is actually quite heavy!) stride after stride over the course of the race that lasts several hours. They might train for this with a more dynamic exercise that simulates running, such as a knee drive, with added resistance (using a band or a cable) and perform this for higher reps to build up their endurance.
Strengthening hip flexors for sitting at a desk
Someone who sits all day long can benefit from having strong hip flexors, too, as these muscles help you sit upright in a good posture. However, we also know that sitting too long can actually fatigue these muscles and weaken them. To train for this, they might consider doing hip flexor marches from a standing position or knee raises while seated. Also important is to get up to move around and take frequent breaks from sitting, giving the hip flexors a chance to recover to stay strong and relaxed.
3. Establish a routine to help with hip flexor recovery
We’ve already talked about what happens to the hip flexors when they don’t have the chance to recover — they become overworked, tight, and weak. Creating a balanced routine that involves a combination of releasing, stretching, and mobility alongside the hip flexor strengthening exercises can keep your hips feeling strong and relaxed while helping your body feel at it best. Click here for the best hip flexor strengthening exercises.
Want to learn more about your hip flexors?
Deepen your knowledge about your hip flexors and discover how tightness, weakness, and imbalances in these muscles impact the way your entire body functions by reading the book “Tight Hip, Twisted Core – The Key To Unresolved Pain” by Christine Koth, MPT.
Frequently asked questions about the hip flexors
How do I know if my hip flexors are weak?
If you are someone that spends a lot of time sitting down or doesn’t get enough movement and exercise on a regular basis, your hip flexors are likely to be weak. Here’s a simple hip flexor strength test to find out if you have weak hip flexors.
Standing on one leg, raise the knee on your other leg towards your chest. Make sure that the knee raises up higher than your hip to better target your hip flexors. Maintain a neutral pelvic position and ensure that you are not hiking your hip up on the working side to compensate for a weak hip flexor. Hold this position for at least 30 seconds and then switch sides, noticing any imbalances side to side.
If you’ve continuously stretched your hip flexors but the tightness keeps coming back, or if you failed the test outlined above, that may be an indication that you’d benefit from getting some strength into these muscles.
How do I know if my hip flexors are tight?
Tight hip flexors do not fully lengthen to their full range of motion. Tight hip flexors also hold tension when at rest. There are a few ways to test whether this is true on your body. First, use the Thomas Test to see if your hip flexors can reach full extension.
You can perform the Thomas Test on yourself at home. If your hip cannot reach extension, then you’ve “failed” the test and may have tight hip flexors. However, it is important to note that you can “pass” the Thomas Test yet still have tight hip flexors.
The next definition of a tight hip flexor is one that holds tension even when at rest. This happens when a portion of the muscle remains contracted (like having a muscle knot or trigger point). This impacts the ability of the muscle to perform its full function, causing it to tighten up as a form of protection to create stability around the hip joint.
Perhaps the best and most effective way to test for this form of tightness is to press on these muscles. If your psoas and iliacus muscles are tender or painful to the touch, then it may be an indication that these muscles are holding tension and are, in fact, truly tight.
What causes weak hip flexors?
Your hip flexors spend a lot of time each day in a shortened position when sitting, where they can become easily fatigued. This contributes to the hip flexors becoming weaker and tighter, especially as you sit for longer periods of time day after day without letting the muscles recover.
What are the benefits of strong hip flexors?
Having strong hip flexors can help you maintain good posture and core stability, reverse the effects of sitting, improve the symptoms of weak hip flexors, decrease the likelihood of pain and injury, and increase athletic performance.
How do you strengthen the hip flexors if they are already tight?
To strengthen tight hip flexors, you may find it helpful to first get those muscles to relax. Using a hip flexor release tool in combination with other hip flexor stretches can help the muscles to recover before you perform hip flexor strengthening exercises.

Wellness Tools to Help with Stiffness or Soreness
We don’t talk enough about the portability of the Hip Hook. That ache in your low back and hips from traveling? That’s what we’re here for.
The Hip Hook helps you straighten up after long hours of sitting. Because it doesn’t just give you a temporary feel-good stretch; it targets the root of muscle tension for long-term relief.
Thankfully, Travel & Leisure Magazine figured that out immediately and highlighted us in their Intelligent Traveller article: Take Wellness With You. They even pointed out the value of applying sustained pressure on stubborn muscle knots (that’s what we’re all about!)
Whether you’re trying to social distance in economy airline seats, taking that long-anticipated road trip, or sitting glued to your desk, your hip flexors are taking the brunt of it. And we’d like them to be able to take a vacation, too!
Plus, the Hip Hook is an easy fit in your travel bag. And, yes, plenty of our customers have taken it through airport security without a problem.

Sciatica Pain Relief: Self Massage Exercises
Many people think sciatica is just something you have to live with. It’s time for a new angle. Often, relief from sciatica pain occurs by releasing tension in the muscles surrounding the sciatic nerve pathway. If you are one of the many people whose sciatica pain is caused or exacerbated by tight muscles, self massage with muscle release tools and learning sciatica trigger points can offer dramatic relief.
Sciatica pain relief exercises
Sciatica pain relief exercises are less about “exercise” and more about applying pressure to specific muscle groups that help relieve tension and remove impingements along the sciatic nerve pathway. You’ll be learning which muscles to target and how to best use muscle release tools to apply direct, prolonged pressure for 90 seconds (while taking nice, deep breaths).
What is sciatica?
Sciatica is often considered to be a type of back pain; however, it is actually nerve pain. The word “sciatica” describes a kind of pain that someone experiences when their sciatic nerve (which begins in the lower back) becomes compressed, inflamed, and irritated. It is estimated that sciatic pain affects as much as 40% of people over the course of their lifetime.
What is the sciatic nerve?
The sciatic nerve is both the largest and longest nerve in the body – it starts in the spinal canal at the L4 vertebra, goes down to the sacrum through S3, travels out towards the buttocks where it passes underneath (or sometimes through) the piriformis muscle, before traveling down the back of the leg all the way to the feet and toes.
What are common symptoms of sciatica?
Common symptoms of sciatica include radiating pain in the lower back that may travel into the glute and down the leg towards the feet. Some describe the pain as a dull ache along the pathway of the sciatic nerve, while others experience more of an electric jolt or burning sensation down their leg. Additional feelings of numbness, tingling, or weakness may also be present on the affected leg. While the pain is typically felt on one side of the body, it is possible to experience sciatica on both sides.
What are common causes of sciatica?
Common causes of sciatica include bulging or herniated discs, a narrowing of the spinal canal (called spinal stenosis), piriformis syndrome, as well as other spinal conditions that impact the natural alignment of the vertebrae and intervertebral discs in the lumbar spine. It is possible for other conditions to seem as if you are experiencing sciatic pain down the leg, such as SI joint dysfunction and IT band syndrome. In most of these scenarios, the piriformis muscle, deep in your glute, plays a major role in sciatica pain.
Because of the many different possibilities, it is important to consult with your healthcare provider to determine the true root cause of your pain so that you can create an appropriate treatment plan and corrective exercise routine to make long-term improvements and get relief from sciatic pain.
How can I prevent sciatica pain?
While some causes of sciatica may be linked back to genetics, the way that you live your life and take care of your body can also have a really big impact on the likelihood of developing sciatic nerve pain. Keeping your body strong and aligned in good posture allows the muscles, bones, joints, discs, and nerves to function properly and reduce the risk of pain or injury.
The connection between our muscles, body alignment, and sciatic pain
Being in good alignment helps your body function at its best and reduces the chances of experiencing pain, like sciatica. Your muscles are what hold your bones, joints, and spine in good posture as you go about your life – whether you are sitting down, out for a run, picking up your kid, working out, and more.
As we move through our lives, muscle imbalances may develop – perhaps from past injuries, accidents, sitting too much, single-sided habits, sporting activities, you name it – and this changes how our body is aligned. Misalignments can lead to gradual wear and tear setting in and may eventually result in pain.
Focusing specifically in the lumbopelvic region where the sciatic nerve originates, muscle imbalances can hold the pelvis in a twisted position, where they may:
- Affect the alignment of the vertebrae in the lumbar spine
- Change the distribution of pressure across the intervertebral discs
- Reduce space in the spinal canal for the nerves to travel
- Make the lumbar facet joints and/or SI joints unhappy
- Cause the muscles surrounding the lower back and pelvis to tighten up (especially one specific troublemaker: the piriformis. We’ll be focusing heavily on that one)
Each of these things can lead to injuries and/or added compression being placed on the sciatic nerves to cause pain – but we don’t want that!
If you are currently experiencing symptoms that resemble sciatica, I’ll share some of my favorite sciatic pain relief self massage exercises that you can try to see how it may help you out along your healing journey.
What are sciatica trigger points?
A “trigger point” is a contracted piece of muscle tissue (commonly known as a muscle “knot”) that exists even when a muscle is at rest. Pressing on this area will trigger a pain response locally in that area and may also cause pain elsewhere in the body, which are known as referral patterns or referral pain.
When describing a trigger point, it is more common to see it be described as within a certain muscle (e.g. piriformis trigger point). When the term “sciatica” is used to describe a trigger point, what someone likely means is actually the pain referral pattern mimics that of sciatica. Due to the proximity of the piriformis muscle to the sciatic nerve, what is actually a “piriformis trigger point” may also be referred to as a “sciatica trigger point.”
How to do self massage for sciatica pain relief
I recommend exploring the following muscles with self massage techniques using a ball or massage tool to help release muscle tension, improve your body’s alignment, decrease compression around the sciatic nerve, and reduce your pain.
For each of these releases, you will likely need to explore along the length of each muscle to find those tighter spots on your body, with a ball or massage tool. Once you find a tight spot, rest in that place (with pressure on that spot) for somewhere between 90 seconds (based on your comfort level). Focus on breathing and relaxing that muscle.
After releasing that spot, you may decide to move the ball or tool to a different area of the same muscle, or move to another area and repeat the same process: direct and prolonged pressure with deep breaths for 90 seconds.
While self massage for sciatica pain relief may hurt, it should be more of a “hurts so good” kind of feeling during and after the release. The pain should start decreasing after 30 seconds; if it doesn’t move the tool to a different spot. If at any point you feel a large increase in pain that lingers after the release, you may want to reduce the intensity of the pressure and/or explore a different spot along the muscle. If that increased pain does not go away, please stop and consult your healthcare practitioner.
Self massage for sciatica on the piriformis
The piriformis is a small, yet very important, muscle to address for sciatica pain relief. This is because the sciatic nerve actually passes underneath this muscle deep within the glute area before it travels down the leg. If the piriformis muscle becomes too tight, it may compress the nerve and cause sciatica-like pain; this is one of the reasons these spots on the piriformis muscle are sometimes referred to as sciatica trigger points.
While the piriformis lies underneath the larger gluteus maximus, it is still relatively close to the surface of the body. This helps make the muscle easier to access by using something like a foam roller, lacrosse ball, or a massage therapy ball.

Self massage for sciatica on the iliopsoas
The iliopsoas muscles are our body’s main hip flexors and also play a large role in supporting the alignment of the lower back and pelvis. Due to its connection points in the lumbar spine, tightness in this muscle can create downward compression on both the joints and discs in the lower back. If left unaddressed for a longer period of time, this may begin to affect the health of these structures and contribute to sciatica due to a disc injury or pinching of the nerve.
Another reason to release the iliopsoas is due to the effect that a tight hip flexor has on the piriformis muscle. The body wants to be in balance, so tension in the front of the hip can cause the muscles on the back side of the hip to tighten up, playing a game of tug-of-war with each other. We already know that a tight piriformis can compress the sciatic nerve and cause pain. When the iliopsoas is also tight, we have a double whammy for potential sciatic pain.
Self massaging the iliopsoas is more challenging than you might think. Unlike the other muscles discussed in this article that are closer to the surface of the body, the iliopsoas is deeper within the core of the body. Because of this, a lacrosse ball is likely too small to even reach this muscle. Using a larger hip flexor release ball can be a little better to reach the general area; however, the most effective way to self massage the iliopsoas is with an iliopsoas release tool designed specifically for that area of the body.
Take a look inside the body to see how the Hip Hook – a psoas release and iliacus release tool – is able to access and release these deeper psoas and iliacus muscles.

Self massage for sciatica on the gluteus medius, gluteus minimus, and tensor fascia latae
This group of muscles – responsible for moving the hips in many different ways and providing stability to the pelvis – tend to be tighter on people who are experiencing pain from sciatica. When these muscles hold tension and do not function properly, it causes other areas of the body to compensate. This becomes the perfect opportunity for the development of muscle imbalances, misalignment of the spine and pelvis, and the potential for sciatic pain over time.
Located on the outside surface of the pelvis, each of these muscles are easily accessible using a lacrosse ball (or similar). You’ll start off laying on your side with a massage therapy ball of your choice underneath you, where you can then angle your torso forward or backward to target the tensor fascia latae (or TFL), gluteus medius, and gluteus minimus muscles.
These trigger point pain referral patterns can mimic the sciatic pain even though the nerve may not be involved, because the muscle knot refers pain to a different spot.

Self massage for sciatica on the spinal erectors and quadratus lumborum
The spinal erectors and quadratus lumborum muscles make up the backside of your “core” and are responsible for moving, stabilizing, and protecting the lumbar spine. Tightness and weakness in these muscles affects a person’s ability to align their pelvis in a safe position when performing their daily activities, increasing the risk of injury and sciatic pain.
For those already experiencing sciatic pain, these muscles like to tighten up to protect the area. However, this can create more compression in the lower back, prevent natural movement of the spine and pelvis, and may increase pain.
The lower back spinal erectors connect to the sacrum and iliac crest and run up each side of the spine along the spinous and transverse processes before inserting into the ribs. The quadratus lumborum are deeper muscles underneath the erector spinae that attaches to the top of the pelvic bone (or ilium), the bottom of the 12th rib, as well as the outside of the transverse processes of the L1-L4 lumbar vertebrae.
While a lacrosse ball may be large enough to reach the spinal erectors, it may be necessary to use a slightly larger massage therapy ball to reach the quadratus lumborum, using pressure in the spots marked with an “x” in the image.
Frequently asked questions about sciatica pain relief
What triggers sciatica?
Sciatica is a type of nerve pain that is triggered when the sciatic nerve becomes compressed, inflamed, and irritated. This is typically caused by conditions such as tight muscles, a herniated disc, degenerative spinal conditions, or misalignments of the vertebrae and discs of the lumbar spine, among other potential causes.
How do I get relief from sciatica pain?
To relieve and improve sciatic pain, you must relieve the pressure that is being placed on the sciatic nerve. One way this can be achieved is through releasing tension in the hip, glute, and lower back muscles.
However, it is important to understand the actual root cause of the issue, which may be closely related to the alignment of the lumbar spine. When the spine is out of alignment, injuries and pain are more likely to occur.
When the spine is in alignment, the bones, joints, discs, nerves, and muscles all work better together. Improving spinal alignment can be achieved through corrective exercises (including muscle release, strengthening, stretching, and mobility).
How do I massage sciatica trigger points?
Applying direct, prolonged pressure to trigger points in the piriformis, as well as trigger points in other related muscles (such as the iliopsoas, gluteus medius, tensor fascia latae, and quadratus lumborum) may help to relieve tension and ease restriction around the sciatic nerve. Pressure is better than rubbing in this cae: rubbing can actually irritate the area and increase pain.
Massaging a tight piriformis muscle may create a sciatica-type pain. This is because the sciatic nerve actually passes underneath this muscle deep within the glute area before it travels down the leg towards the feet.
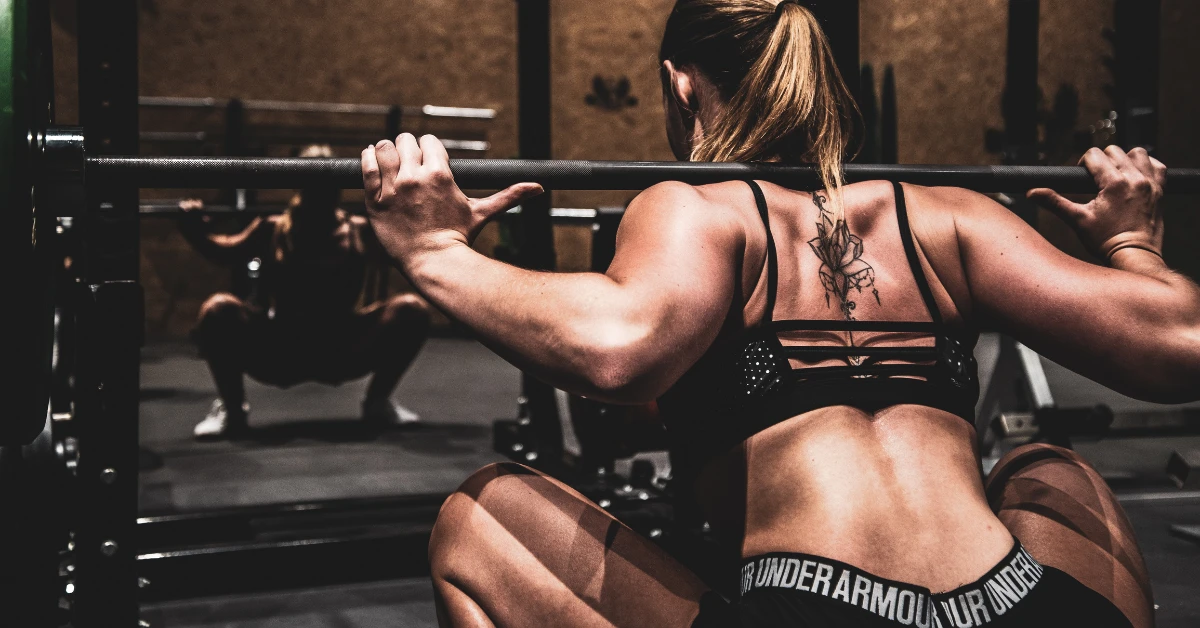
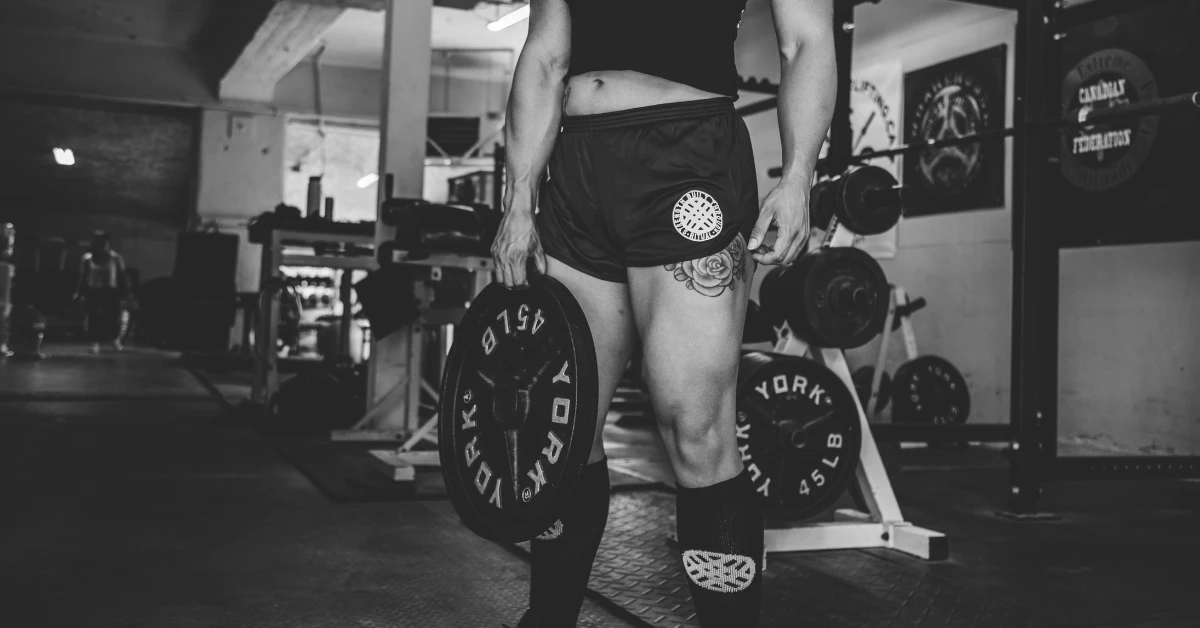
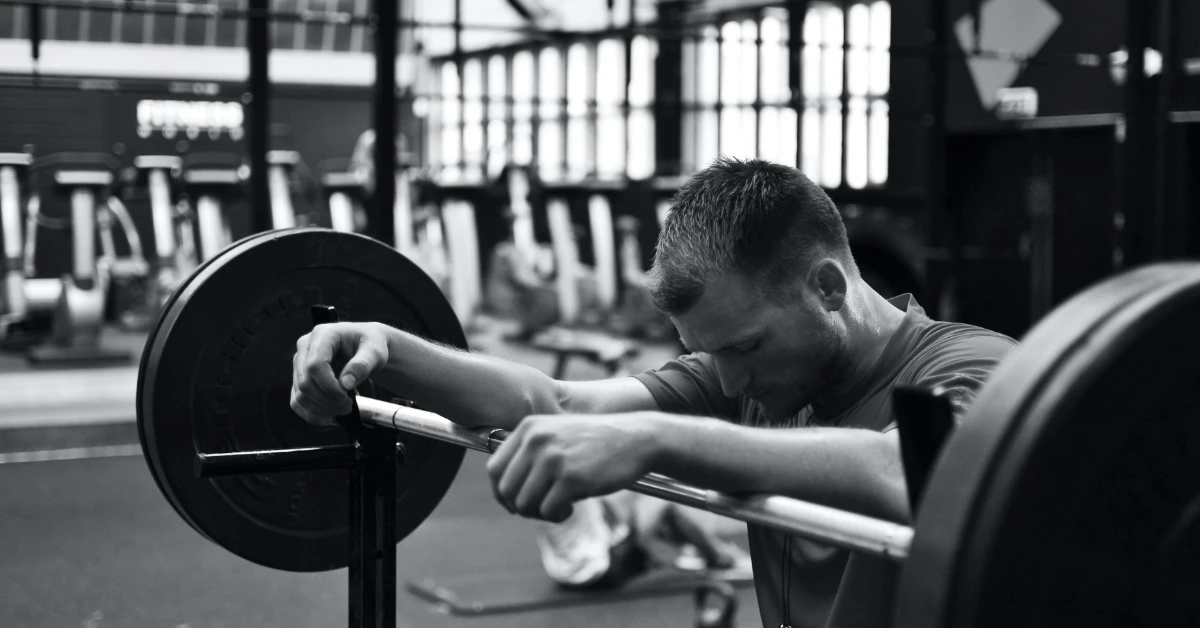
4 Ways to Prevent Hip Pain When Squatting or Weight Lifting
Why do my hip flexors hurt after squatting?
Can lifting weights cause hip pain?
Many of my clients who are frequent gym-goers, CrossFit enthusiasts, or weight lifters come to me with these questions. Hip pain when squatting is more common than you might think, and it isn’t something you just have to live with.
Squatting is such a functional and effective exercise, no matter your fitness level. So, having hip pain after exercising or lifting weights not only impacts your gym progress, but your day-to-day quality of life as well.
There are a variety of reasons why hip pain from weight lifting occurs, but once you can determine the cause, it becomes much easier to treat and even eliminate.
Understanding how your hip functions
Before I jump straight into the reasons why your hips hurt, it helps to understand how your hips move when you exercise. Our hips have a powerful connection to our entire body. They are the center of our kinetic chain that is being used while you squat, connecting the upper body to the lower.
The hip is a large ball-and-socket joint that is reinforced with four ligaments and supported by multiple muscles. Two of these muscles are the iliacus and psoas muscles, which connect your spine and pelvic bone to your thigh bone. Together, they are known as your iliopsoas muscles, and they play a very important role when it comes to both flexibility and stability.
One important thing to keep in mind: although medical professionals generalize the way the hip joint is structured, not everyone will have hips that fit the “textbook” anatomical definition.
We all have different bone structures. The length of the femur (the leg bone), the angle of the head of the femur (where the ball comes off the bone), and the depth and angle of the socket (that the ball fits into), are all examples of bone structure that can vary widely from person to person.
All of these factors, in addition to the structure of the pelvic bone, correlate to the hip’s ability to rotate, flex, and stabilize. These determine if your leg rotates out when you squat or if your toes can point straight forward. This also impacts how stable or unstable your hip may be during activity. A deep hip socket, for example, is more stable than a shallow one.
There are also less-visible factors at play, such as how much collagen or elastin your body naturally has. This ratio of collagen to elastin affects the strength and stretch of the ligaments, joint capsules, tendons, and fascia in the body.
Those with more elastin are likely to be more flexible and have a larger range of motion when doing exercises like squatting. But too much elastin can make the hip unstable when it’s being asked to do challenging tasks. This instability will cause your hip flexors to become tighter in response, as the muscles will take over the work of holding you together if your connective tissue isn’t stable.
Those with less collagen have more joint support while exercising. On the downside, you may not have the mobility to get into the deepest version of that squat.
It’s all about balancing stability and mobility in the body. Your body is happiest when you are in balance, a concept that stretches into all aspects of life.
Common causes of hip pain when squatting
Squatting is an explosive and powerful exercise that puts an enormous amount of pressure and stress on our hip joints and iliopsoas muscles, yet is highly effective in strength building and athletic performance.
Although the main muscles that work to move your body during a squat are your glutes, quads, calves, and back muscles, the iliopsoas is behind the scenes, holding it all together. These two muscles stabilize the hip, pelvis and lumbar spine.
When tremendous and repetitive stress is placed on this area of the body, the iliopsoas contracts with intensity to hold your back from going out, keep your hips in the socket, and keep your tailbone connected to your pelvic bones. It’s a big job!
It’s no surprise that several different hip problems can arise from heavy lifting.
If and when you decide to seek treatment for hip pain from weight lifting, you will need to go over the symptoms you are experiencing with your doctor. Instead of including an exhaustive list of hip pain scenarios, I have listed the three most common reasons people experience hip pain when squatting.
Hip pain while squatting due to muscle strain
You are likely familiar with some form of muscle strain or pull. When a muscle is used beyond its capability, microtears or even major tears can occur. And it’s the most likely culprit of hip pain when squatting or exercising.
Pulled muscles are uncomfortable and can take a long time to heal. When it comes to your hips, a strain or pull can occur in those big mover muscles (the glute, back, or quad), but can also occur in either the iliacus or psoas muscle – and can be especially painful.
The iliacus and psoas major muscles (also known as your iliopsoas) work together to stabilize your core while you squat. And the rectus femoris (a part of your quadriceps muscle) is closely associated with the iliopsoas in location and helps you to stand up. Because the rectus femoris part of the quad crosses the hip joint as well, this part of the quad is especially sensitive to injury with challenging squats. It attaches to the front point of your knee cap and travels all the way up to the pelvic bone.
When you’re experiencing a hip flexor strain, you might feel pain in the front of your hip, leading from the outside of your hip down into your groin area. You may even feel mid-to-low back pain where the psoas attaches. Muscles that are strained hurt when used or stretched. They also tend to hold tension to protect themselves. Injured and tight muscles become weak because the brain is trying to tell you to stop moving so much so it can heal! If you ask an injured muscle to work hard, it’s not going to be happy about it.
Unlike delayed onset muscle soreness that lasts a few days, muscle strains last weeks or months.
More specific symptoms of a hip flexor strain include:
- Muscle spasms in your hip or thigh
- Pain that comes on suddenly
- Increased pain when stretching hip muscles
- Increased pain when actively lifting your thigh towards your chest or raising your knee
- Pain or tenderness when touching the front of your hip
- Swelling on the hip area
- Pain when walking, especially up the stairs
Other muscles that are strained will feel similar sensations just in different locations.
Something to note about the hip flexors is that strain creates tension because an injured muscle wants to protect itself by encouraging you not to move. A strained muscle also becomes weaker for this same reason.
When the hip flexor complex is tight or holding tension due to injury, or even from having to work too hard for other reasons, that tension is pulling on the bones of the hip, spine, and pelvis. This also changes the length of the other muscles that attach to these bones. These other muscles like the hamstring, glute, and quad become weaker as a result. Shortened or lengthened muscles lose some of their strength, resulting in increased susceptibility for strains themselves. Furthermore, tension in the hip flexors will change the mechanics of the entire leg, spine, and tailbone, making you more susceptible to further injury somewhere else.
Very few people realize that working out with tight muscles makes you more susceptible to strains in this way.
Hip impingement when squatting
One type of bony issue that causes impingement is known as femoroacetabular impingement (FAI). This common issue causes you to feel pain and stiffness in your groin and hip flexor area. With movement, you may even feel a catch or clicking feeling on your inner hip. You may also feel discomfort when sitting for extended periods.
FAI occurs when the bones of your hip joint have a suboptimal fit, causing your bones to pinch or rub too close to surrounding tissues. These rubbing or pinching movements create unnecessary friction between the various bones and tissues, causing deterioration and pain.
To break it down further, the hip is designed so that the femoral head, which is the ball of the hip joint, sits on the femoral neck. You can envision this as you would a scoop of ice cream sitting in an ice cream cone.
So, when the hip joint – either the femoral head and the socket – does not fit together as they were designed, they will rub against each other, creating friction. This prolonged rubbing in the hip socket (such as in avid gym-goers) is one of the causes of hip pain when squatting. This bone structure can also pinch muscles and tendons nearby.
One thing worth mentioning: this pain often has very little to do with how much weight you are lifting. The weight may speed up your symptoms or increase your discomfort, but easing off on your gym visits or weights won’t fix the problem.
Often, I find that even though the bones have set the stage for pinching, when the iliopsoas muscles have been unnaturally pulling on your hip joints, it causes even more pinching to occur. A tight hip flexor twists the core and further impinges the hip joint in flexion. Deep flexion, where your knee goes up towards your chest as in a deep squat, is the motion that is limited when you have an anterior pelvic rotation due to a tight hip flexor. It’s also the motion that is irritated with an impingement issue.
Once they’re able to release the iliopsoas muscles – particularly the iliacus – my clients have noticed their symptoms either go away or are remarkably improved, allowing that joint to have more space to move before it is pinched!
Hip bursitis causing hip pain when squatting
Lateral hip pain when squatting can be caused by bursitis.
Bursa are small, fluid-filled sacs that sit in various places around your hips. They are positioned between the bone and the soft tissue of the joint to cushion those structures when you move. When your bursa gets inflamed, it causes bursitis.
There are two bursa sacs located around your hip joints, and they can become inflamed for several reasons:
- Improper posture when sitting, standing, or squatting
- Laying on the side of your hips for extended periods
- A hip injury of some kind
- Overuse of hips from running, jumping, squatting, etc.
- Tightness in the hip flexor complex which in turn causes unnatural tension in the muscles that are nearby the bursa
Once a bursa is irritated, it will no longer be able to properly protect the tissues near the hip joint. There is a major bursa on the outside of the hip that helps cushion many muscle attachments on the greater trochanter, a part of the femur that sticks out on the outside of the hip. When this bursa is irritated, it is called trochanteric bursitis. The iliopsoas attachment also has a commonly irritated bursa that gets irritated in the inner groin.
Some other common symptoms of bursitis include:
- Redness surrounding the outer hip and upper thigh (for trochanteric bursitis)
- Noticeable swelling of the hip area
- Limited joint movement
- Pain in the hips while walking, sitting, or lying down, especially when lying on the outside of the hip
- Warmth in the hip area
Pain from hip bursitis may not always be consistent or noticeable. It can come and go in flare-ups after activities such as CrossFit, running, or weight lifting.
You may not even notice the hip pain when squatting or lifting, but once you are home and resting, pain may arise.
Four ways to prevent hip flexor pain when squatting
1. Focus on form
When performing a squat of any kind, but especially while weight lifting, your form is the best defense against any type of injury. If you are using poor form, you can accentuate your hip pain in CrossFit or other weight lifting activities.
So, take a step back from your weights next time you’re in the gym – or even do this little exercise at home. Break down each movement to ensure that you are not putting a strain on one part of your body over another.
To perform a basic bodyweight squat, follow these steps:
- Stand with feet hip-distance apart, toes turned slightly out. The position of your toes will vary depending on your bony anatomy. Allow yourself to have a natural stance for your hips
- Stabilize your stance by tightening your core and turning your chest upward
- While doing this, begin to shift your weight back into your heels and push your hips behind you as you squat down
- Continue to slowly lower yourself until your thighs are almost parallel to the floor
- During this movement, your feet should remain flat on the floor, and your knees should stay over your second toe
- Keep your chest lifted and gaze either forward or slightly up
There are other variations of a squat, such as a jump squat, sumo squat, and barbell squat, which all require slightly different positioning to be performed correctly. For loaded or barbell squats, for example, you could move below a parallel position with your thighs.
If you are not properly distributing the weight throughout your body, more pressure is put on your hips to compensate for changes in posture and positioning.
When squatting, most clients say they focus on their legs or keeping their knees in the proper position. While these are vital aspects to squat form, focusing on our hip positioning is equally important.
If it’s not possible for your thighs to become parallel to the floor when you squat, it is likely that you lack strength and mobility in your iliopsoas muscle or other areas of the body. Leaning too far forward as you squat will put added stress on your back and quadriceps while also shortening and tightening your iliopsoas.
If you are feeling wobbly or off-balance when you slow down, that may be an indicator that your iliopsoas muscles have been weakened from overuse or poor form. Remember, these muscles are supposed to help you stabilize.
When your hip flexor muscles have proper mobility and strength, they assist you to pull your squat deeper while still maintaining form in your back and keeping the center of gravity over your feet. Your best bet with form is to work with a skilled trainer or practitioner who can watch you move and help tweak your motion.
2. Flexibility and mobility
During your warm-up or cool down, consider adding in some hip mobility exercises along with stretches, especially if you have hip pain when squatting.
You don’t have to limit it to those times either. Any time during your workout, between sets, or even at home before bed is a good time for stretching. If you improve your flexibility, you will simultaneously be able to increase your mobility.
If you’re already experiencing some pain or tightness in your iliopsoas, it should be addressed before you turn to strengthening exercises.
Hip mobility is important when performing a squat because if any muscles (calf, thigh, glute) are too tight, or a joint is unable to move fully, you will not be able to get into a full squat position. Beyond your hips, your knees and ankles need to be able to flex adequately to get to that desired depth in positioning.
If you do not have enough flex or mobility in any of these three joint areas, you compromise a neutral spine.
For squatting specifically, the flexibility of your hip flexor muscles, like the iliopsoas, dramatically impacts your form and ability to properly perform a squat. If you have tight iliopsoas muscles, you will have a tendency to lean forward as you squat. Even a slight lean forward when squatting shifts your center of gravity, increasing activation of your quadriceps while decreasing in your glutes.
Lastly, keep in mind that you don’t have to go as deep into your squat as you currently are. It is much better to listen to the cues your body is giving you than to overwork your iliopsoas muscles.
You can still get a great workout without moving your legs past parallel to the ground. As you go past parallel, your hips go into more and more flexion, shortening your hip flexors quite a bit. Short muscles become weaker and those hip flexors have a hard time stabilizing your hip, tailbone, and spine, making those areas more prone to injury the deeper you go. Throw in overcoming mobility issues in other parts of the body, like your ankles for example, and you’re setting up a precarious situation.
Box squats are a great way to strengthen without asking your body to go too deep into hip flexion. It’s the best of both worlds.
3. Strengthen and stabilize your muscles
It is generally accepted that squats are an effective form of exercise since they utilize multiple muscles simultaneously. Just in a standard bodyweight squat, you’re using your:
- Abdominal muscles
- Back
- Glutes
- Hamstrings
- Quadriceps
- Calves
- Foot muscles
With so many muscle groups engaged during a single bodyweight squat, you could see why strength and stability are important in preventing pain. When the other muscle groups surrounding your hip and hip flexor are strong, they add much-needed support and stability during the exercise.
Take the psoas muscles in your hip flexors as an example. If you have weak psoas major muscles, your entire hip could experience instability, which could cause overuse of other muscles, like your back.
If those same muscles are too weak, even in one area, it puts additional strain on your hips. Any added strain could cause you to lose a proper form or even injure your hip.
This is why it is also important to diversify your workout routine. You can target more muscle groups and transfer the strain across more areas of your body when doing cross-training. And this may prevent hip and back pain while squatting.
Finding a way to strengthen all of these muscle groups, including your hips, will give you a more stable base and improve your ability to perform a squat. Some targeted exercises that can improve hip strength and stability include:
- Hip flexion
- Bridges
- Side-lying leg lifts like a clamshell
- Hip extensions
Many other exercises target your hip muscles and, for a short time, you may want to work with a physical therapist to have the most effective outcome.
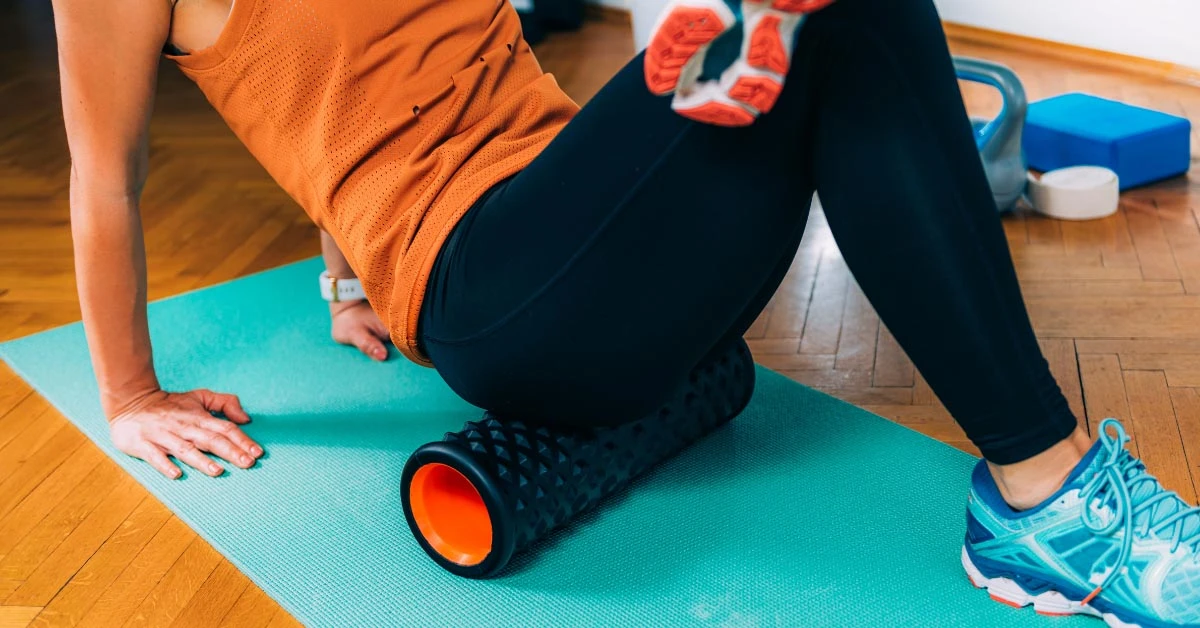
4. Make time for rest and recovery
One of the easiest ways to injure your hips is overuse. This is true beyond squats, weight lifting, and CrossFit, too.
If you’re a runner or a cyclist, hip pain can be a real issue if you do not schedule some good old fashioned rest and recovery into the mix. This goes beyond just taking a rest day or adding some extra time between reps, though.
When you are working on improving your form and overall strength, getting enough sleep is a vital part of the recovery process. Muscles like your iliopsoas use this time to fully relax, take a break from the demands of the day, and repair themselves after a difficult workout.
How to relieve and reduce hip pain
Now that we’ve listed some ways to avoid hip pain when squatting, let’s discuss what you can do if you are already experiencing it.
First, it is important to identify and diagnose the cause of your pain. For this step, you will want to work closely with a trusted medical professional. When you figure out the cause of your symptoms, you don’t need to rely on anti-inflammatories and endless rest days.
For a more targeted approach to hip pain when squatting, I use release techniques and tools like the Hip Hook to create a full release of the iliacus and psoas muscle. Just 5 minutes a day on the Hip Hook should be a standard practice for all weight training regimens. As you now know, tension in this muscle can easily occur with weight lifting and CrossFit, and tension in these muscles can be responsible for pain related to this activity.
Unlike standard foam rollers or balls, the Hip Hook targets the root of your hip pain by providing prolonged (30-90 seconds), precise, angular pressure on the iliacus and psoas muscles. These muscles are hard to access without a specific tool or a skilled practitioner. Use this tool to ease your hip pain and tension so you can get back to the workouts you love.
And once you’ve achieved that release, it’s important to find ways to strengthen your muscles, increase mobility, and dial in your form as you go forward. This will help you prevent hip pain when squatting, weight lifting, and exercising in the future.
FAQs on hip pain when squatting
Can I squat with hip impingement?
Even though the bones have set the stage for pinching, when the iliopsoas muscles have been unnaturally pulling on your hip joints, it causes even more pinching to occur. A tight hip flexor twists the core and further impinges the hip joint in flexion, such as a squat. Releasing the iliopsoas muscle will not structurally change the impingement, but symptoms and movement can be improved.
Why does my hip hurt while squatting?
There are a variety of reasons you may have hip pain while squatting, from bursitis to arthritis to impingement, and many of them can be improved by releasing and stabilizing the hip flexor muscles.
How can I warm-up for squats?
Releasing your hip flexor muscles is a great practice before working out. It’s too easy to think of muscle-release as a post-workout routine, but releasing them with prolonged pressure beforehand will help your body to realign and use those muscles more effectively.
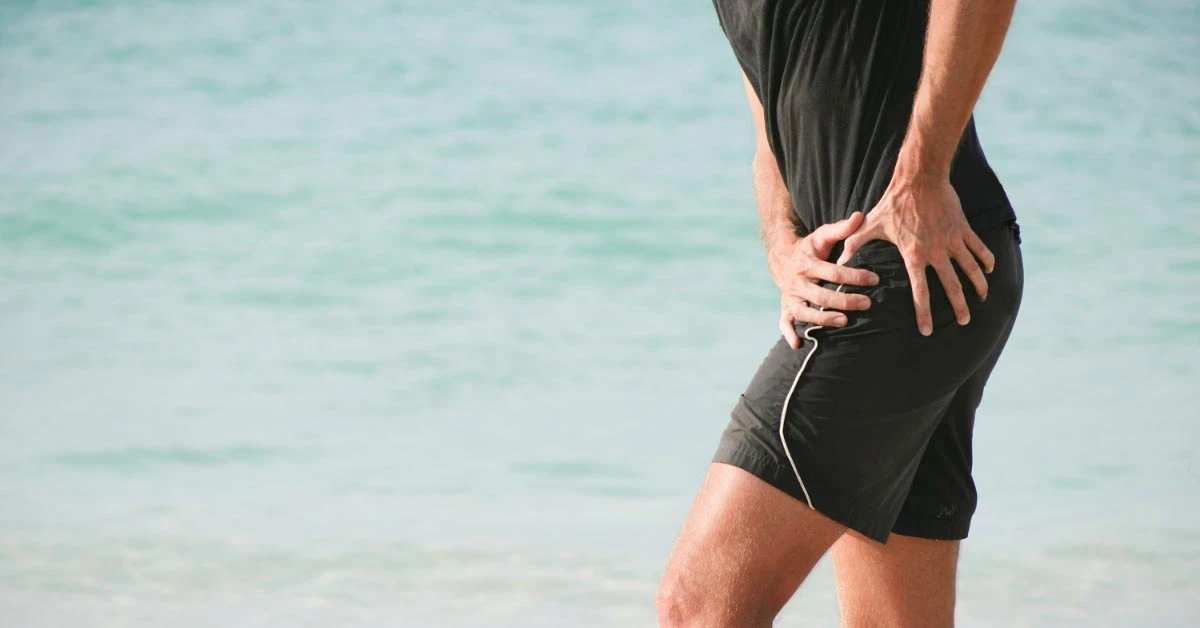
5 Hip Impingement Exercises to Relieve Your Hip Pain
Hip pain can hold you back from many activities: from your favorite sports, to games with the kids, or even hitting it hard at the gym. Finding the root of your hip pain is the first step to doing something about it.
If you suspect (or know) that your pain stems from hip impingement, introducing hip impingement exercises to your routine may also help you address and treat your pain.
What is hip impingement syndrome?
Also known as femoroacetabular impingement (FAI), hip impingement syndrome is when the contact point of the hip joint (the ball and socket) has abnormal wear and tear. It is technically a mechanical or structural disorder that directly impacts the hip joint.
Usually, this wear on the hip joint occurs on the labrum (or hip joint cartilage) and develops over time due to excess friction on the joint structure. The added friction could be caused by overuse, incorrect form when exercising, tight hip flexor muscles, or an abnormal hip shape. Any of these reasons has been known to cause hip impingement pain.
In a healthy, normally functioning hip, the top of the thigh bone (the femoral head) is rounded to fit perfectly into the hip socket (the acetabular socket). When this is a seamless fit, the femoral head can move without resistance.
There is a thin layer of smooth cartilage that protects these bones at their connection point and a labrum around the rim of the hip socket creating a protective ridge of cartilage for added security during femoral head movement.
Anytime something prevents this smooth, seamless movement between the hip’s femoral head and the acetabular socket, hip impingement may occur.
Hip impingement syndrome symptoms can affect anyone at any age – even young adults and children.
Bone shape, tight muscles, and hip impingement pain
When we think about hips and hip injuries, we often assume that everyone’s hip is precisely the same. But, just like we all have varying body shapes, our hip bone shapes and hip joints are different, too.
Being aware of your unique hip bone shape can be one of the most effective ways to set realistic expectations for your body, especially if you’re an athlete. For example, one person may have an extremely shallow hip socket. Shallow hip sockets will allow for more mobility and flexibility, but they may also create instability and a higher chance of labrum damage, hip labrum tears, and pain from hip impingement.
The human body has a fantastic way of working extra hard to correct injured areas. So as hip impingement sets in for most people, the iliopsoas muscles begin to tighten. These muscles are what you might think of as your hip flexor muscles, and they connect your spine and pelvic bone to the inside of your femur (thigh bone), facilitating movement and giving your body stability.
The iliopsoas muscle is actually made up of two large muscles that sit side-by-side: the iliacus and psoas. These two muscles help stabilize the pelvis and core with every movement you make – whether sitting, standing, bending over to tie your shoe, or stretching out your legs after a long day. They also help protect the hip joint and tendons in your body from taking on too much stress.
But when a damaged hip or hip joint is thrown into the mix, the iliopsoas muscles become fatigued. This may result in tightness in your hip flexors and/or hip pain. And, as your iliopsoas muscles begin to tighten and pull on the bones they connect to, that can cause a pelvic tilt, difficulty fully extending your legs, lower back pain, and a host of other issues. This is what we refer to as a “twisted core.” It’s the result of one or both of your iliopsoas muscles refusing to loosen their grip on your body.
As you can imagine, having tight hip flexors can also make hip impingement symptoms even worse. Having your hips out of alignment can cause problems on its own. Paired with already existing hip impingement syndrome, tight iliopsoas muscles are likely to create even more friction during movement.
In order to ease hip impingement pain, and find the correct hip impingement exercises for your case, it’s important to understand the type of impingement you are dealing with.
Types of hip impingement
The exact type of hip impingement you’re experiencing has a lot to do with the shape of your hip joint bones. There are two main types of hip impingement that doctors will often refer to.
- Cam impingement: This occurs when the ball-shaped end of the femur is not perfectly round. Since the femoral head has an abnormal shape, the way it rubs as it moves in the socket adds extra friction to the cartilage and labrum.
- Pincer impingement: This happens when the femoral head is covered too much by the acetabulum or socket. This excess coverage can cause the femur’s neck to touch and impinge along the rim of the hip socket. Over time, this causes cartilage and labral damage.
Just because you have one type of impingement in your hip doesn’t mean you can’t have the other. Plus, there are even more types of impingement than these two. These are simply the most commonly referred to by doctors.
In the absence of both cam and pincer impingement, hip impingement caused by hypermobility or a shallow hip socket is also possible.
To understand if you have hip impingement and could benefit from hip impingement exercises, let’s take a look at some of the symptoms of this syndrome.
Hip impingement symptoms
Hip impingement symptoms often fly under the radar for years. Some people won’t even feel pain until the hip damage worsens with time. The most common symptom is pain in the groin area. However, pain may not be existent at all in the early stages of hip impingement, or you may associate it with other issues.
Hip impingement pain will usually be more noticeable when walking, running, or performing an exercise that flexes the hip.
Other than hip pain, you may experience some decreased range of motion and tightness in the iliopsoas muscles.
When hip impingement symptoms first occur, you may only feel resistance, pain, or decreased range of motion when engaging in stretching, running, jumping, or other activities that put stress on the hip joint.
So, if you’re an athlete that often pushes the limits of your body, you may notice hip impingement pain much earlier than someone that works in an office setting and goes on leisurely walks each evening.
No matter the hip engagement, if the syndrome worsens with time and day-to-day hip use, even the most simple activities could become painful. Doing things like walking up stairs or standing up from sitting after driving to the market are likely to produce pain in the groin area.
Something that hip impingement patients need to realize is that if gone unchecked, hip impingement can lead to osteoarthritis.
If you are having pain at night as you are lying in bed, or even when walking slowly on flat ground, this could mean that a lack of cartilage is allowing contact of the bones as you move. As the cartilage breaks down, other symptoms could arise, and osteoarthritis is not out of the question.
Now that you are aware of the symptoms, it’s time to explore some hip impingement exercises to properly stabilize your hip joints and prevent hip pain.
Top 5 hip impingement exercises
Luckily, surgery is not the first or only option to treat hip impingement. While some patients may require surgery due to severe damage to the labrum or joint structure, we believe it should be a last resort.
Instead, we focus on helping you create and practice hip impingement exercises that strengthen the muscles around your hip joint and promote balance and alignment.
Here are the top five hip impingement exercises to try before resorting to surgery.
1. Stretching
When entering into physical therapy for hip impingement of any kind, it is essential to note that strength training and stretching are equally important. If you try to rely solely on stretching, it is possible to overstretch your hip muscles – especially the iliopsoas.
Since hip impingement can be caused by hyper flexibility, overstretching your hip flexor muscles could exacerbate the problem entirely. Still, if part of your hip’s misalignment is from overly tight muscles, then some hip stretching could be beneficial.
Knowing the cause and type of your hip impingement can help your physical therapist design hip impingement exercises that will not be harmful to your joint.
Some commonly used stretches that a physical therapist may have you do include:
- Hip flexor stretches like lunges
- Groin stretches like a gentle butterfly stretch
- Piriformis stretches to stretch the back hip
Be sure to listen to your body as you engage with these hip impingement exercises. Happy muscles shouldn’t hurt. Tightness and pain are both indicators that you could be stretching your muscles too far.
2. Core strengthening
Besides stretching the iliopsoas muscles, strength training will often be used to further stabilize the hip structure and keep it in proper alignment. Hip strengthening may seem normal in this situation, but what about core strengthening as part of your hip impingement exercises?
Your iliopsoas muscles are a part of your core and play a large role in the stability of not just your hips, but your whole body. So, by balancing out the muscle strength in and around your hips, you add more stability to the hip joint itself.
Core strengthening exercises ideal for hip impingement patients:
- Bridging
- Leg raises
- Pelvic tilt
- Pelvic clock
Just as with stretching exercises, if core strengthening exercises cause you pain at any time, STOP. Be sure to report these instances back to your physical therapist so they can restructure hip impingement exercises that better fit your needs.
3. Hip strengthening
Since your hip area is the source of your pain, it’s important to strengthen your hip region. Of course, finding hip-strengthening exercises that don’t hurt may take some trial and error. You may also need to work with your therapist to release your muscles and promote the correct hip joint alignment before engaging in any strengthening movements or exercises.
One way to do this is with a tool like the Hip Hook, the only muscle release tool designed to release both the psoas and the hard-to-reach iliacus muscle. The iliacus is half of your iliopsoas, and it is too often overlooked in addressing hip pain and impingement. Its location along the inner side of your pelvic muscle can make it very difficult to reach and release without a specific tool or a skilled therapist.
Once you’ve used the Hip Hook and felt a release, you can then move to some of these hip impingement exercises that may help strengthen the hips:
- Bridges (single and double leg)
- Clamshells
- Lateral band walking
- Isometric hip raise
- Hip hikes
Remember, releasing muscle tension needs to happen before you can strengthen. Otherwise, you will cause your already-tight muscle to contract even more or may not be able to achieve a full range of motion.
4. Balance exercises
Many balance exercises may feel a bit like strength training and will engage your leg muscles, hip muscles, glutes, and core. Working on balance is a way to target small muscle groups around the hip joint to improve the joint’s stability. As your balance improves, you will gain more control of your pelvic and lower extremities, and take some pressure off of the hip joint itself.
Keep in mind that when performing balance exercises, you will have to push yourself just a little. If it’s easy to balance, try to move to the next level of a movement, or shift the position of your eyes. Feeling wobbly is normal!
Balance exercises to try include:
- Using a Bosu ball
- Standing on a balance board
- Single leg squats
When attempting these hip impingement exercises, be sure to have something nearby (such as a wall or chair) to help you with stability as needed. Work to find a balance of challenging yourself just enough to pursue a better balance, without putting yourself in danger of injury.
And, if you are unsure of any movement, always ask your therapist. They will be there to supervise your form and provide alternatives if your current level of hip mobility doesn’t allow you to safely do an exercise.
5. Working on form and functional training
Something as simple as the way you step as you walk can impact your hips. Body awareness is important for managing and treating hip joint pain.
Functional training will teach your body how to move correctly as you go about day-to-day activities. This can also be targeted to your needs. For instance, if you’re an athlete, you may need functional training to strengthen your hip joint enough for sprinting or kicking. If that’s the case, a physical therapist would need to structure your hip impingement exercises around your form and overall awareness of movement.
And when doing any of the above hip impingement exercises, you should always prioritize form over trying to go deeper into a stretch or completing an exercise more quickly. In many ways, you are re-teaching your body and hips to move in a different way while doing familiar exercises. If you’ve been suffering from hip impingement for some time, your body may have acquired muscle memory around improper form. This may be as a result of certain muscles compensating for others in your hip region or because your hip joint structure wouldn’t allow for a full range of motion.
So, be gentle with yourself! Slow down and listen to your body.
Other hip impingement treatment options
Though these solutions may help, remember that hip impingement exercises aren’t everything. While physical therapy is the ideal option for treating hip impingement, some other options are available. Things like rest, pressure release of muscles, injections, and surgery could all be a part of the healing process.

Hey Guys: Release Your Psoas for Better Sex
Sitting, Sex, and the Psoas (the p is silent). English is weird.
You may think this title is just some clickbait to get you here. Truthfully, it is not. Men’s sexual health and erectile dysfunction affect a large population of men. The worldwide prevalence of erectile dysfunction is expected to increase to 322 million men by 2025, affecting 30 million American men.
The iliopsoas muscle and men’s health
I’m not saying that sitting is the primary cause of less-than-stellar sex life or erectile dysfunction. There are many variables to take into account – diet, exercise, stress – that can all affect men’s reproductive and sexual health.
I am going to be focusing on one overlooked piece of the puzzle: the iliopsoas muscle. This muscle is made up of two separate muscles that merge into one: the psoas and iliacus. Together, they connect your upper body to your lower body. Traveling from the vertebrae of your lower back, through your pelvis, and attaching to the femur, the iliopsoas is a neighbor to a lot of important real estate. From nerves and arteries to lymph nodes and organs, any issue with the iliopsoas affects these neighbors as well.
The iliopsoas is one of your hip flexors, and there’s even preliminary research that the volume (size) of the psoas plays a role in male sexual health. Bicep curls are out, leg lifts are in! Balanced bodies are healthy bodies; focus on functional muscles for men’s health, not just the obvious eye candy.
Fight, flight, freeze
Think of this muscle as the fetal position muscle: It is strong, and it is meant to snap shut like a steel trap gluing your knees to your chest to shield your vital organs from an attack. This means that this muscle naturally holds tension when stressed, and when we add in 40+ weekly hours of sitting, this tension becomes chronic.
Sitting and sexual dysfunction
Humans did not evolve to sit at 90 degrees. Our hips evolved to sit in a deep squat comfortably (think pooping in the woods). Today, most people can’t even get into that position! This lack of mobility can result in some pretty serious issues, ranging from breathing, digestion, and constipation to reproductive and sexual health problems. Without the daily full range of motion of squatting deep to relieve ourselves, the hip flexors stop moving correctly and they begin to tighten until they are chronically contracted. Your body is the master adapter: if you sit with your hips flexed at 90 degrees for 8 hours a day, five days a week, your body is going to make changes to help you continue to do so. Unfortunately, this adaptation causes issues in all other areas of life, from sleeping to sexy time.
How do hip flexors affect sex?
Our hips are meant to be both an endurance runner, an explosive athlete, to walk dozens of miles a day and then cozy on down for some hot and heavy hip thrusts. But as modern men, we lock our hips into a seated position until they become weak and immobile. Over time, this immobility leads to pain, pain leads to dysfunction, and dysfunction is the last thing you want on date night!
Ever watch a hula dancer? Those are some healthy and mobile hips! You know what they say: it’s not about the size of the ship, it’s the motion of the ocean. And many of our oceans are solidifying into concrete.
Too much sitting locks up the hip flexors, the diaphragm, and the pelvic floor: affecting sexual functioning and the ability to hip thrust. Think of your pelvic floor as a hammock supporting your organs from the bottom and your diaphragm as an umbrella on the top. With each passing breath, the pelvic floor and diaphragm gently move up and down. This gentle up and down movement stimulates blood flow, digestion, and everyday processes. When we sit in a chair with poor posture, this movement stops and we begin taking shorter, more shallow breaths. This shallow chest breathing sends a cascade of stress signals that something is wrong, further compounding tension in the body.
Sexual performance for men: it’s all in the hips.
Probably the best line to come out of an Adam Sandler movie. So before you go down the road of little blue pills or chugging beet juice before the third date…
Two steps you can take to promote healthy hips and sexual performance
- Apply pressure to your tight hip flexors and gluteus muscles
- Stretch your hip flexors
No different than when someone massages your traps, and you melt into a puddle of bliss, the muscles surrounding your hips need the same treatment. Angry muscles relax under pressure. (This does not apply to an angry spouse: apologize and leave the room, slowly.)
Psoas release with prolonged pressure
Applying pressure to release the psoas and iliacus is tricky, and only possible with the right tool or a skilled practitioner. I recommend the Hip Release Ball, which has the right diameter and density to gently release the psoas. But if you really want to get in there, and release the psoas AND the iliacus (the entire iliopsoas muscle), you’ll need the Hip Hook.
The Hip Hook is a psoas release tool and iliacus release tool. It first releases the psoas through patented angular pressure. When you press down the handle, the Hip Hook pivots up into the iliacus muscle, providing the necessary prolonged (90 seconds) pressure for relaxation. This one tool effectively releases the long-standing tension held by your hip flexor, allowing for corrective exercises and stretches to have a much more lasting and therapeutic effect.
Once you have released the hip flexors, work the ball around the sides and back of your hips looking for tender spots. Once you have found an ‘ouch’, hold and breath on that spot for 90 seconds while your muscle relaxes around the ball. The usual suspects that get tight from sitting are the gluteus medius, obturator internus, quadratus lumborum, and piriformis muscles.

How to stretch your hip flexors
After applying prolonged pressure to the iliopsoas, now it’s time to stretch! The lunge stretch is highly recommended because it stretches the iliopsoas, bringing circulation and length to that muscle.
Step one foot forward with your spine straight. You can do this stretch with your knee on or off the ground. With this stretch, it’s important to engage your abdominal muscles, a light cough can achieve this, then contract your glutes by tucking your butt under you. This allows for the iliopsoas muscle to stretch fully over the joint while protecting your lower back from the psoas tugging on it while it’s being stretched.
You should feel the stretch in the front of your hip joint or the front of your thigh. If you’re not feeling it there or if you’re feeling it in a different spot, then stop. You can experiment with bending your spine to the opposite side of the leg you’re stretching to increase the psoas stretch.
To get lasting results from your hip flexor stretch, focus on using proper form and take generously deep breaths.
Hip flexor corrective exercises
The glute bridge is going to be THE exercise that keeps you on your A-game. This exercise stretches the hip flexors by activating the glute muscles. Sure, you’re just humping the sky, but we all know practice makes perfect, so get on the floor and start hip thrusting at least once per day. A solid goal to work up to is a 3-minute glute bridge, holding at the top of the movement (hips off the ground) for 3 mins as well as 100 full reps. Build stronger glutes and stretch your hip flexors at the same time.
Evolutionarily speaking, men’s hips are meant to thrust, ALOT. Unfortunately, it’s usually when our partner is in the mood which is not enough to maintain healthy hips. Walk, thrust, walk some more and sit only when you have to. To reiterate the importance, PLEASE DO THIS EXERCISE.
To learn more about how your hip flexors affect your body – and your sex life – check out Christine Koth’s book Tight Hip Twisted Core. For complete psoas release and iliacus release, I recommend the Hip Hook, and the Hip Release Ball for addressing the back of the hips and glutes. Releasing both the psoas and iliacus are important for full range of motion, pelvic strength, and a lifetime of amazing sex.
FAQs about tight hip flexors and sexual health:
Can tight hips cause groin pain?
Yes, tight hip flexors (iliopsoas) can result in misalignment in the pelvis, this misalignment can manifest as pain throughout the pelvic and groin area.
Can sex cause low back pain?
Possibly. A tight hip flexor (iliopsoas) can pull on your low back causing pain and reduced range of motion in the pelvis.
Does flexibility affect sex?
Stretching and tension release activities can promote blood flow and lymphatic drainage to the pelvis thereby improving the health and function of the pelvic floor and sexual organs.
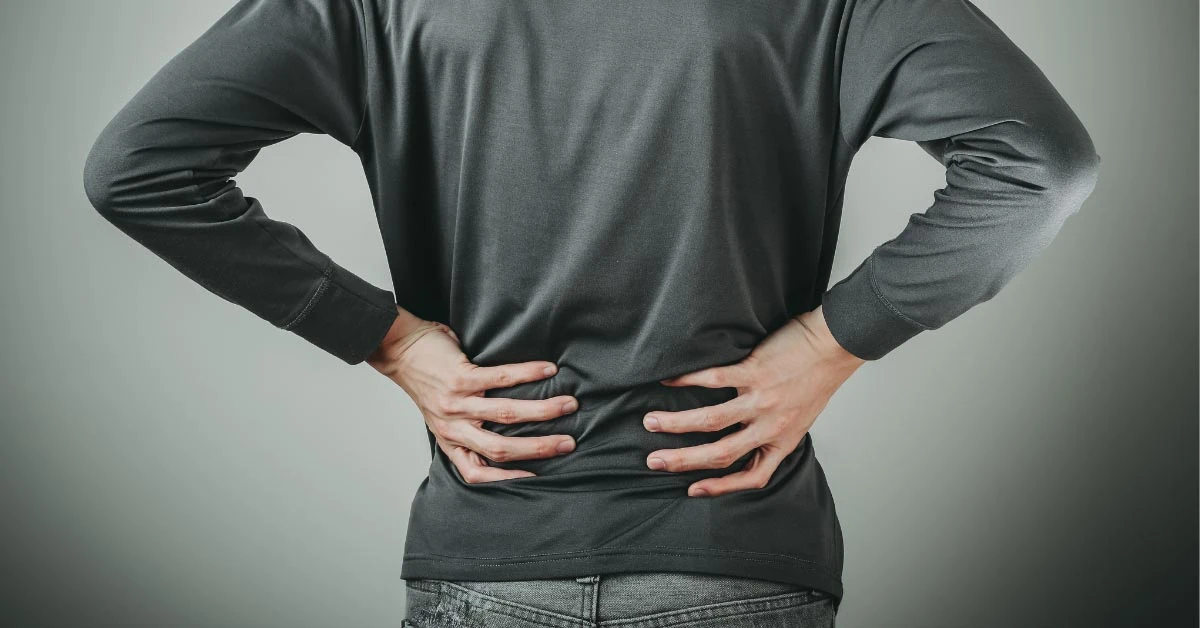
7 Home Remedies for Sacroiliac Joint Pain
If you’ve ever felt lower back pain, hip pain, or other pelvic joint pain, then you may also have experienced — or still be experiencing — sacroiliac joint pain.
Your pelvis, hips, tailbone, and spine are a very complex and vital part of your ability to function during your day-to-day activities. One part of this system is your sacroiliac joint, which makes small yet important movements with every one of your steps. So, what happens when those joints cause you pain?
While surgery is sometimes necessary for sacroiliac joint pain, home remedies for sacroiliac joint pain also exist and can be quite useful when applied correctly. You should also consult a medical physician before implementing specific exercises or heath routines into your life.
There are a million home remedies out there on the internet, and not all of them are created equal. To help narrow down your search — and save you time and effort — I’ve put together a list of home remedies for sacroiliac joint pain that actually work.
Before we get started though, it would be helpful for you to understand more about the sacroiliac joint and how it affects your body.
What is the sacroiliac joint?
Your SI (sacroiliac) joint is where your sacrum connects to the ilium bones, and is located directly above the tailbone and is mostly immobile, allowing only four degrees of rotation. There are many soft tissues (muscles, ligaments, cartilage) that hold the SI joint in alignment and support movement. Because of the close proximity to your hips and tailbone, the SI joint is still necessary for completing everyday movements as it balances and absorbs shock from walking or jumping in the spine.
The SI joint is a self-locking joint, so it locks whenever you prepare to perform an activity like jumping or running. Since it functions so frequently during daily movements, your SI joint endures a lot of stress and tension.
For your body to perform all of the movements absorbed by the SI joint, you engage your iliopsoas muscles, commonly known as your hip flexors. You can think of the iliopsoas muscles as the puppet masters of your hip and pelvic joints and bones.
The iliacus and psoas muscles that make up the iliopsoas grab hold of your pelvis and thigh bones and help them engage in movements like sitting, standing, or kicking. These muscles work hand-in-hand with your SI joint to create comfortable movement, but they don’t always work as planned.
How to recognize sacroiliac joint pain
SI joint dysfunction has become increasingly common due to the immense stress the joint goes through day to day. However, because of its location, it can be challenging to identify where your pain is originating from, or if it is an SI joint dysfunction at all.
If you are struggling with SI joint dysfunction, pain is most often identified in the lower back region. There are plenty of other possible symptoms of sacroiliac joint pain, including:
- Difficulty balancing
- A slight burning sensation near your pelvis
- General pain in your hips, groin, or thighs
- Trouble sleeping due to discomfort in your back or hips
- Pain after sitting for long periods
Many people who experience SI joint pain will experience symptoms like those listed above in the morning after being immobile for the night, or during physical activity. Certain activities like walking up and down stairs or doing squats can also trigger intense pain, as they further engage your iliopsoas muscles and pelvic area
Common causes of sacroiliac joint pain
Since your iliopsoas muscles essentially utilize the SI joint, it is important to recognize that hip joint, pelvic joint, and SI joint pain are often associated with tight iliopsoas muscles. Since the iliopsoas muscles work in tandem with your pelvic joints, including the SI joint, if your muscles are tight, they directly impact these joints.
The primary function of the iliacus is to stabilize the hip joint and the sacroiliac joint (or SI joint), keeping those two joints aligned and strong regardless if the body is stationary (such as when sitting or standing) or if the body is moving (such as when walking or running). Other secondary functions of the iliacus include assisting in hip flexion (like marching) and hip external rotation (turning out your leg). Your body is the most comfortable when your spine, pelvis, and hips are aligned, working together with the iliopsoas muscles.
It helps to think of the iliopsoas muscles like a rubber band holding a stack of cards together. Without healthy and fully-functioning iliopsoas muscles, your hip, spine, and pelvis alignment can easily topple out of place, like a deck of cards — causing pain in your back, hips, and SI joint. This misalignment affects the way the bones move in relation to each other, and if they’re not well-aligned then they are running into each other and rubbing each other the wrong way.
Now that you are aware of what the SI joint is, and some common causes for pain in that region, let’s look at some home remedies for sacroiliac joint pain so we can help you find sacroiliac joint pain relief.

Home remedies for sacroiliac joint pain
While sacroiliac joint pain treatments will vary according to the pain’s severity, many home remedies for sacroiliac joint pain can help ease symptoms.
It can be tempting to treat sacroiliac joint pain entirely at home, but it can help get the guidance of a medical professional and physical therapist. Some people will need interventions such as surgeries, steroid injections, or physical therapy.
For those who can get by without more serious treatments and interventions, here is my recommended list of home remedies for sacroiliac joint pain:
Anti-inflammatory medications
One of the fastest home remedies for sacroiliac joint pain is anti-inflammatories. A lot of sacroiliac pain is due to inflammation of your muscles and joint area. When you’re first addressing your pain and other symptoms, it may be necessary to use non-habit forming anti-inflammatory medications, especially after activities that may irritate your joints.
Ice and heat therapy
If you are looking for home remedies for sacroiliac joint pain that don’t require medication, one of the best is ice and heat therapy. As mentioned above, inflammation can be a huge issue with sacroiliac pain. While anti-inflammatory drugs can be beneficial, ice and heat therapy will also relax and relieve pain. It is most helpful to alternate between ice therapy and heat therapy. Start with ice therapy on the irritated area, or where you’re feeling the most pain, to bring down some of the swelling. Then, apply heat to the SI joint area to improve blood flow and relax the joint area to relieve some pain.
Losing weight
Some home remedies for sacroiliac joint pain require more long-term commitment. Anytime you carry excess weight in your body, you add extra stress to your joints. This is the same for your SI joint area. Excess weight, specifically on your abdomen area, adds a significant amount of stress on your spine, hip joints, pelvic joint, and the SI joints because they are working harder to keep your body upright and in a correct posture.
Losing excess weight will help keep your joints aligned, and minimize the stress put on them during daily activities. If you are experiencing back or SI joint pain, it can be difficult to motivate yourself to exercise. The good news is that weight can be lost and maintained with a healthy diet and low-impact exercise.
SI joint pain exercises
Working exercise into your routine is important for various health reasons, but finding specific SI joint pain exercises to incorporate into your daily routine can help strengthen, balance, and stretch the SI joint area.
Not all exercises are suitable for the SI joint, though, so remember that if it causes you pain to perform a stretch or exercise, listen to your body and stop. As you alleviate more of the SI joint pain, more exercises may become easier and more comfortable.
There are a variety of yoga poses that help both stretch and strengthen the SI joint area. They are great home remedies for sacroiliac joint pain. A few of the best joint pain exercises include:
- Cobra pose
- Child’s pose
- Bird dog
- Bridge
- Single and double knee to chest
- Hip and knee rolls side to side
Wear an SI joint brace
One of the most prevalent home remedies for sacroiliac joint pain, especially when dealing with severe SI joint pain, is to wear a sacroiliac joint belt or brace. The use of an SI joint belt is most common in people that experience SI joint pain and also have hypermobile joints. Sacroiliac joint belts support and compress the joint area, and prevent the joints from moving too much.
Luckily, most SI joint belts and braces are quite low profile and can be worn under clothing. However, the SI joint braces should not be seen as a long-term solution, simply as a stepping stone to provide some relief throughout the sacroiliac joint pain treatment process.
Eliminate inflammatory foods from your diet
If you are looking for dietary home remedies for sacroiliac joint pain, avoiding and minimizing your consumption of inflammatory foods can be helpful.
Highly inflammatory foods to avoid include:
- Sugar (including high fructose corn syrup)
- Vegetable and seed oil
- Artificial trans fats
- Alcohol
- Refined carbohydrates
- Processed meats
- Dairy
Along with avoiding inflammatory foods, you can also consider introducing more anti-inflammatory foods to your diet, including:
- Berries
- Broccoli
- Green tea
- Grapes
- Peppers
- Mushrooms
- Turmeric
- Cherries
Eating a whole foods, plant-based diet cuts out highly processed, sugary, and fried inflammatory foods and introduces more fruits and vegetables to your diet.
Iliopsoas muscle release
At this point, you may not be surprised that one of the most efficient home remedies for sacroiliac joint pain actually targets your iliopsoas muscles. Since the iliopsoas muscle is so intimately connected to your sacroiliac joints’ well-being and function, tight iliopsoas muscles can cause additional SI joint pain. Watch a video to understand more about how tight hip flexors affect SI joint pain.
Although some stretching can help, stretching alone won’t fully address muscle tightness and in some cases can worsen it. The best way to release these muscles is with precise, prolonged (30-90 seconds) pressure. Reaching your hip flexor muscles with average massage tools like foam rollers is very difficult because of the location. You may get some relief when going to the physical therapist because they can reach the iliopsoas muscle with their hands.
For the best iliopsoas muscle release results, you’ll need to use a tool designed specifically for releasing your hip flexors. Designed by a physical therapist, the only muscle release tool with the ability to effectively reach and release your psoas and iliacus muscles is the Hip Hook.
Once all the hip flexor muscles are released, you should notice a marked difference in your SI joint pain.

Piriformis muscle release
The piriformis is a muscle in the back of your hip, and easily found by laying on your back with your knees bent and placing a massage ball in the middle of your buttcheek. Allowing your muscles to relax over the Hip Flexor Release Ball for 30-90 seconds. You can use this to release tension in the back of the hip. When the piriformis becomes tight, it pulls on the sacrum and ilium and can lead to compression or misalignment around the SI joint. As you continue to move your body with these supporting muscles not functioning optimally, the sacrum and ilium rub each other the wrong way and cause the soft tissues inside the joint to become irritated.
A tight piriformis muscle often goes hand-in-hand with tight hip flexors, like your iliacus and psoas muscles. This is because your body is searching for balance on each side of the hip. If the hip flexors on the front of the hip are tight and pulling the pelvis, the muscles on the back side of the hip (like the piriformis) will tighten up and play a game of tug-of-war. This combination of a tight iliacus and tight piriformis is very common among people who are experiencing SI joint pain.
